Loading ...
Loading ...
Loading ...
6 7ICE & WATER INSTALLATIONINSTALLATION
Unpacking
ENVIRONMENTAL TIPS
ENVIRONMENT
Most of the packing materials are recyclable. Please
dispose of those materials through your local recycling
depot or by placing them in appropriate collection
containers.
Important – check for any damages or marks. If you find
the refrigerator is damaged or marked, you must report
it within 7 days should you wish to claim for damage/
marks under the manufacturers warranty. This does not
affect your statutory rights.
Clean your refrigerator thoroughly following the
instructions in the “Cleaning” section and wipe off any
dust that has accumulated during shipping.
Locating the refrigerator
WARNING
CAUTION
Automatic aerosol systems (such as insect control)
should not be located adjacent to the product as the
spray may cause long term damage to the external
plastics of the appliance.
Do not put the refrigerator in a location that is too cold or
is unprotected, for example in a garage or on a veranda.
For optimal performance the ambient temperature should
be between 10°C and 43°C.
Put the refrigerator in a dry place avoiding areas of high
moisture or humidity.
Ensure the refrigerator is located on an even surface.
Adequate ventilation around your refrigerator
The diagram below shows the recommended airspace to
allow for ventilation of your refrigerator.
Note: 10mm clearance at the top of the cabinet is once
the cabinet is tilted back and in it's final location.
Allow a 250 – 350mm minimum clearance on the hinge
side of the doors, if you place the refrigerator next to the
wall. This will make cleaning easier.
Make sure that cupboards or fixtures do not stick out
further than the refrigerator cabinet.
INSTALLING YOUR NEW
REFRIGERATOR
NOTE: Doors are designed to sit proud of cabinetry (not
flush). The clearances shown above are the recommended
minimum clearances.
Installing your refrigerator
1. Roll the refrigerator into place.
The rollers are designed for forward or backward
movement only. They are not castors. Moving the
refrigerator sideways may damage your floor and the
rollers. Before moving your refrigerator ensure the
adjusting nuts are fully wound up off the floor.
2. Using spanner supplied, wind the large height
adjusting nuts under door hinges down until the
refrigerator is tilted back by 10 – 15mm (see diagram)
and the cabinet is stable. If you have difficulty
winding the nut or height adjusting foot down,
have someone tilt the refrigerator back so you
have better access.
3. Check the alignment of the refrigerator to the
surrounding cupboards to see if it is level. You can
adjust the level as detailed in step 2.
4. If you find your refrigerator rocks from corner to
corner, it means your floor is uneven. Find a piece
of plastic or hardboard etc. and pack it firmly under
the foot.
5. You may now need to fine-tune the installation by
repeating steps 2, 3 and 4.
6. Plug your refrigerator straight into its own power
point and never use a double adapter.
7. Before you put any food in your refrigerator, it’s
recommended you leave it on for 2 or 3 hours to
check it is running properly.
Fitting the handles
The handles are supplied prepackaged inside your
refrigerator and will require fitting. Refer to the
instructions provided in the pack.
Adjusting door alignment
The doors can be aligned by adjusting the right hand
door up or down by turning the adjustable bolt under the
hinge using the spanner provided.
1. Loosen lock nut
2. Turn adjusting bolt until doors are aligned
3. Tighten lock nut
NOTE: When the height of the rollers and adjusting bolts
are correctly adjusted the refrigerator will stand firmly on
the floor and the doors will be in line with one another.
Fitting the handles
The handles are supplied prepackaged inside your
refrigerator and will require tting. Refer to the instructions
provided in the pack.
WARNING
WARNING
Connect to potable water supply only.
The new hose-sets supplied with the appliance must be
used and old hose-sets should not be reused.
Never connect the appliance to a hot water supply.
Do not use with water that is microbiologically unsafe
or with water of unknown quality without adequate
disenfection.
Water Filter
The service life of the filter may be reduced in water
supplies that contain an excess of particles or other
impurities. Reduced flow rate is an indication that a new
filter is required. Failure to replace the filter when required
can affect the function of the ice maker. Service calls
caused by a failure to replace the filter are not covered
by warranty. Replacement water filters are available from
Electrolux Home Products Spare Parts Centres and can
be posted to you for your convenience (refer to spare
parts contact numbers on the warranty page).
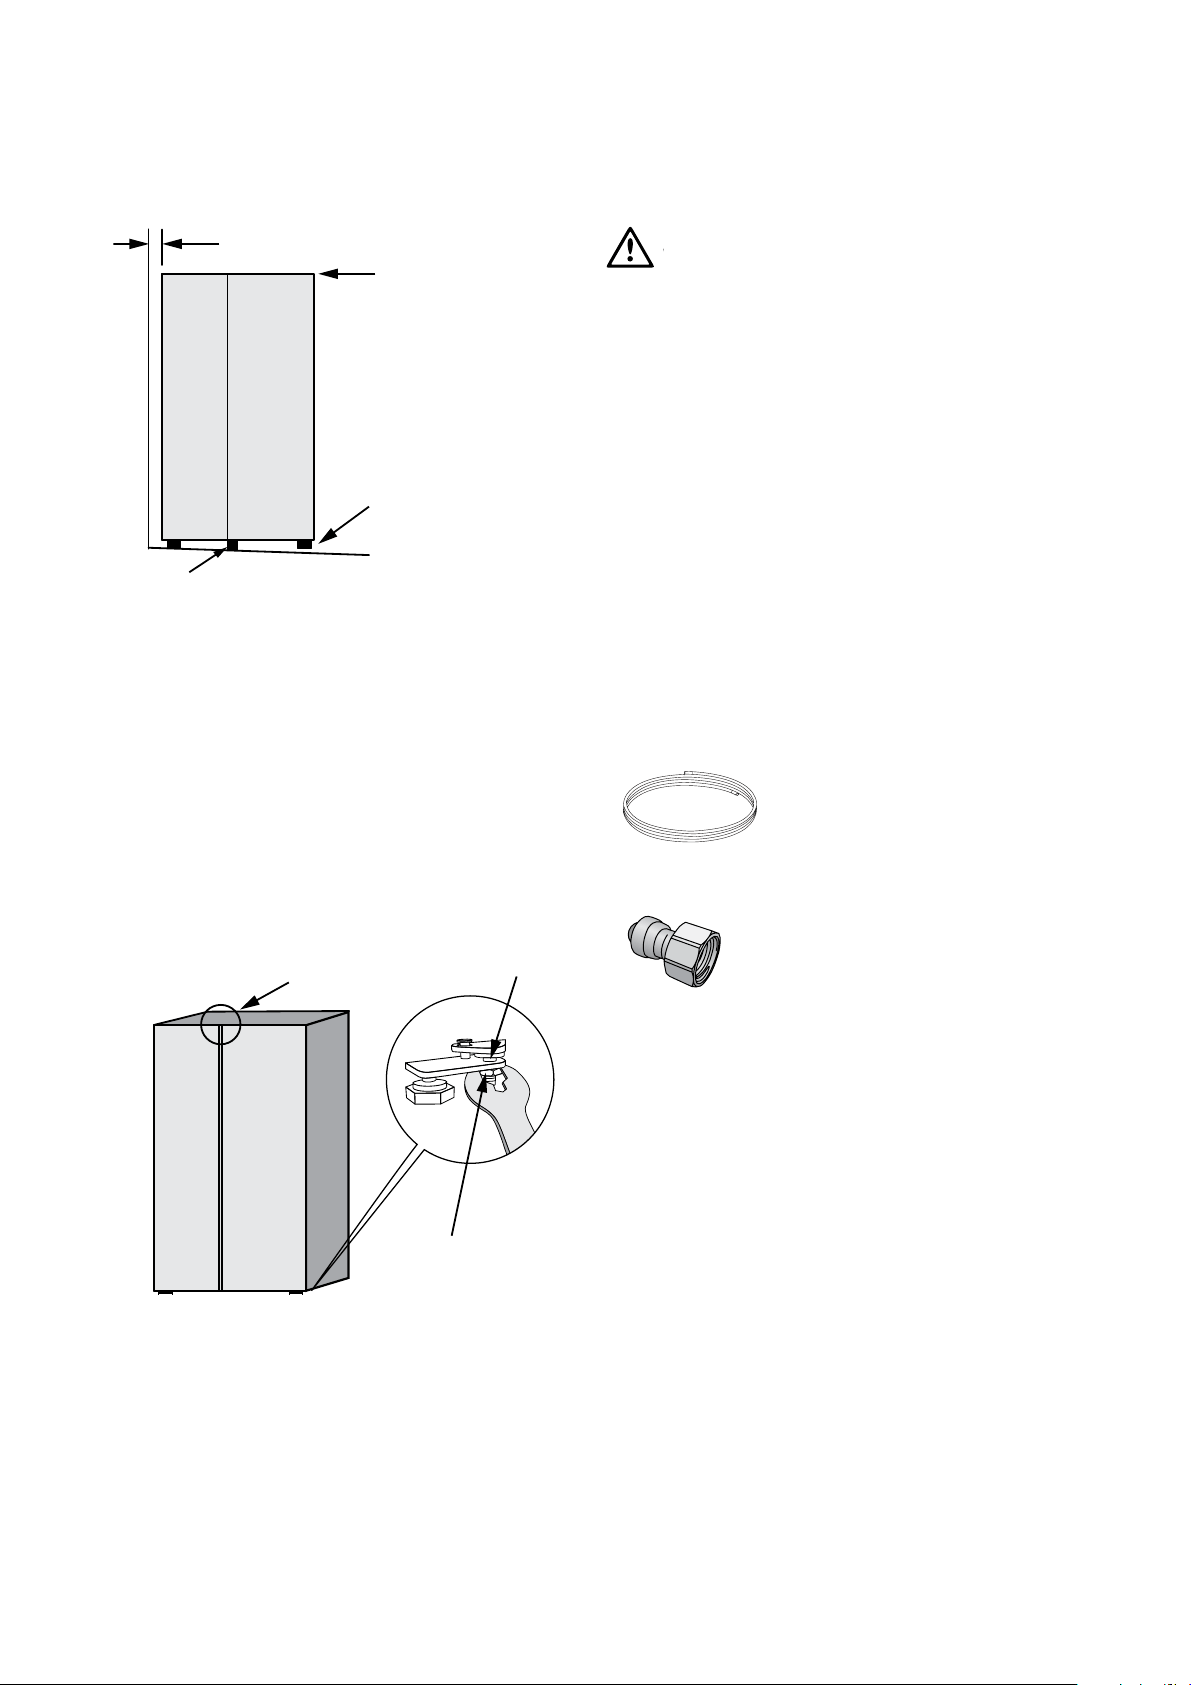
Contents of installation kit
4 metres of water tubing
DATE FITTED___/___/___
1 x 1/2” tap fitting
Water supply and plumbing
A drinkable water supply to suit a 1/2” tap fitting is
required adjacent to the refrigerator. It is recommended
that a licensed plumber install a new water supply outlet
nearer to the appliance should the tubing supplied not be
long enough. It is not recommended that the tubing be
extended as this could adversely affect the flow of water
to the ice maker or water dispenser. The water dispenser
and automatic ice maker require a drinkable water supply
with a pressure range of between 206kPa and 689kPa
(30PSI and 100PSI). If the water supply is above 100psi a
pressure limiting valve should be installed.
It is recommended that a noise reduction valve also be
fitted in the water supply line. This will reduce water
hammer and its effects from quick action household taps
and fast acting valves on appliances.
The refrigerator water valve is pre-fitted with a push-fit
connector for inserting the water tube. When the tap
connection is other than 1/2”, adapters can be purchased
from plumbing supply stores or good hardware stores.
ICE AND WATER INSTALLATION
Recommended
minimum airspace
around the base of
the cabinet
50mm
10mm
10mm
10mm
10–15mm
Maximum
cupboard depth
Adjust front feet for unevenness
of floor e.g. adjust this foot
down. Packing may be required
underneath the rear roller to
ensure stability.
Top of refigerator is
level – horizontal
Aligned to cupboard
– even gap
Centre roller
Door alignment
Adjusting bolt
Lock nut
350mm
250mm
Height adjusting nut
Fixed rollers
Loading ...
Loading ...
Loading ...