Loading ...
Loading ...
Loading ...
12
Cleaning the self cleaning surfaces in the oven interior
The inside rear and side walls and ceiling of some ovens may
be lined with a highly porous ceramic lining. This lining absorbs
splashes produced during baking and roasting, dissolving them
while the oven is on. This cleaning will be most effective at
higher temperatures and during longer cooking times.
The cleaning system makes it possible to regenerate self-
cleaning surfaces that can not properly clean themselves. See
the chapter on Self-cleaning.
Slight discolouration of the lining does not affect its self-
cleaning performance.
Caution!
■ Do not use abrasive cleaning products. These would scratch
and impair the highly porous lining.
■ Never use oven cleaning products on ceramics. If oven
cleaner is spilled on this accidentally, immediately remove it
using lots of water and a sponge.
Cleaning the oven's enamelled bottom and walls
Use a cleaning cloth and hot water with a little soap or vinegar.
If very dirty, use a fine steel scourer or a special oven cleaning
product. These must only be used when the oven interior is
cold. Do not use metal scourers or special oven cleaning
products on self-cleaning surfaces.
Light
The oven light can be turned on manually to facilitate cleaning.
Turning on the oven light
Turn the function control knob to the
^ position.
The light will come on. The temperature control knob must be
turned off.
Turning the oven light off
Turn the function control knob to the
Ûposition.
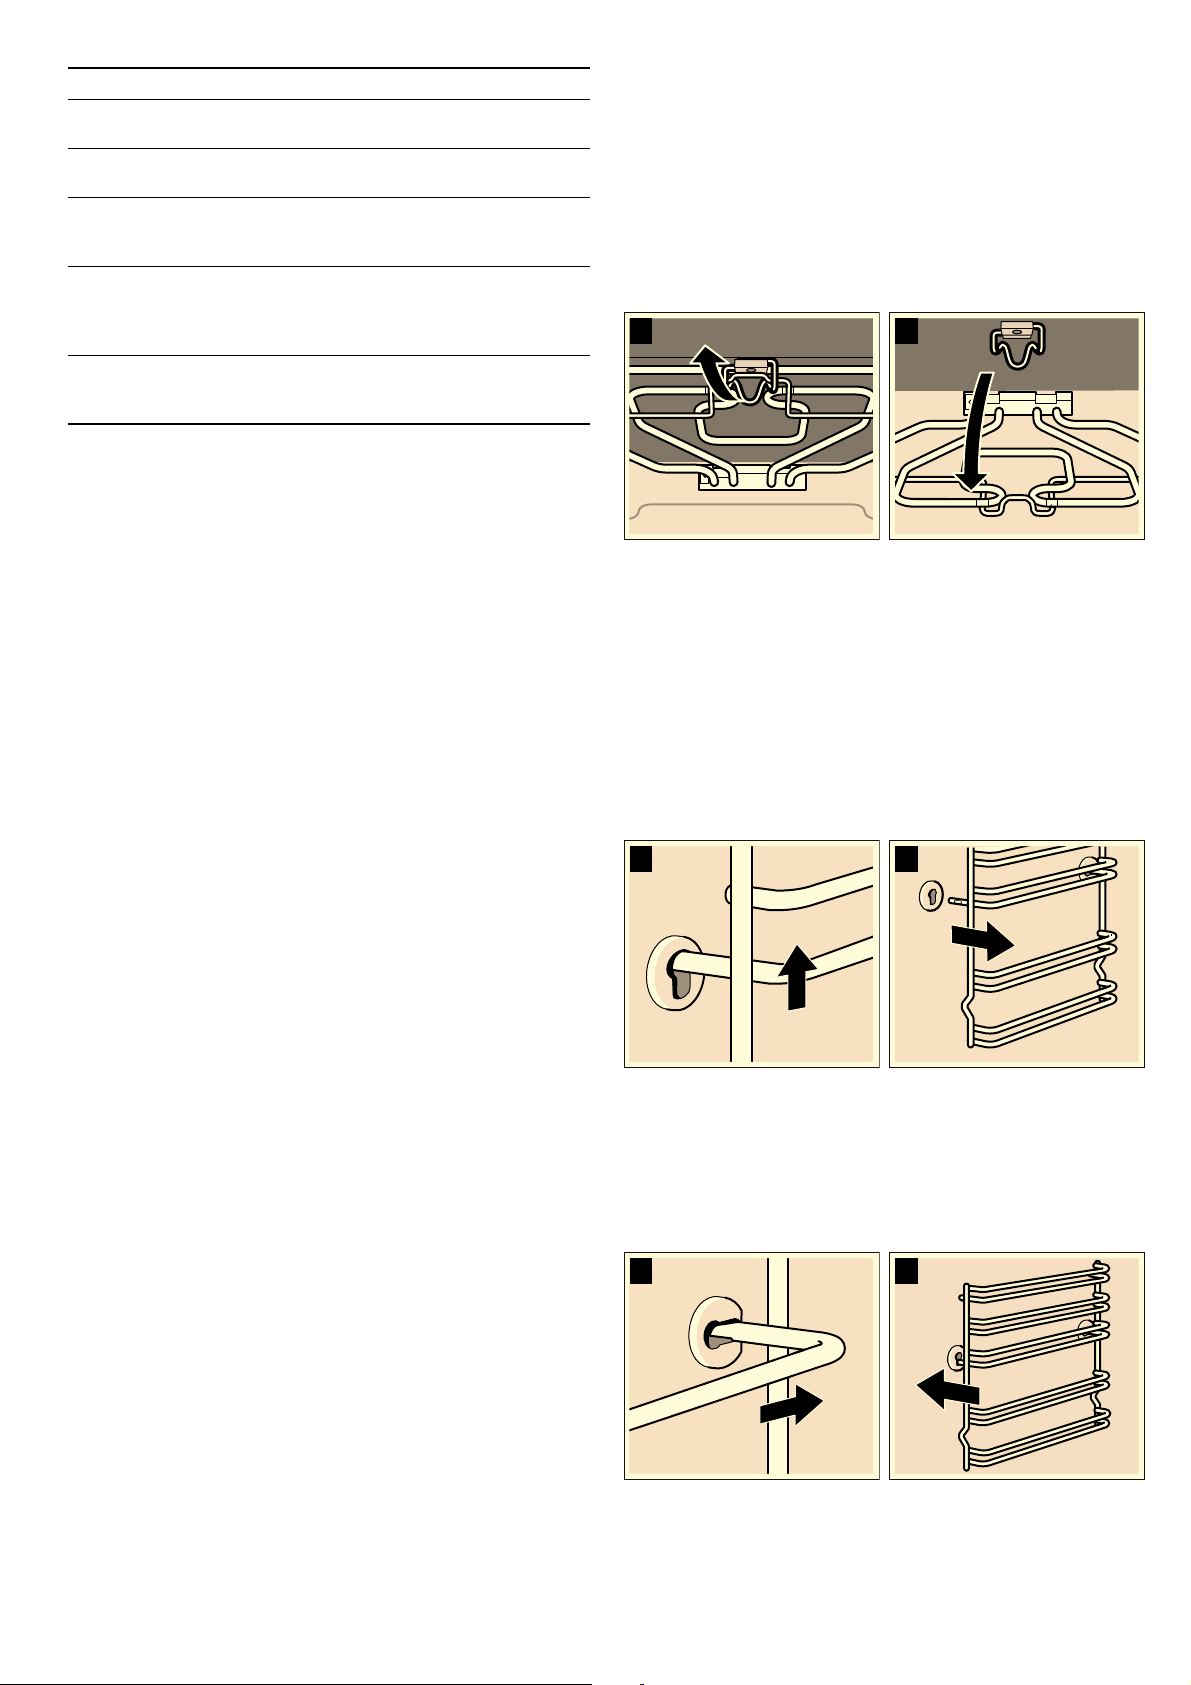
Removing the grill heating element
The grill heating element can be removed in some ovens to
facilitate cleaning.
: Risk of burns.!
The oven must be cold.
1. Pull the grill element handle towards you and push it upwards
until you hear it click into position (figure A).
2. At the same time, hold the grill element and swing it down
(figure B).
After cleaning, push the grill heating element up again. Push
the locking handle down and secure the grill element.
Removing and refitting the wire shelves or left
and right hand side rails
The wire shelves or left and right hand side rails can be
removed for cleaning. The oven must be cold.
Release the guides or rails
1. Lift the front of the guide or rail and release it (figure A).
2. Then pull the guide or rail forwards completely and remove it
(figure B).
Clean the guides or rails with detergents and a sponge. The
use of a brush is recommended for stubborn stains.
Install the wire shelves or rails
1. First insert the shelf or the rail in the rear groove by pushing it
back slightly (figure A)
2. then insert it in the front groove (figure B).
Wire shelves or rails can be adjusted on the left and right hand
side. Their curvature should always be face down.
Glass cover for the oven
light
Hot water and a little soap:
Clean with a dishcloth.
The seal
Do not remove!
Hot water and a little soap:
Clean with a dishcloth. Do not rub.
Wire shelves or rails Hot water and a little soap:
Soak and clean using a dishcloth or
brush.
Sliding guides Hot water and a little soap:
Clean with a dishcloth or a brush.
Do not leave this to soak or wash in
a dishwasher.
Accessories Hot water and a little soap:
Soak and clean using a dishcloth or
brush.
Zone Cleaning products
%$
%
$
%
$
Loading ...
Loading ...
Loading ...