Loading ...
Loading ...
Loading ...
30 Philips · HDP2510
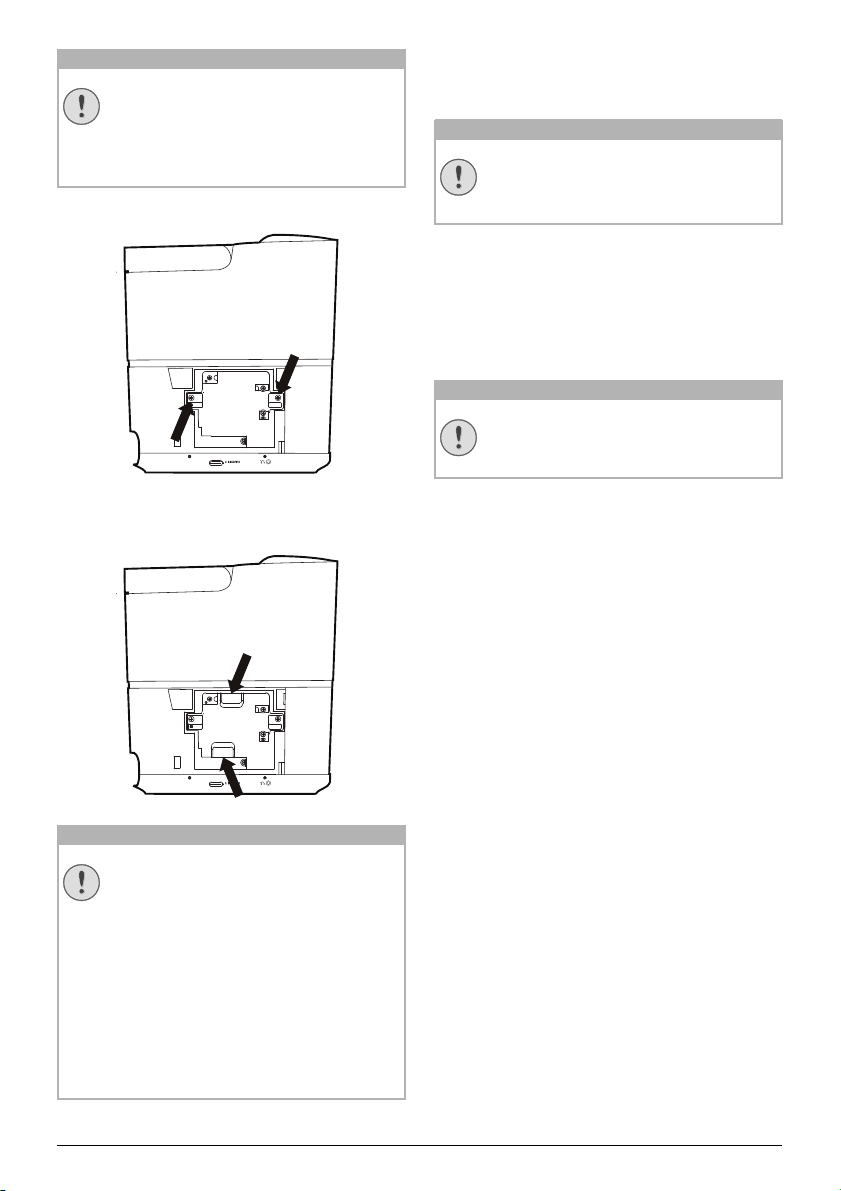
1 Loosen the two screws that secure the lamp.
1 Pull out the lamp by inserting your fingers in
the two slots.
.
2 Gently insert the new lamp.If it doesn’t fit
easily, make sure its facing the correct way.
3 Tighten the two screws that secure the lamp.
4 Replace the lamp cover on the projector.
5 Tighten the two screws that secure the lamp
cover.
6 Plug the power cable to outlet.
Resetting the lamp timer
1 To turn on the projector, press the B button
on the panel control of the device or on the
remote control once.
2 Press the OPTION/Ă button and use ¡/¢
to select System.
3 Confirm with OK.
4 Use ¡/¢ to select Reset lamp timer.
5 Confirm with OK.
6 A message displays asking if you want to
reset the lamp timer. Confirm with OK. The
lamp time will be reset to “0”.
CAUTION!
• Do not turn the power on while the
lamp cover is removed.
• Do not insert your fingers between
the lamp and the projector.
• The sharp edges inside the projec-
tor may cause injuries.
CAUTION!
• Pulling it too quickly may cause the
lamp to break and scatter broken
glass in the projector.
• Do not place the lamp in locations
where water might splash on it,
children can reach it, or near flam-
mable materials.
• Do not insert your hands into the
projector after the lamp is
removed.
• If you touch the optical compo-
nents inside, it could cause colour
unevenness and distortion of the
projected images.
CAUTION!
• Loose screws may cause a bad
connection, which could result
malfunction.
• Do not overtighten the screws.
CAUTION!
Do not reset the lamp timer if the lamp
has not been replaced as this could
cause damage.
Loading ...
Loading ...
Loading ...