Loading ...
Loading ...
Loading ...
6 English
Tools and Parts
Removing the packaging
CAUTION
Remove the carton carefully. Wear gloves to protect against sharp edges.
WARNING
Remove the protective lm covering the product before putting into
operation.
Parts supplied
• Hood assembly with blower and LED lamps already installed.
• Hardware bag with:
Part Qty Part Qty
6x80 mm
6
Torx 20 adapter
1
6x16 mm
4
Ø 6.4x11 mm washers
4
4.2x19 mm
6
Ø 5.3x20 mm washers
2
Drip tray screws
2
Drip tray bracket
1
10x60 mm
6
6- 9 wire blower con-
nector
1
10” (25.4 cm) round air
transition
1
Drip tray
2
3.5x9.5 mm
4
Tools/Materials required
• Level
• Drill with 1¼” (3.0 cm),
1
⁄8” (3.0 mm) and
5
⁄8” (15.8 mm) drill bits
• Pencil
• Wire stripper or utility knife
• Tape measure or ruler
• Pliers
• Caulking gun and weatherproof caulking compound
• Vent clamps
• Saber or keyshole saw
• Flat-blade screwdriver
• Metal snips
• Screwdrivers:
• Phillips
• Flat - blade
Parts needed
• Home power supply cable
• ½” (12.7 mm) UL listed or CSA approved strain relief
• 3 UL listed wire connectors
• 1 wall or roof cap
• Metal vent system
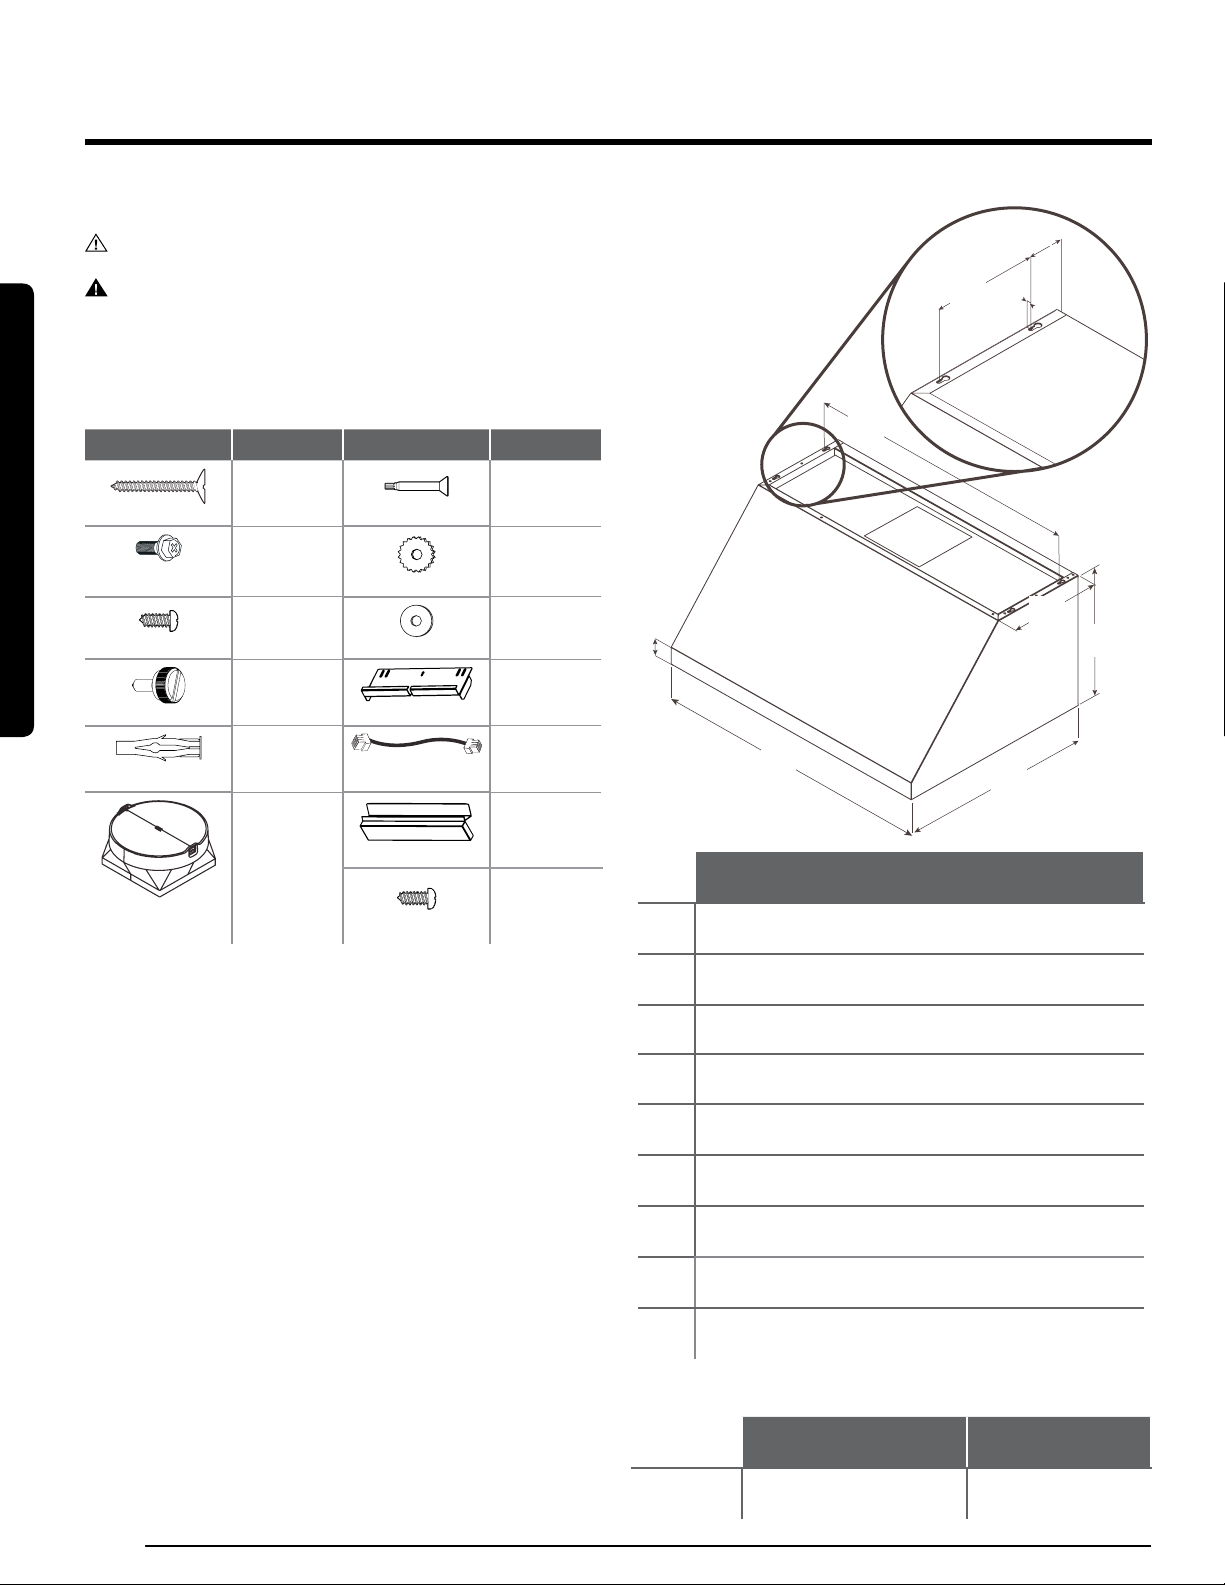
Dimensions and Clearances
A
B
C
D
E
F
G
H
I
NK36R9600CS
NK36R9600CM
A 36″ (91.2 cm)
B 25″ (63.5 cm)
C 18″ (45.7 cm)
D 12″ (30.5 cm)
E 2
3
⁄4″ (7 cm)
F 35
1
⁄8″ (89.2 cm)
G 7
1
⁄2″ (19 cm)
H 2
9
⁄16″ (6.5 cm)
I
3
⁄8″ (1 cm)
Optional accessories and consumables
MODEL NK36R9600CS NK36R9600CM
Duct Cover Kit NK-AE907LCS/AA NK-AE907LCM/AA
Installation Requirements
Installation Requirements
Loading ...
Loading ...
Loading ...