Loading ...
Loading ...
Loading ...
10 English
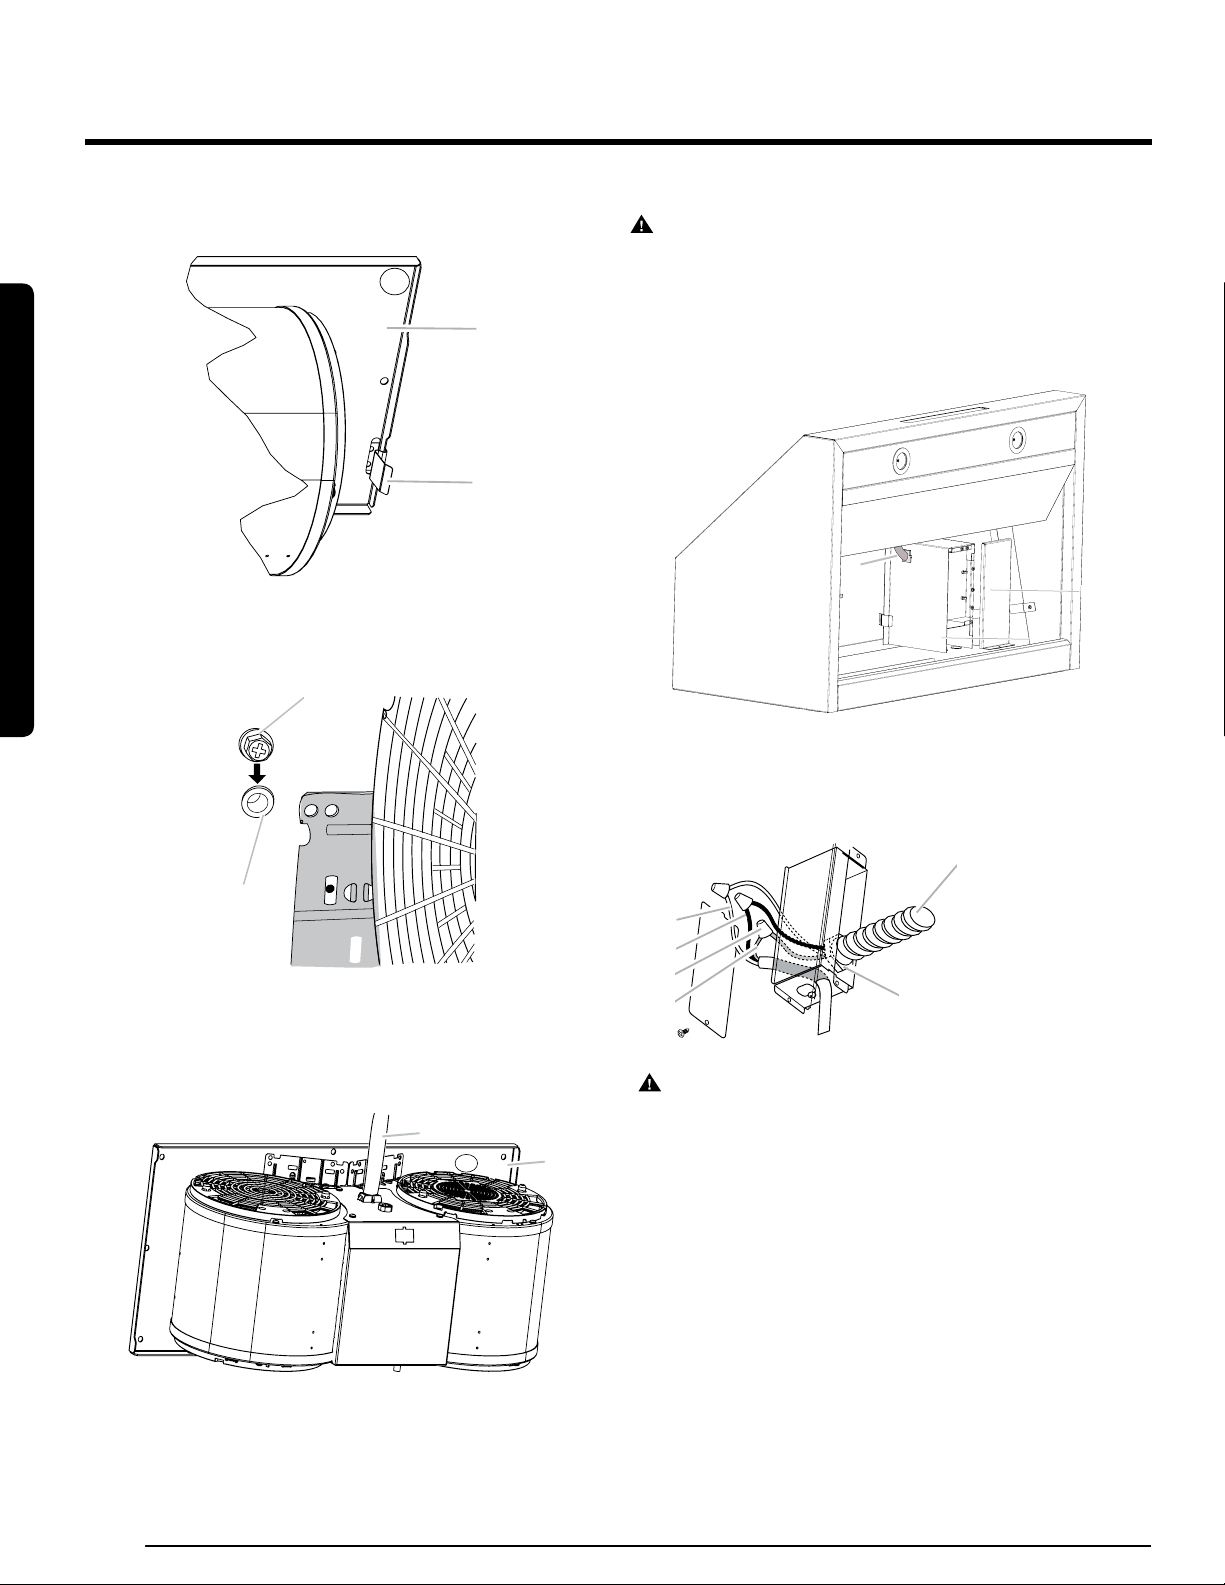
3. Push the right end of the motor mounting plate up, and then snap it
into the spring tab.
NOTE: The spring tab should be outside the slot in the mounting
plate.
A
B
A. Motor mounting plate
B. Spring clip
4. Align the mounting holes and then install 6 x 16 mm screws and 6.4 x
11 mm lock washers.
B
A
A. Screw with lock washer
B. Mounting hole
5. Make the connection between the blower and the junction box with
the supplied wire blower connector.
A
B
A. Motor mounting plate
B. Power supply wire connector
Electrical Connection
WARNING
ELECTRICAL SHOCK HAZARD.
DISCONNECT POWER BEFORE SERVICING. REPLACE ALL PARTS
AND PANELS BEFORE OPERATING. FAILURE TO DO SO CAN
RESULT IN DEATH OR ELECTRICAL SHOCK.
1. Remove the knockout and the Junction box cover, and then install
the conduit connector (cULus listed) in the junction box.
A. Junction box cover
B. Knockout
C. Power supply wire connector
A
B
C
2. Run 3 wires - black, white, and green - according to the National
Electrical Code and local codes and ordinances, in
1
⁄2″ conduit from
the service panel to the junction box.
A
F
E
D
C
B
A. White wires
B. Black wires
C.UL listed wire connector
D. Green (or bare) and
yellow-green ground wire
E. Homepower supply cable
F. UL listed or CSA
approved
1
⁄2″ strain relief.
WARNING
ELECTRICALLY GROUND THE BLOWER. CONNECT THE GROUND
WIRE TO THE GREEN AND YELLOW GROUND WIRES IN THE
TERMINAL BOX. FAILURE TO DO SO CAN RESULT IN DEATH OR
ELECTRICAL SHOCK.
• Connect the black wire from the service panel to the black or the
red in the junction box. Connect the white to white and green
to green-yellow.
• Close and secure the junction box cover.
Completing the installation
Replace the lters and check the operation of the hood.
If the range hood does not operate:
• Conrm that the circuit breaker is not tripped or the house fuse
blown.
• Disconnect the power supply, and then check if the wiring is correct.
• To get the most efcient use from your new range hood, read the
“Range Hood Use” section.
• Keep these Installation Instructions and Use and Care Guide close to
range hood for easy reference.
Installation
Installation
Loading ...
Loading ...
Loading ...