Loading ...
Loading ...
MAINTENANCE OF THE CHARCOAL FILTER (FOR FILTRATION
MODELS ONLY)
This lter retains the unpleasant odours produced during cooking.
Saturation of the carbon lter occurs after a relatively long use,
however this depends on the type of cooking and how regularly
the grease lter is cleaned. Regardless, it is necessary to replace the
cartridge every 4 months. It CANNOT be washed or recycled.
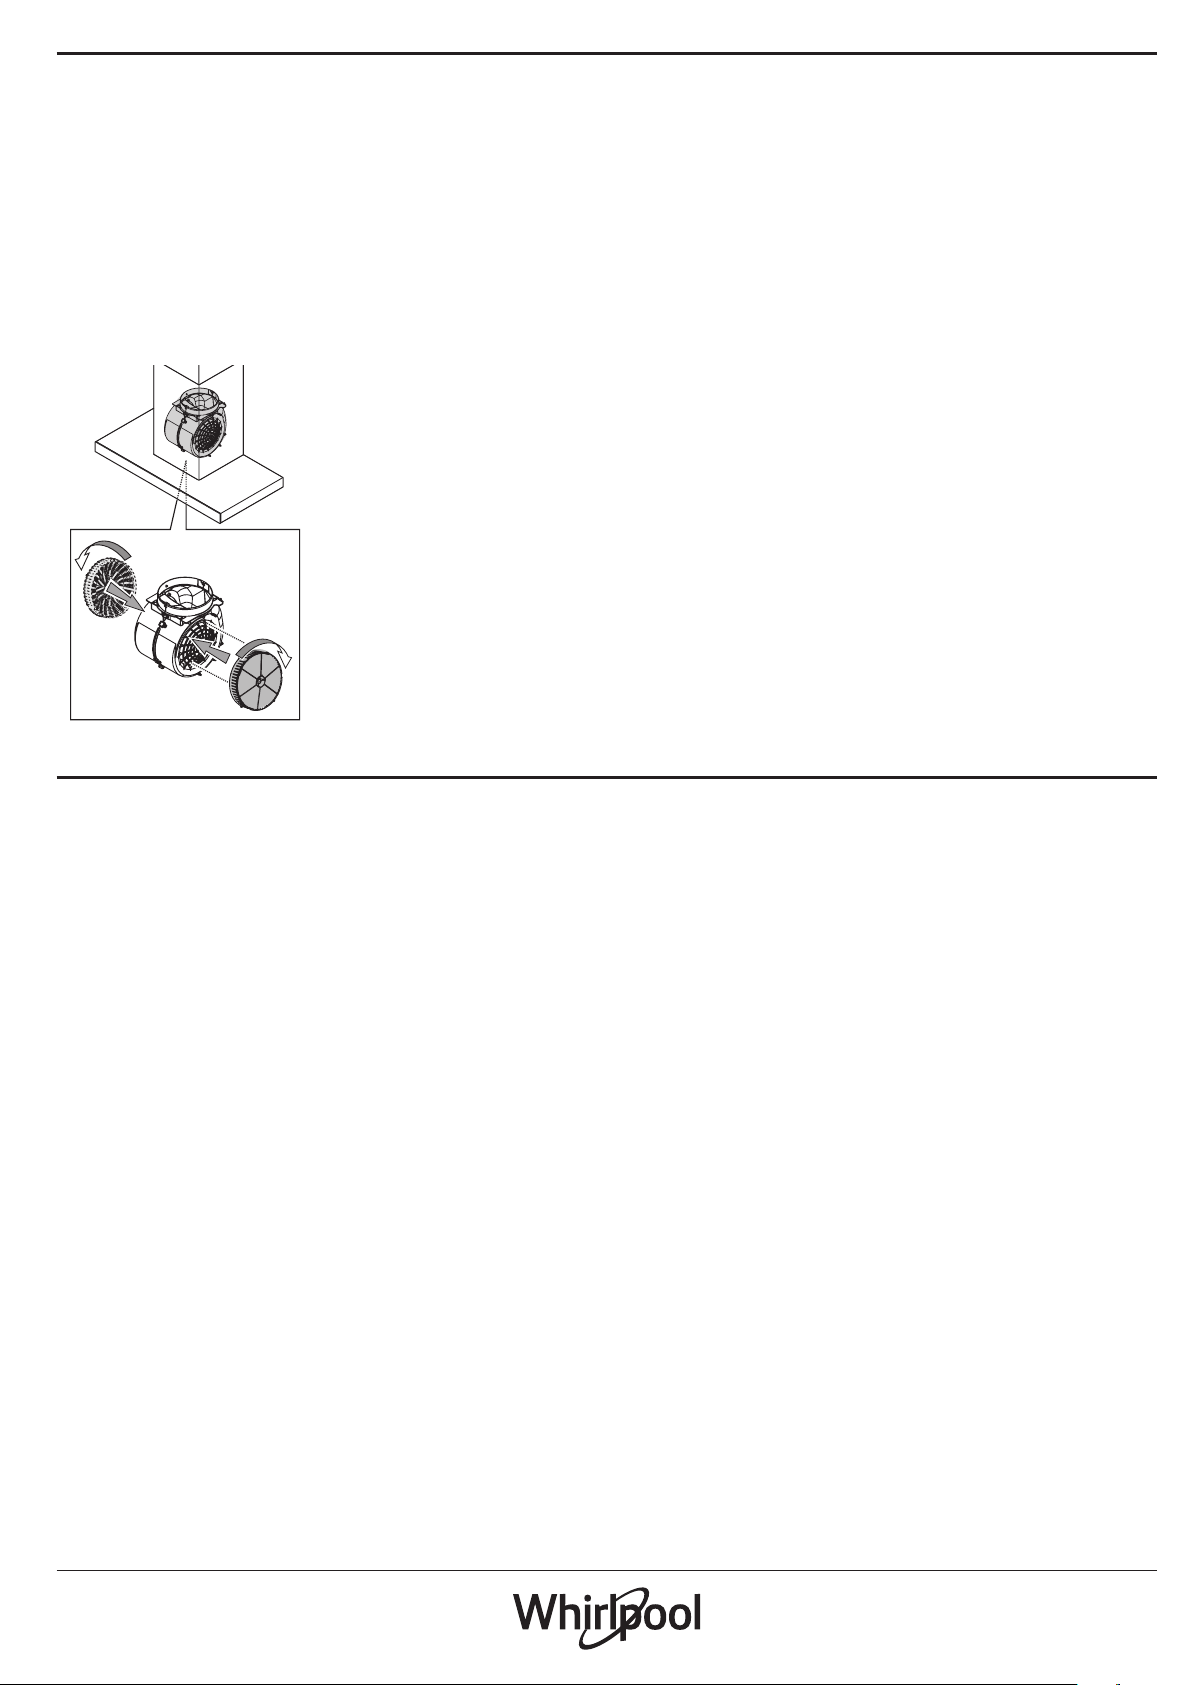
Fitting or replacing the carbon lter
1. Disconnect the hood from the mains.
2. Remove the grease lters.
3. Fit 2 carchoal lters (one each side of the conveyour), bajonet
attachment.
4. Reinstall the grease lter in place.
Proceed in reverse order to remove.
REPLACING THE LAMPS
The hood is equipped with an LED lighting system.
LEDs ensure excellent illumination, have a service life up to 10 times
longer than traditional bulbs, and oer up to 90% energy savings.
Note: For replacement LED, please contact the Technical After-sales Service
Centre.
WIFI MANUAL
LIVE APPLICATION REMOTE CONTROL /SET UP PROCEDURE
The LIVE feature allows to operate and supervise the appliance
remotely by external device. To enable the appliance to be remotely
controlled, you rst have to complete successfully the connectivity set
up process. This process is necessary to register your appliance and
connect to your home network. The set up procedure has to be carried
out only once. You have to carry it out again if you change your router
set up properties (network name or password or data provider).
1.1 BEFORE STARTING THE SET UP PROCESS
1. To use this feature You need to own: • a smart phone running
Android 4.3 (or higher) with a 1280x720 (or higher) screen or a
tablet or a smart phone running iOS 8 (or higher); • a wireless
router 2.4Ghz WiFi b/g/n connected to internet (verify with your
smart device that the signal strength of your home wireless
network close to the appliance is good).
2. Download & Install the free application: LIVE on your Android
smart-phone or iPAD/iPhone from the store. The App will guide
you, step by step, through the installation process.
If You do not have an account already, create one and subscribe (legal
terms) to service to be able to benet the features provided through
the app.
3. Register your appliance following the App instructions. For the
registration process You will need the Smart Appliance IDentier
(SAID) number, sticker on the appliance. The SAID is composed
by numbers and letters (10 chars ). You can take a note of your
appliance SAID here:
SAID … … … … … … … … … …
1.2 PROVISIONING
• Before starting the installation process turn on your router and
verify that the wireless signal of your home router is reaching
the appliance. To verify the Wi strength signal use a Tablet or
Smart-phone connected only to the Wi-Fi router, disable any other
data connections, and place the device close to the appliance.
Open any internet web page in a browser and check that it is
downloaded fast correctly. If the internet connection of your
home is working correctly but the page is not downloaded, you
may need to install a Wi-Fi extender device (not provided with the
appliance).
• If your router supports WPS 2.0 (or gather ) , follow one of the two
manual setup procedures to connect your appliance to router.
If your router is not supported by WPS, follow the manual setup
procedure .
Follow the instructions on your 6th Sense Live application on your
smartphone to connect the appliance to your wi network.
Otherwise read the next paragraphs for automatic or manual
connection.
1.2.1 AUTOMATIC SETUP INSTRUCTION FIRST TIME USE WPS
METHOD
This procedure is applicable only if your router supports WPS2.0 (or
greater)
1. On your appliance activate the provisioning process by pressing
and hold for three seconds the connectivity button (an acoustical
feedback is played). The appliance is being set to a “search” mode
for a local network. The Connectivity icon on the appliance starts
blinking fast.
2. On wireless router press the WPS button to establish a connection
between the two products. An indicator light on your router will
begin blinking.
3. When the appliance successfully connects to the local router, the
wi icon switches from fast to slow blinking (supported not in all
appliances).
4. The appliance try to connect to Backend system. Connectivity
icon becomes steady. If the wi icon does not stop blinking after
few minutes, then the appliance has failed to nd the connections
to home network using WPS. Try the procedure again and if not
successful, then use one of the two manual setup instructions.
5. You can abort the WiFi connection procedure by pressing the
connectivity button.
Loading ...
Loading ...