Loading ...
Loading ...
Loading ...
50
Wireless
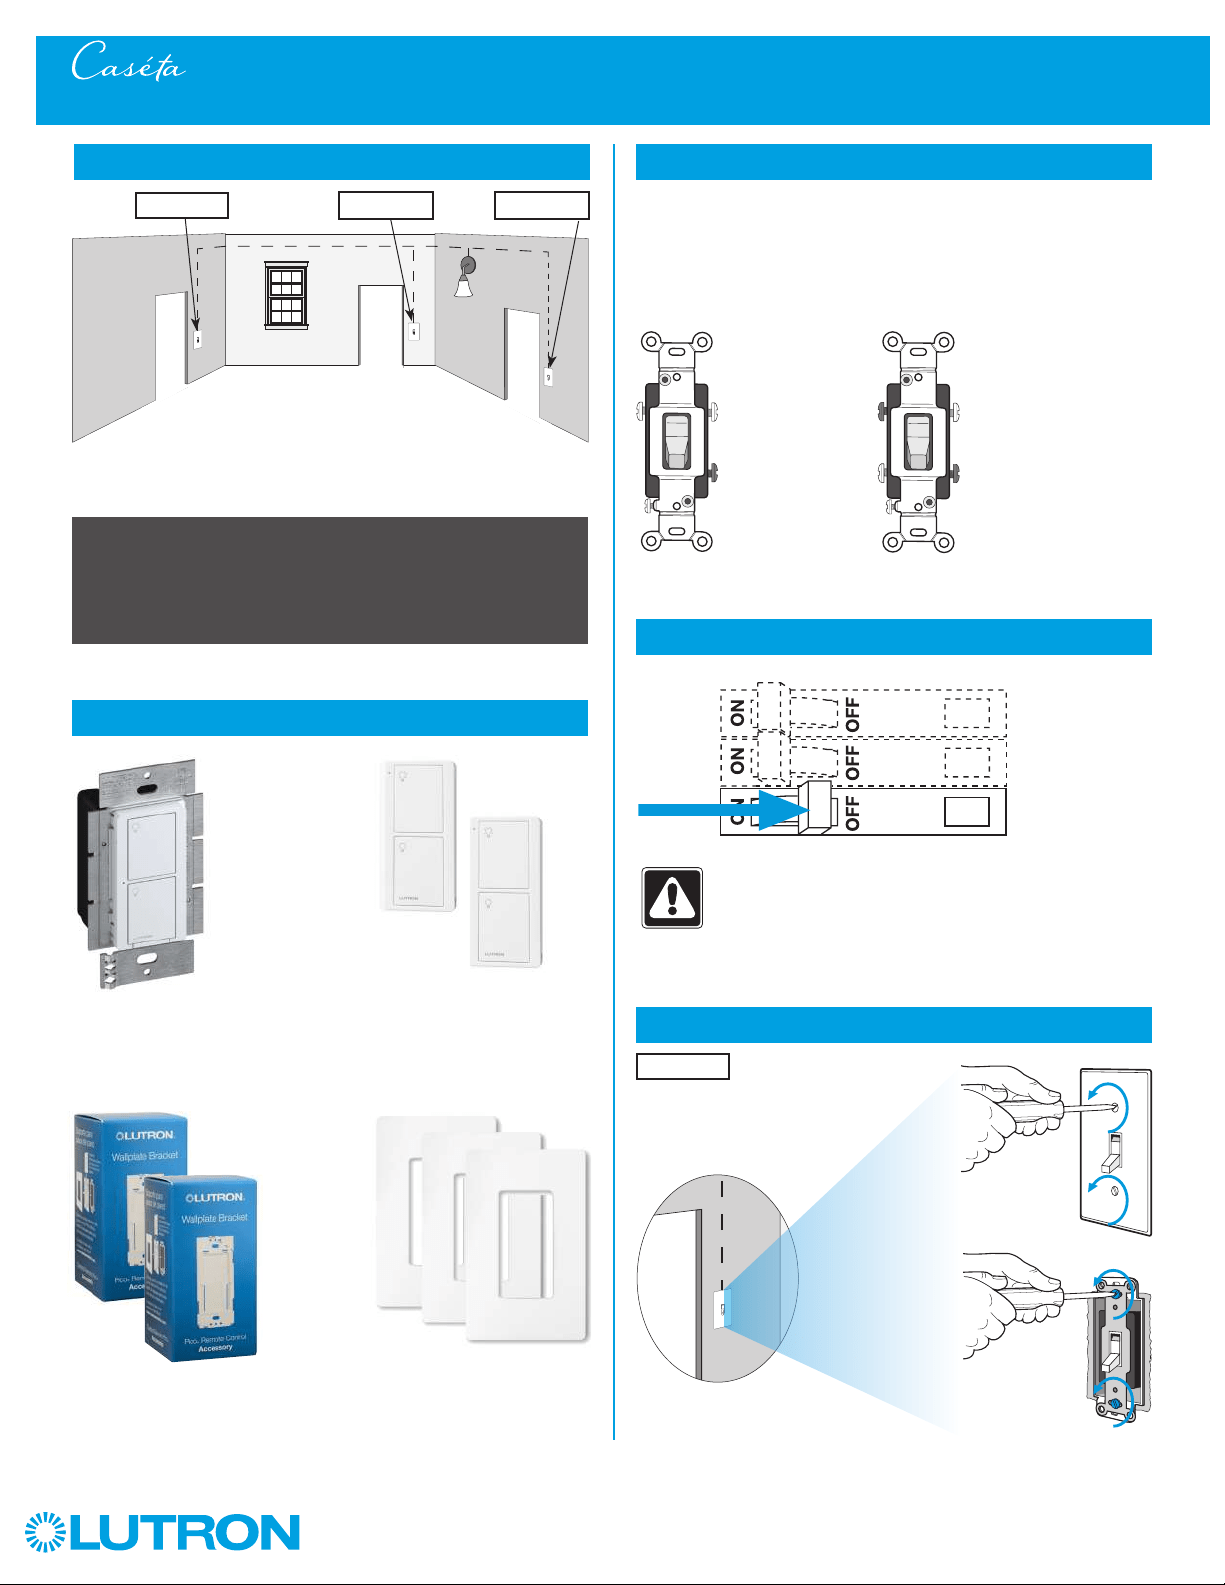
Multi-Location Installation - Caséta Wireless In-Wall Neutral Switch with Pico Remote Controls
1
Identify existing wiring
2
What you need for a multi-location installation
WARNING! Shock Hazard. May result in serious
injury or death. Turn off power at circuit breaker
before installing the unit.
4
Turn power off at circuit breaker
5
Remove existing switch from wall at Location 1
- If one switch controls the lights (single-pole installation)
See quick-start guide that came with your switch
- If two switches control the lights (3-way installation)
See page 14 or page 32 for details
Important note:
3
Choose a location for your Caséta Wireless switch
NOTE: There will be two different types of existing switches in this
application. Locations 1 and 3 will use 3-way switches (three screws
which control the lights, plus one ground screw) and Location 2 will use
a 4-way switch (four screws which control the lights, plus one ground
screw). For easiest installation, we recommend replacing one of the 3-way
switches with your Caséta Wireless switch (Locations 1 or 3). In this
example, we will use Location 1.
Location 1
3-Way Switch
Locations 1 and 3
4-Way Switch
Location 2
Three or more switches control the lights
(multi-location installation)
Location 1 Location 2 Location 3
+
In-wall switch
PD-6ANS
Two Pico
remote controls
PJ2-2B
Two Wallplate Brackets
PICO-WBX-ADAPT
+
Three Claro Wallplates
CW-1
+
Loading ...
Loading ...
Loading ...