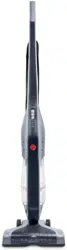

CYCLONIC
STICK
VAC
CYCLONIC
ASPIRATEUR
VERTICAL
CYCLONIC
BARREDORA
DE SUCCIÓN
Instructions d’Utilisation et d’Entretien
Veuillez lire attentivement ces instructions avant d’utiliser votre aspirateur vertical HOOVER
MD
.
N’oubliez pas d’enregistrer votre produit en ligne, à l’adresse Hoover.com, ou par téléphone,
au 1-800-944-9200.
Operating and Servicing Instructions
Please read these instructions carefully before using your HOOVER
®
Stick Vac.
Be sure to register your product online at Hoover.com or call 1-800-944-9200 to register by phone.
Instrucciones de Funcionamiento y Mantenimiento
Lea atentamente estas instrucciones antes de usar su Barredora de succión HOOVER
®
.
Inscriba su producto en línea en Hoover.com, o llame al 1-800-944-9200 si preere hacerlo por teléfono.
©2010 Techtronic Floor Care Technology Limited. All Rights Reserved. Tous droits réservés.
Todos los derechos reservados. #960009635 ID101174-R0
OWNER’S MANUAL
GUIDE D’UTILISATION • MANUAL DEL USUARIO
1
2
3
4
7
8
5
6
10
9
11
1. FEATURES
2. ASSEMBLY
For filter replacement, please call 1-800-944-9200 or visit our website at www.hoover.com to locate
a dealer nearest you. Filter Service Part #410044001.
For belt replacement, please call 1-800-944-9200 or visit our website at www.hoover.com to locate
a dealer nearest you. Belt Service Part #001942002
6. TROUBLESHOOTING
ANY SERVICING SHOULD BE DONE BY AN
AUTHORIZED SERVICE REPRESENTATIVE
Call 1-800-944-9200 USA & Canada
In the event that further assistance is required, see your Yellow Pages for an authorized HOOVER
®
Dealer
or visit www.hoover.com. Costs of any transportation to and from any place of repair are to be paid by
the owner. The service parts used in this unit are easily replaced and readily available from an authorized
HOOVER
®
Dealer or retailer. Always identify your product by the model number and manufacturing code
when requesting information or ordering replacement parts. (The model number appears behind the dirt
cup of the product.)
5. SERVICE
3. HOW TO OPERATE
12
THIS PRODUCT IS INTENDED FOR HOUSEHOLD USE ONLY.
IF USED COMMERCIALLY WARRANTY IS VOID.
IMPORTANT SAFETY INSTRUCTIONS
SAVE THESE INSTRUCTIONS
When using an electrical appliance, basic precautions should always be
followed, including the following:
READ ALL INSTRUCTIONS BEFORE USING THIS APPLIANCE.
WARNING: TO REDUCE THE RISK OF FIRE,
ELECTRIC SHOCK OR INJURY:
•Fullyassemblebeforeoperating.
•Operatecleaneronlyatvoltagespecifiedondataplateoncleanerbehinddirtcup.
•Donotleaveappliancewhenpluggedin.Unplugfromoutletwhennotinuseandbeforecleaningor
servicing.
• Donotuseoutdoorsoronwetsurfaces.
•Donotallowtobeusedasatoy.Notintendedforusebychildrenage12andunder.Closesupervision
isnecessarywhenusednearchildren.Toavoidinjuryordamage,keepchildrenawayfromproduct,
anddonotallowchildrentoplacefingersorotherobjectsintoanyopenings.
•Useonly as describedin this manual.Use onlymanufacturer’srecommended attachmentsand
products.
•Donotusewithdamagedcordorplug.Ifapplianceisnotworkingasitshould,hasbeendropped,
damaged,leftoutdoors,ordroppedintowater,takeittoaservicecenterpriortocontinuinguse.
•Donotpullorcarrybycord,usecordasahandle,closeadooroncord,orpullcordaroundsharp
edgesorcorners.Donotplaceproductoncord.Donotrunapplianceovercord.Keepcordawayfrom
heatedsurfaces.
•Donotunplugbypullingoncord.Tounplug,grasptheplug,notthecord.
•Donothandleplugorappliancewithwethands.
•Donotputanyobjectintoopenings.Donotusewithanyopeningblocked;keepfreeofdust,lint,hair,
andanythingthatmayreduceairflow.
•Keephair,looseclothing,fingers,andallpartsofbodyawayfromopeningsandmovingparts.
•Turnoffallcontrolsbeforeunplugging.
•Useextracarewhencleaningonstairs.Toavoidpersonalinjuryordamage,andtopreventthe
cleanerfromfalling,alwaysplacecleaneratbottomofstairsoronfloor.Donotplacecleaneronstairs
orfurniture,asitmayresultininjuryordamage.
•Donotusetopickupflammableorcombustiblematerials,suchasgasoline,orfinewoodsandings,
oruseinareaswheretheymaybepresent.
•Alwaysturnoffthisappliancebeforeconnectingordisconnectingmotorizednozzle.
•Donotpickupanythingthatisburningorsmoking,suchascigarettes,matches,orhotashes.
•Donotusewithoutfiltersordirtcupinplace.
•WARNING-ThisproductcontainschemicalsknowntotheStateofCaliforniatocausecancer,birth
defectsorreproductiveharm.
•Aninternalthermalprotectorhasbeendesignedintoyourcleanertoprotectitfromoverheating.
Whenthethermalprotectoractivatesthebrushrollwillstoprunning.
Ifthishappensproceedasfollows:
1.TurncleanerOFFandunplugitfromtheelectricaloutlet.
2. Inspect the nozzle base, dirt cup inlet openings, and dirt tube for any obstructions. Clear
obstructionsifpresent.
3.Whencleanerisunpluggedandmotorcoolsfor30minutes,thethermalprotectorwilldeactivate
andcleaningmaycontinue.
Ifthethermalprotectorcontinuestoactivateafterfollowingtheabovesteps,yourcleanerneeds
servicing.
CAUTION - TO REDUCE THE RISK OF DAMAGE:
•Avoidpickinguphard,sharpobjectswiththisproduct,astheymaycausedamage.
•Storeinadryplace.Donotexposemachinetofreezingtemperatures.
Attach Nozzle
Line up nozzle with main body
and firmly push nozzle into
body of unit until nozzle locks
into place. NOTE: To remove,
push release button and pull the
nozzle away from the body of
the unit.
If a minor problem develops, it usually can be remedied quite easily when the cause is identified by using
the checklist below.
Any other servicing should be done by an authorized service representative.
WARNING: To reduce risk of personal injury - unplug vacuum before servicing.
FRONT
1. On/Off Switch
(0=OFF, I=ON)
2. Dirt Cup
3. Large Debris Opening
4. Bottom Nozzle Cover
(underneath nozzle)
BACK
9. Handle
10. Dirt Cup Release
Button
11. Nozzle Release
Button
12. Cord
DIRT CUP AND FILTER
5. Filter Cap
6. Filter (inside filter cap)
7. Baffle Tube
8. Bottom Empty
Release Button
1.1
Insert handle into body.
NOTE: Ensure handle faces
proper direction.
Insert screw and tighten until
secure. NOTE: DO NOT over
tighten screw.
2.1
Insert handle into body.
2.2
Insert screw and tighten until
2.3
3.2
3.1
Hold down nozzle with foot and
tilt back to reclining position.
To turn vacuum on, slide switch
forward.
(OFF) O
(ON) I : Has two modes,
each indicated by a graphic
displayed in window. The first
mode is for bare floors and the
second for carpet.
Baffle Tube Removal and Replacement
Filter Removal and Cleaning
Belt and Brushroll Replacement
Hold dirt cup right side up and
press bottom release button to
open trap door.
Turn baffle tube counter
clockwise until it stops. Pull out
baffle tube, hold over trash can
and shake free debris.
To replace baffle tube, insert
back into dirt cup, align slots
and twist clockwise until tube
locks in place.
Baffle Tube Removal and Replacement
Hold dirt cup right side up and
4.11
4.12
To replace baffle tube, insert
4.13
Filter Removal and Cleaning
Belt and Brushroll Replacement
4.6
4.14
Dirt Cup and Filter Replacement
Insert filter cap into dirt cup.
Place bottom of dirt cup onto
housing and pivot into place until
dirt cup release button locks.
Insert filter cap into dirt cup.
4.9
Place bottom of dirt cup onto
4.10
PROBLEM POSSIBLE REASON POSSIBLE SOLUTION
Product does not
pick up dirt
1. Dirt cup may be full. 1. Empty dirt cup.
2. Filter may be dirty. 2. Clean and/or wash filter.
3. Baffle tube may be dirty. 3. Remove and clean.
4. Airpath may be clogged. 4. Unplug vacuum before servicing. Remove nozzle by pressing
the nozzle release button and pulling the nozzle in a downward
motion. Remove any debris clogged in the nozzle airpath (see figs.
4.4 - 4.5). Reassemble nozzle to the product.
5. Internal component damage. 5. Call for service: 1-800-944-9200
Brushroll will not
turn
1. Brushroll may have an obstruction. 1. Unplug vacuum before servicing. Remove nozzle by pressing
the nozzle release button and pulling the nozzle in a downward
motion. Remove any debris clogged in the nozzle airpath (see figs.
4.4 - 4.5). Reassemble nozzle to the product.
2. Motor protection device tripped. 2. Turn product to off and unplug, product will reset in approximately 30 minutes.
3. Broken belt. 3. Unplug vacuum before servicing. Remove nozzle cover replace with
recommended belt and replace nozzle cover.
4. Internal component damage. 4. Call for service: 1-800-944-9200
Cleaner won’t run
1. Power cord not firmly plugged in. 1. Plug unit into outlet firmly.
2. Internal damage. 2. Call for service: 1-800-944-9200
3. Blown fuse or tripped breaker. 3. Replace fuse or reset breaker in home.
Pull out filter cap.
CAUTION:
To reduce the risk of injury from moving parts, unplug before
servicing.
CAUTION: Not to be used for grooming a pet.
Turn vacuum nozzle over. Remove screws indicated by arrows on
bottom nozzle plate. Lift plate off nozzle bottom to access brush, belt
and nozzle.
After replacement turn brushroll making sure belt turns freely.
Return nozzle plate and screws.
CET ASPIRATEUR A ÉTÉ CONÇU POUR USAGE DOMESTIQUE SEULEMENT.
L’UTILISATION DE CE PRODUIT À DES FINS COMMERCIALES INVALIDE LA
PRÉSENTE GARANTIE.
CONSIGNES DE SÉCURITÉ IMPORTANTES
RANGER ET CONSERVER CES INSTRUCTIONS
Durantl’utilisationd’unappareilélectrique,toujoursrespecterlesprécautions
élémentaires,ycomprislessuivantes:
LIRE TOUTES LES INSTRUCTIONS AVANT D’UTILISER CET APPAREIL.
AVERTISSEMENT: AFIN DE RÉDUIRE AU
MINIMUM LES RISQUES D’INCENDIE, DE
CHOC ÉLECTRIQUE OU DE BLESSURES :
•Assemblercomplètementavantl’utilisation.
•N’utiliserl’appareilqu’àlatensionspécifiéesurlaplaquesignalétiquesituéederrièrelevide-
poussièredel’appareil.
•Nepaslaisserl’appareilsanssurveillancelorsqu’ilestbranché.Ledébrancherquandiln’est
pasutiliséetavantd’enfairel’entretien.
•Nepasutiliserl’appareilàl’extérieurousurdessurfaceshumides.
•Ne pas permettre que l’appareil soit utilisé comme un jouet. Ce produit n’estpas conçu
pour être utilisé par des enfants de 12 ans et moins. Exercer une étroite surveillance
lorsquel’appareilestutiliséàproximitéd’enfants.Pouréviterlesrisquesdeblessuresoude
dommages,tenirleproduithorsdelaportéedesenfants,etnepasleurpermettredeplacer
leursdoigtsoudesobjetsdanslesouvertures.
•L’appareildoitêtreutiliséseulementcommeindiquédanscemanuel.Utiliseruniquementles
accessoiresetlesproduitsrecommandésparlefabricant.
•Nepasutiliserl’appareilsilaficheoulecordonestendommagé.Sil’aspirateurnefonctionne
pasadéquatement,s’ilesttombé,aétéendommagé,aétélaisséàl’extérieurouesttombé
dansl’eau,l’expédieràuncentrederéparationpourqu’ilsoitvérifié.
•Ne pas tirer l’appareil par le cordon, ne pas se servir du cordon comme poignée,
ne pas fermer de portes sur le cordon et ne pas contourner des coins ou des rebords
tranchants avec le cordon. Éviter de faire rouler l’appareil sur le cordon. Tenir le cordon
éloignédessurfaceschaudes.
•Nepastirersurlecordonpourdébrancherl’appareil,maisplutôtsurlafiche.
•N e pasmanipulerlaficheoul’aspirateuraveclesmainsmouillées.
•N e pas insérer d’objets dans les ouvertures de l’appareil. Ne pas utiliser l’appareil si les
orificessontobstrués;retirerlapoussière,lamousse,lescheveuxoutoutcequipourrait
réduireledébitd’air.
•Garderlescheveux,lesvêtementsamples,lesdoigtsettouteautrepartieducorpsàl’écart
desouverturesetdespiècesenmouvement.
•Éteindretouteslescommandesavantdedébrancherl’appareil.
•Êtretrèsprudentpendantl’utilisationdanslesescaliers.Nepasdéposerl’aspirateursurles
marches.Afind’éviterlesblessuresoulesdommagesetd’empêcherl’appareildetomber,
toujoursplacerl’appareilaubasdel’escalier.Nepasplacerl’appareildanslesescaliersou
surunmeuble,cequipourraitcauserdesblessuresoudesdommages.
•Ne pas aspirer les liquides inflammables ou combustibles comme l’essence, ni utiliser
l’appareilàproximitédecesmatériaux.
•Toujourséteindrecetappareilavantd’installerouderetirerletuyauoulesuceurélectrique.
•N’aspireraucunematièrebrûlanteoudégageantdelafumée,commedescigarettes,des
allumettesoudescendreschaudes.
•N e pasutiliserl’appareilsanssonvide-poussièreousesfiltres.
FRANÇAIS
If you need assistance:
Visit our website at hoover.com. Follow the authorized dealer locator link to find the Hoover® authorized dealer nearest you or
call 1-800-944-9200 for an automated referral of Hoover® authorized dealer locations (U.S. only) or to speak with a customer
service representative; Mon- Fri 8am- 7pm EST.
PLEASE DO NOT RETURN THIS PRODUCT TO THE STORE.
Limited TWO Year Warranty
for Cyclonic Stick Vac
(Domestic Use)
WHAT THIS WARRANTY COVERS
When used and maintained in normal household use and in accordance with the Owner’s Manual, your HOOVER
®
product
is warranted against original defects in material and workmanship for a full two year from date of purchase (the “Warranty
Period”). During the Warranty Period, Hoover
®
will provide labor and parts, at no cost to you, to correct any such defect in
products purchased in the United States, U.S. Military Exchanges and Canada.
HOW TO MAKE A WARRANTY CLAIM
If this product is not as warranted, take or send the product to a Hoover
®
Authorized Warranty Service Dealer along with proof
of purchase. For an automated referral to authorized service outlets in the U.S.A., phone: 1-800-944-9200 OR visit Hoover
®
online at www.hoover.com.
WHAT THIS WARRANTY DOES NOT COVER
This Warranty does not cover: use of the product in a commercial operation (such as maid, janitorial and equipment rental
services), brushroll, belt, improper maintenance of the product, damage due to misuse, acts of God, nature, vandalism
or other acts beyond the control of Hoover®, owner’s acts or omissions, use outside the country in which the product
was initially purchased and resales of the product by the original owner. This warranty does not cover pick up, delivery,
transportation or house calls. However, if you mail your product to a Hoover® Authorized Warranty Service Dealer, cost of
shipping will be paid one way.
This warranty does not apply to products purchased outside the United States, including its territories and possessions, outside
a U.S. Military Exchange and outside of Canada. This warranty does not cover products purchased from a party that is not an
authorized retailer, dealer, or distributor of Hoover® products.
OTHER IMPORTANT TERMS
This Warranty is not transferable and may not be assigned. This Warranty shall be governed and construed under the laws of
the state of Ohio. The Warranty Period will not be extended by any replacement or repair performed under this Warranty.
THIS WARRANTY IS THE EXCLUSIVE WARRANTY AND REMEDY PROVIDED BY HOOVER
®
. ALL OTHER WARRANTIES,
EXPRESSED OR IMPLIED, INCLUDING WARRANTIES OF MERCHANTABILITY OR FITNESS FOR PARTICULAR PURPOSE,
ARE DISCLAIMED. IN NO EVENT WILL HOOVER
®
BE LIABLE FOR ANY SPECIAL, INDIRECT, INCIDENTAL OR
CONSEQUENTIAL DAMAGES OF ANY KIND OR NATURE TO OWNER OR ANY PARTY CLAIMING THROUGH
OWNER, WHETHER BASED IN CONTRACT, NEGLIGENCE, TORT OR STRICT PRODUCTS LIABILITY OR ARISING FROM
ANY CAUSE WHATSOEVER. Some states do not allow the exclusion of consequential damages, so the above exclusion may
not apply to you. This warranty gives you specic rights; you may also have others that vary from state to state.
Nozzle
Release
Button
4.4
In order to maintain optimum performance of your cleaner, each time
the dirt cup is removed for emptying it is recommended to check if there
is any debris trapped in the dirt tube (A). If so, remove the debris before
re-attaching the dirt cup to the cleaner.
If you still are experiencing reduced suction/performance, detach
the nozzle base from the main unit (press button on back of nozzle
to release, B) and inspect both openings of the nozzle base (C) for
any trapped debris. Remove any debris that may be present before
re-attaching the nozzle base to the main body of the cleaner.
Dirt Cup Debris and Clog Removal
A
C
Attach Handle
4. MAINTENANCE
Dirt Cup & Filter Removal & Replacement
IMPORTANT: For best results, clean after each use.
REGULAR MAINTENANCE: Each time the dirt cup is emptied, the filter should be cleaned (Filter will be
discolored after use. This will not affect the filter’s performance.)
Any other servicing should be done by an authorized service representative.
Dirt Cup Removal and Cleaning
To Remove dirt cup, depress
the dirt cup release button
located on the top of the dirt
cup and tip away from the
body of the unit.
Press dirt cup empty button over trash can to release debris.
Push door closed until latch clicks.
Dirt Cup Removal and Cleaning
To Remove dirt cup, depress
4.1
4.2
Press dirt cup empty button over trash can to release debris.
4.3
Handle Release
2.4
Wrap cord around cord hooks
for convenient storage. Attach
the plug end to cord.
Cord Storage
On/Off Switch
4.5
B
Pull out filter and brush clean.
Rinse under cold water as
needed.
Pull out filter and brush clean.
4.7
Insert filter into filter cap.
Insert filter into filter cap.
4.8
WARNING: Always dry filter
for 24 hours before replacing.
WARNING: Do not use
detergent or hot water to clean
filter.
•BrushrollcontinuestoturnwhileproductisturnedonandhandleisinuprightpositionunlessOn/
Offswitchissettothebarefloormode.Toavoiddamagetocarpet,rugs,andflooring,avoidtipping
cleanerorsettingitonfurniture,fringedarearugs,orcarpetedstairs.
WARNING:
•Toreducetheriskofelectricshock,thisappliancehasapolarizedplug(onebladeiswiderthanthe
other).Thisplugwillfitinapolarizedoutletonlyoneway.Iftheplugdoesnotfitfullyintheoutlet,
reversetheplug.Ifitstilldoesnotfit,contactaqualifiedelectricantoinstalltheproperoutlet.Donot
changethepluginanyway.
CAUTION: To reduce the
risk of injury from moving parts,
unplug before servicing.
CYCLONIC
STICK
VAC
CYCLONIC
ASPIRATEUR
VERTICAL
CYCLONIC
BARREDORA
DE SUCCIÓN
Instructions d’Utilisation et d’Entretien
Veuillez lire attentivement ces instructions avant d’utiliser votre aspirateur vertical HOOVER
MD
.
N’oubliez pas d’enregistrer votre produit en ligne, à l’adresse Hoover.com, ou par téléphone,
au 1-800-944-9200.
Operating and Servicing Instructions
Please read these instructions carefully before using your HOOVER
®
Stick Vac.
Be sure to register your product online at Hoover.com or call 1-800-944-9200 to register by phone.
Instrucciones de Funcionamiento y Mantenimiento
Lea atentamente estas instrucciones antes de usar su Barredora de succión HOOVER
®
.
Inscriba su producto en línea en Hoover.com, o llame al 1-800-944-9200 si preere hacerlo por teléfono.
©2010 Techtronic Floor Care Technology Limited. All Rights Reserved. Tous droits réservés.
Todos los derechos reservados. #960009635 ID101174-R0
OWNER’S MANUAL
GUIDE D’UTILISATION • MANUAL DEL USUARIO
1
2
3
4
7
8
5
6
10
9
11
1. FEATURES
2. ASSEMBLY
For filter replacement, please call 1-800-944-9200 or visit our website at www.hoover.com to locate
a dealer nearest you. Filter Service Part #410044001.
For belt replacement, please call 1-800-944-9200 or visit our website at www.hoover.com to locate
a dealer nearest you. Belt Service Part #001942002
6. TROUBLESHOOTING
ANY SERVICING SHOULD BE DONE BY AN
AUTHORIZED SERVICE REPRESENTATIVE
Call 1-800-944-9200 USA & Canada
In the event that further assistance is required, see your Yellow Pages for an authorized HOOVER
®
Dealer
or visit www.hoover.com. Costs of any transportation to and from any place of repair are to be paid by
the owner. The service parts used in this unit are easily replaced and readily available from an authorized
HOOVER
®
Dealer or retailer. Always identify your product by the model number and manufacturing code
when requesting information or ordering replacement parts. (The model number appears behind the dirt
cup of the product.)
5. SERVICE
3. HOW TO OPERATE
12
THIS PRODUCT IS INTENDED FOR HOUSEHOLD USE ONLY.
IF USED COMMERCIALLY WARRANTY IS VOID.
IMPORTANT SAFETY INSTRUCTIONS
SAVE THESE INSTRUCTIONS
When using an electrical appliance, basic precautions should always be
followed, including the following:
READ ALL INSTRUCTIONS BEFORE USING THIS APPLIANCE.
WARNING: TO REDUCE THE RISK OF FIRE,
ELECTRIC SHOCK OR INJURY:
•Fullyassemblebeforeoperating.
•Operatecleaneronlyatvoltagespecifiedondataplateoncleanerbehinddirtcup.
•Donotleaveappliancewhenpluggedin.Unplugfromoutletwhennotinuseandbeforecleaningor
servicing.
• Donotuseoutdoorsoronwetsurfaces.
•Donotallowtobeusedasatoy.Notintendedforusebychildrenage12andunder.Closesupervision
isnecessarywhenusednearchildren.Toavoidinjuryordamage,keepchildrenawayfromproduct,
anddonotallowchildrentoplacefingersorotherobjectsintoanyopenings.
•Useonly as describedin this manual.Use onlymanufacturer’srecommended attachments and
products.
•Donotusewithdamagedcordorplug.Ifapplianceisnotworkingasitshould,hasbeendropped,
damaged,leftoutdoors,ordroppedintowater,takeittoaservicecenterpriortocontinuinguse.
•Donotpullorcarrybycord,usecordasahandle,closeadooroncord,orpullcordaroundsharp
edgesorcorners.Donotplaceproductoncord.Donotrunapplianceovercord.Keepcordawayfrom
heatedsurfaces.
•Donotunplugbypullingoncord.Tounplug,grasptheplug,notthecord.
•Donothandleplugorappliancewithwethands.
•Donotputanyobjectintoopenings.Donotusewithanyopeningblocked;keepfreeofdust,lint,hair,
andanythingthatmayreduceairflow.
•Keephair,looseclothing,fingers,andallpartsofbodyawayfromopeningsandmovingparts.
•Turnoffallcontrolsbeforeunplugging.
•Useextracarewhencleaningonstairs.Toavoidpersonalinjuryordamage,andtopreventthe
cleanerfromfalling,alwaysplacecleaneratbottomofstairsoronfloor.Donotplacecleaneronstairs
orfurniture,asitmayresultininjuryordamage.
•Donotusetopickupflammableorcombustiblematerials,suchasgasoline,orfinewoodsandings,
oruseinareaswheretheymaybepresent.
•Alwaysturnoffthisappliancebeforeconnectingordisconnectingmotorizednozzle.
•Donotpickupanythingthatisburningorsmoking,suchascigarettes,matches,orhotashes.
•Donotusewithoutfiltersordirtcupinplace.
•WARNING-ThisproductcontainschemicalsknowntotheStateofCaliforniatocausecancer,birth
defectsorreproductiveharm.
•Aninternalthermalprotectorhasbeendesignedintoyourcleanertoprotectitfromoverheating.
Whenthethermalprotectoractivatesthebrushrollwillstoprunning.
Ifthishappensproceedasfollows:
1.TurncleanerOFFandunplugitfromtheelectricaloutlet.
2. Inspect the nozzle base, dirt cup inlet openings, and dirt tube for any obstructions. Clear
obstructionsifpresent.
3.Whencleanerisunpluggedandmotorcoolsfor30minutes,thethermalprotectorwilldeactivate
andcleaningmaycontinue.
Ifthethermalprotectorcontinuestoactivateafterfollowingtheabovesteps,yourcleanerneeds
servicing.
CAUTION - TO REDUCE THE RISK OF DAMAGE:
•Avoidpickinguphard,sharpobjectswiththisproduct,astheymaycausedamage.
•Storeinadryplace.Donotexposemachinetofreezingtemperatures.
Attach Nozzle
Line up nozzle with main body
and firmly push nozzle into
body of unit until nozzle locks
into place. NOTE: To remove,
push release button and pull the
nozzle away from the body of
the unit.
If a minor problem develops, it usually can be remedied quite easily when the cause is identified by using
the checklist below.
Any other servicing should be done by an authorized service representative.
WARNING: To reduce risk of personal injury - unplug vacuum before servicing.
FRONT
1. On/Off Switch
(0=OFF, I=ON)
2. Dirt Cup
3. Large Debris Opening
4. Bottom Nozzle Cover
(underneath nozzle)
BACK
9. Handle
10. Dirt Cup Release
Button
11. Nozzle Release
Button
12. Cord
DIRT CUP AND FILTER
5. Filter Cap
6. Filter (inside filter cap)
7. Baffle Tube
8. Bottom Empty
Release Button
1.1
Insert handle into body.
NOTE: Ensure handle faces
proper direction.
Insert screw and tighten until
secure. NOTE: DO NOT over
tighten screw.
2.1
Insert handle into body.
2.2
Insert screw and tighten until
2.3
3.2
3.1
Hold down nozzle with foot and
tilt back to reclining position.
To turn vacuum on, slide switch
forward.
(OFF) O
(ON) I : Has two modes,
each indicated by a graphic
displayed in window. The first
mode is for bare floors and the
second for carpet.
Baffle Tube Removal and Replacement
Filter Removal and Cleaning
Belt and Brushroll Replacement
Hold dirt cup right side up and
press bottom release button to
open trap door.
Turn baffle tube counter
clockwise until it stops. Pull out
baffle tube, hold over trash can
and shake free debris.
To replace baffle tube, insert
back into dirt cup, align slots
and twist clockwise until tube
locks in place.
Baffle Tube Removal and Replacement
Hold dirt cup right side up and
4.11
4.12
To replace baffle tube, insert
4.13
Filter Removal and Cleaning
Belt and Brushroll Replacement
4.6
4.14
Dirt Cup and Filter Replacement
Insert filter cap into dirt cup.
Place bottom of dirt cup onto
housing and pivot into place until
dirt cup release button locks.
Insert filter cap into dirt cup.
4.9
Place bottom of dirt cup onto
4.10
PROBLEM POSSIBLE REASON POSSIBLE SOLUTION
Product does not
pick up dirt
1. Dirt cup may be full. 1. Empty dirt cup.
2. Filter may be dirty. 2. Clean and/or wash filter.
3. Baffle tube may be dirty. 3. Remove and clean.
4. Airpath may be clogged. 4. Unplug vacuum before servicing. Remove nozzle by pressing
the nozzle release button and pulling the nozzle in a downward
motion. Remove any debris clogged in the nozzle airpath (see figs.
4.4 - 4.5). Reassemble nozzle to the product.
5. Internal component damage. 5. Call for service: 1-800-944-9200
Brushroll will not
turn
1. Brushroll may have an obstruction. 1. Unplug vacuum before servicing. Remove nozzle by pressing
the nozzle release button and pulling the nozzle in a downward
motion. Remove any debris clogged in the nozzle airpath (see figs.
4.4 - 4.5). Reassemble nozzle to the product.
2. Motor protection device tripped. 2. Turn product to off and unplug, product will reset in approximately 30 minutes.
3. Broken belt. 3. Unplug vacuum before servicing. Remove nozzle cover replace with
recommended belt and replace nozzle cover.
4. Internal component damage. 4. Call for service: 1-800-944-9200
Cleaner won’t run
1. Power cord not firmly plugged in. 1. Plug unit into outlet firmly.
2. Internal damage. 2. Call for service: 1-800-944-9200
3. Blown fuse or tripped breaker. 3. Replace fuse or reset breaker in home.
Pull out filter cap.
CAUTION:
To reduce the risk of injury from moving parts, unplug before
servicing.
CAUTION: Not to be used for grooming a pet.
Turn vacuum nozzle over. Remove screws indicated by arrows on
bottom nozzle plate. Lift plate off nozzle bottom to access brush, belt
and nozzle.
After replacement turn brushroll making sure belt turns freely.
Return nozzle plate and screws.
CET ASPIRATEUR A ÉTÉ CONÇU POUR USAGE DOMESTIQUE SEULEMENT.
L’UTILISATION DE CE PRODUIT À DES FINS COMMERCIALES INVALIDE LA
PRÉSENTE GARANTIE.
CONSIGNES DE SÉCURITÉ IMPORTANTES
RANGER ET CONSERVER CES INSTRUCTIONS
Durantl’utilisationd’unappareilélectrique,toujoursrespecterlesprécautions
élémentaires,ycomprislessuivantes:
LIRE TOUTES LES INSTRUCTIONS AVANT D’UTILISER CET APPAREIL.
AVERTISSEMENT: AFIN DE RÉDUIRE AU
MINIMUM LES RISQUES D’INCENDIE, DE
CHOC ÉLECTRIQUE OU DE BLESSURES :
•Assemblercomplètementavantl’utilisation.
•N’utiliserl’appareilqu’àlatensionspécifiéesurlaplaquesignalétiquesituéederrièrelevide-
poussièredel’appareil.
•Nepaslaisserl’appareilsanssurveillancelorsqu’ilestbranché.Ledébrancherquandiln’est
pasutiliséetavantd’enfairel’entretien.
•Nepasutiliserl’appareilàl’extérieurousurdessurfaceshumides.
•Ne pas permettre que l’appareil soit utilisé comme un jouet. Ce produit n’estpas conçu
pour être utilisé par des enfants de 12 ans et moins. Exercer une étroite surveillance
lorsquel’appareilestutiliséàproximitéd’enfants.Pouréviterlesrisquesdeblessuresoude
dommages,tenirleproduithorsdelaportéedesenfants,etnepasleurpermettredeplacer
leursdoigtsoudesobjetsdanslesouvertures.
•L’appareildoitêtreutiliséseulementcommeindiquédanscemanuel.Utiliseruniquementles
accessoiresetlesproduitsrecommandésparlefabricant.
•Nepasutiliserl’appareilsilaficheoulecordonestendommagé.Sil’aspirateurnefonctionne
pasadéquatement,s’ilesttombé,aétéendommagé,aétélaisséàl’extérieurouesttombé
dansl’eau,l’expédieràuncentrederéparationpourqu’ilsoitvérifié.
•Ne pas tirer l’appareil par le cordon, ne pas se servir du cordon comme poignée,
ne pas fermer de portes sur le cordon et ne pas contourner des coins ou des rebords
tranchants avec le cordon. Éviter de faire rouler l’appareil sur le cordon. Tenir le cordon
éloignédessurfaceschaudes.
•Nepastirersurlecordonpourdébrancherl’appareil,maisplutôtsurlafiche.
•N e pasmanipulerlaficheoul’aspirateuraveclesmainsmouillées.
•N e pas insérer d’objets dans les ouvertures de l’appareil. Ne pas utiliser l’appareil si les
orificessontobstrués;retirerlapoussière,lamousse,lescheveuxoutoutcequipourrait
réduireledébitd’air.
•Garderlescheveux,lesvêtementsamples,lesdoigtsettouteautrepartieducorpsàl’écart
desouverturesetdespiècesenmouvement.
•Éteindretouteslescommandesavantdedébrancherl’appareil.
•Êtretrèsprudentpendantl’utilisationdanslesescaliers.Nepasdéposerl’aspirateursurles
marches.Afind’éviterlesblessuresoulesdommagesetd’empêcherl’appareildetomber,
toujoursplacerl’appareilaubasdel’escalier.Nepasplacerl’appareildanslesescaliersou
surunmeuble,cequipourraitcauserdesblessuresoudesdommages.
•Ne pas aspirer les liquides inflammables ou combustibles comme l’essence, ni utiliser
l’appareilàproximitédecesmatériaux.
•Toujourséteindrecetappareilavantd’installerouderetirerletuyauoulesuceurélectrique.
•N’aspireraucunematièrebrûlanteoudégageantdelafumée,commedescigarettes,des
allumettesoudescendreschaudes.
•N e pasutiliserl’appareilsanssonvide-poussièreousesfiltres.
FRANÇAIS
If you need assistance:
Visit our website at hoover.com. Follow the authorized dealer locator link to find the Hoover® authorized dealer nearest you or
call 1-800-944-9200 for an automated referral of Hoover® authorized dealer locations (U.S. only) or to speak with a customer
service representative; Mon- Fri 8am- 7pm EST.
PLEASE DO NOT RETURN THIS PRODUCT TO THE STORE.
Limited TWO Year Warranty
for Cyclonic Stick Vac
(Domestic Use)
WHAT THIS WARRANTY COVERS
When used and maintained in normal household use and in accordance with the Owner’s Manual, your HOOVER
®
product
is warranted against original defects in material and workmanship for a full two year from date of purchase (the “Warranty
Period”). During the Warranty Period, Hoover
®
will provide labor and parts, at no cost to you, to correct any such defect in
products purchased in the United States, U.S. Military Exchanges and Canada.
HOW TO MAKE A WARRANTY CLAIM
If this product is not as warranted, take or send the product to a Hoover
®
Authorized Warranty Service Dealer along with proof
of purchase. For an automated referral to authorized service outlets in the U.S.A., phone: 1-800-944-9200 OR visit Hoover
®
online at www.hoover.com.
WHAT THIS WARRANTY DOES NOT COVER
This Warranty does not cover: use of the product in a commercial operation (such as maid, janitorial and equipment rental
services), brushroll, belt, improper maintenance of the product, damage due to misuse, acts of God, nature, vandalism
or other acts beyond the control of Hoover®, owner’s acts or omissions, use outside the country in which the product
was initially purchased and resales of the product by the original owner. This warranty does not cover pick up, delivery,
transportation or house calls. However, if you mail your product to a Hoover® Authorized Warranty Service Dealer, cost of
shipping will be paid one way.
This warranty does not apply to products purchased outside the United States, including its territories and possessions, outside
a U.S. Military Exchange and outside of Canada. This warranty does not cover products purchased from a party that is not an
authorized retailer, dealer, or distributor of Hoover® products.
OTHER IMPORTANT TERMS
This Warranty is not transferable and may not be assigned. This Warranty shall be governed and construed under the laws of
the state of Ohio. The Warranty Period will not be extended by any replacement or repair performed under this Warranty.
THIS WARRANTY IS THE EXCLUSIVE WARRANTY AND REMEDY PROVIDED BY HOOVER
®
. ALL OTHER WARRANTIES,
EXPRESSED OR IMPLIED, INCLUDING WARRANTIES OF MERCHANTABILITY OR FITNESS FOR PARTICULAR PURPOSE,
ARE DISCLAIMED. IN NO EVENT WILL HOOVER
®
BE LIABLE FOR ANY SPECIAL, INDIRECT, INCIDENTAL OR
CONSEQUENTIAL DAMAGES OF ANY KIND OR NATURE TO OWNER OR ANY PARTY CLAIMING THROUGH
OWNER, WHETHER BASED IN CONTRACT, NEGLIGENCE, TORT OR STRICT PRODUCTS LIABILITY OR ARISING FROM
ANY CAUSE WHATSOEVER. Some states do not allow the exclusion of consequential damages, so the above exclusion may
not apply to you. This warranty gives you specic rights; you may also have others that vary from state to state.
Nozzle
Release
Button
4.4
In order to maintain optimum performance of your cleaner, each time
the dirt cup is removed for emptying it is recommended to check if there
is any debris trapped in the dirt tube (A). If so, remove the debris before
re-attaching the dirt cup to the cleaner.
If you still are experiencing reduced suction/performance, detach
the nozzle base from the main unit (press button on back of nozzle
to release, B) and inspect both openings of the nozzle base (C) for
any trapped debris. Remove any debris that may be present before
re-attaching the nozzle base to the main body of the cleaner.
Dirt Cup Debris and Clog Removal
A
C
Attach Handle
4. MAINTENANCE
Dirt Cup & Filter Removal & Replacement
IMPORTANT: For best results, clean after each use.
REGULAR MAINTENANCE: Each time the dirt cup is emptied, the filter should be cleaned (Filter will be
discolored after use. This will not affect the filter’s performance.)
Any other servicing should be done by an authorized service representative.
Dirt Cup Removal and Cleaning
To Remove dirt cup, depress
the dirt cup release button
located on the top of the dirt
cup and tip away from the
body of the unit.
Press dirt cup empty button over trash can to release debris.
Push door closed until latch clicks.
Dirt Cup Removal and Cleaning
To Remove dirt cup, depress
4.1
4.2
Press dirt cup empty button over trash can to release debris.
4.3
Handle Release
2.4
Wrap cord around cord hooks
for convenient storage. Attach
the plug end to cord.
Cord Storage
On/Off Switch
4.5
B
Pull out filter and brush clean.
Rinse under cold water as
needed.
Pull out filter and brush clean.
4.7
Insert filter into filter cap.
Insert filter into filter cap.
4.8
WARNING: Always dry filter
for 24 hours before replacing.
WARNING: Do not use
detergent or hot water to clean
filter.
•BrushrollcontinuestoturnwhileproductisturnedonandhandleisinuprightpositionunlessOn/
Offswitchissettothebarefloormode.Toavoiddamagetocarpet,rugs,andflooring,avoidtipping
cleanerorsettingitonfurniture,fringedarearugs,orcarpetedstairs.
WARNING:
•Toreducetheriskofelectricshock,thisappliancehasapolarizedplug(onebladeiswiderthanthe
other).Thisplugwillfitinapolarizedoutletonlyoneway.Iftheplugdoesnotfitfullyintheoutlet,
reversetheplug.Ifitstilldoesnotfit,contactaqualifiedelectricantoinstalltheproperoutlet.Donot
changethepluginanyway.
CAUTION: To reduce the
risk of injury from moving parts,
unplug before servicing.
2. ENSAMBLADO
6. GUIDE DE DÈPANNAGE
Si un problème mineur survient, il est habituellement possible de le résoudre facilement si la cause est déterminée à
l’aide de la liste ci dessous.
Toute autre tâche d’entretien doit être confiée à un représentant de service autorisé.
AVERTISSEMENT : Pour réduire le risque de blessure, retirer la pile avant d’effectuer l’entretien de l’appareil.
Si ocurre un problema menor, generalmente puede resolverse con bastante facilidad cuando se halla la
causa, usando esta lista de verificación.
Cualquier otra tarea de mantenimiento debe ser realizada por un representante de mantenimiento autorizado.
ADVERTENCIA:
Para reducir el riesgo de lesiones personales - retire el paquete de la batería antes de realizar el mantenimiento.
Aligner la buse avec le corps de l’appareil et
la pousser fermement à l’intérieur de l’appareil
jusqu’à ce qu’elle se verrouille en place.
REMARQUE :
Pour enlever la buse,
appuyer sur le bouton de dégagement et tirer
la buse en l’éloignant du corps de l’appareil.
Insérer la poignée dans le corps de
l’appareil.
REMARQUE :
S’assurer que la poi-
gnée est installée dans le bon sens.
Insérer la vis et serrer fermement.
REMARQUE :
NE PAS trop serrer
la vis.
2.1
2.2
2.3
3.2
3.1
Tenir la buse avec le pied et pencher
l’aspirateur vers l’arrière en position inclinée.
Pour mettre l’aspirateur en marche, faire glisser l’interrupteur vers l’avant.
(ARRÊT) O
(MARCHE) I : Il y a deux modes, chacun étant indiqué par une image
sur la fenêtre. Le premier mode est destiné aux planchers à surface dure,
l’autre aux moquettes.
Para reemplazar el filtro, visite nuestro sitio Web en www.hoover.com para comprar en Internet, o llame al servicio
de atención al cliente al 1-800-944-9200. No. de Parte 410044001.
Garantie limitée de DEUX ans
(Usage domestique seulement)
ÉLÉMENTS COUVERTS PAR LA PRÉSENTE GARANTIE
Votre produit HOOVER
MD
est garanti pour des conditions normales d’utilisation et d’entretien domestiques, comme il est stipulé dans le Guide
de l’utilisateur, contre les défauts de matériaux et de fabrication pour une période complète de deux ans à compter de la date d’achat
(la « Période de garantie »). Pendant la Période de garantie, Hoover
MD
fournira, sans frais supplémentaires, les pièces et la main-d’œuvre
nécessaires à la remise en bon état de fonctionnement de tout produit acheté aux États-Unis, au Canada ou par l’intermédiaire du Programme
d’échanges militaires américain.
COMMENT PRÉSENTER UNE RÉCLAMATION AU TITRE DE LA GARANTIE
Si ce produit ne fonctionne pas comme annoncé, l’apporter à un atelier de service garanti autorisé Hoover
MD
, accompagné de la preuve
d’achat. Pour accéder à un service d’aide automatique donnant la liste des centres de service autorisés, composer le 1 800 944-9200 OU
visiter Hoover
MD
sur Internet à hoover.com (clients aux États-Unis) ou à hoover.ca (clients au Canada).
ÉLÉMENTS NON COUVERTS PAR LA PRÉSENTE GARANTIE
La présente garantie ne couvre pas : toute utilisation commerciale du produit (p. ex., utilisation dans le cadre de services ménagers, de
conciergerie ou de location de matériel) Rouleaubrosse, Courroie ; l’entretien inadéquat du produit; les dommages liés à une utilisation
inadéquate, à des cas fortuits ou catastrophes naturelles, au vandalisme, à tout autre acte hors du contrôle de Hoover
MD
ou à tout acte ou
négligence de la part du propriétaire du produit; toute utilisation dans un pays autre que celui où le produit a été acheté initialement, et tout
produit revendu par son propriétaire original. La présente garantie ne couvre pas le ramassage, la livraison, le transport ou la réparation
à domicile du produit. Cette garantie ne s’applique pas aux produits achetés : hors des États-Unis (ce qui comprend ses territoires et
possessions); hors du Programme d’échanges militaires américain; hors du Canada. Cette garantie ne couvre pas les produits achetés chez
un tiers autre qu’un détaillant, marchand ou distributeur autorisé de produits Hoover
MD
.
AUTRE CONDITIONS IMPORTANTES
La présente garantie n’est pas transférable et ne peut pas être cédée. La présente garantie sera régie et interprétée selon les lois de l’État
de l’Ohio. La Période de garantie ne peut pas être prolongée par quelque réparation ou remplacement que ce soit exécuté en vertu de la
présente garantie.
LA PRÉSENTE GARANTIE EST L’UNIQUE GARANTIE ET RECOURS FOURNIS PAR HOOVER
MD
. HOOVER
MD
DÉCLINE TOUTE
RESPONSABILITÉ QUANT À TOUTES LES AUTRES GARANTIES EXPRESSES OU TACITES, Y COMPRIS LES GARANTIES LIÉES À
LA QUALITÉ MARCHANDE OU À LA COMPATIBILITÉ DU PRODUIT POUR UN USAGE PARTICULIER. HOOVERMD NE POURRA
EN AUCUN CAS ÊTRE TENUE RESPONSABLE DE TOUS DOMMAGES-INTÉRÊTS SPÉCIAUX OU DOMMAGES INDIRECTS,
ACCESSOIRES OU CONSÉCUTIFS DE QUELQUE NATURE QUE CE SOIT SUBIS PAR LE PROPRIÉTAIRE DU PRODUIT OU PAR TOUTE
PARTIE RÉCLAMANT PAR L’INTERMÉDIAIRE DU PROPRIÉTAIRE, QU’ILS RELÈVENT DU DROIT DES CONTRATS, DE LA NÉGLIGENCE,
DE LA RESPONSABILITÉ CIVILE DÉLICTUELLE OU DE LA RESPONSABILITÉ STRICTE DU FAIT DES PRODUITS, OU QU’ILS DÉCOULENT
DE QUELQUE CAUSE QUE CE SOIT. Certains États ne permettent pas l’exclusion des dommages consécutifs; par conséquent, l’exclusion
précédente pourrait ne pas être applicable dans votre cas. La présente garantie vous donne des droits spéciques; vous pouvez également
avoir d’autres droits, qui varient d’un État à l’autre.
Fixer le manche
Rangement du
cordon
Fixer le suceur
Interrupteur Marche/ Arrêt
2.4
Positions du manche
3. UTILISATION
Conecte la boquilla
Colocación Del
Mango
CUALQUIER OTRO SERVICIO DEBE SER REALIZADO POR UN REPRESENTANTE
AUTORIZADO DE SERVICIO
Para realizar el servicio, llame al 1-800-944-9200 USA y Canada
En caso de necesitar más ayuda, consulte las Páginas Amarillas para encontrar a un Distribuidor Autorizado HOOVER
®
o visite nuestro
sitio Web en www.hoover.com. Los costos de transporte hacia y desde el sitio de reparación serán pagados por el propietario.
Las partes de repuesto utilizadas en esta unidad son de reemplazo fácil y están disponibles a través de un Distribuidor Autorizado
HOOVER
®
o en otras tiendas. Siempre identifique su aspiradora por medio del número de modelo y el código de fabricación cuando
pida información u ordene partes de repuesto. (El número de modelo está indicado detrás del depósito para polvo del aparato.).
ESPAÑOL
ESTA ASPIRADORA ESTÁ DISEÑADA PARA USO DOMÉSTICO SOLAMENTE.
EL USO COMERCIAL DE ESTE PRODUCTO ANULA LA GARANTÍA.
¡SALVAGUARDIAS IMPORTANTES!
¡GUARDE ESTAS INSTRUCCIONES!
Al usar un aparato eléctrico, observe siempre las precauciones básicas,
incluyendo las siguientes:
LEA TODAS LAS INSTRUCCIONES ANTES DE USAR ESTE APARATO
ADVERTENCIA: PARA REDUCIR EL RIESGO
DE INCENDIOS, CHOQUES ELÉCTRICOS O
LESIONES:
•Ensamblecompletamenteelproductoantesdehacerlofuncionar.
•Hagafuncionarlalimpiadorasolamenteconelvoltajeespecificadoenlaplacadedatosque
seencuentraenlalimpiadora,detrásdelcontenedorparapolvo.
•Nouseesteaparatoenlugaresalairelibreniensuperficieshúmedas.
•Nopermitaqueelaparatoseusecomounjuguete.Noestádiseñadoparaquelousenniños
de12añosomenos.Serequiereunasupervisiónestrictacuandoesteaparatoseusacerca
delosniños.Paraevitarlesioneso daños, mantenga alosniñoslejosdelproductoyno
permitaquecoloquenlosdedosniotrosobjetosdentrodelasaberturas.
4. ENTRETIEN
Retrait et Remplacement du Vide
IMPORTANT : Pour obtenir de meilleurs résultats, nettoyer après chaque utilisation.
ENTRETIEN RÉGULIER : Le filtre devrait être nettoyé chaque fois que le vide-poussière est vidé. (Le filtre se décolorera après
l’utilisation, mais cela n’affectera pas sa performance.)
Utiliser les instructions numérotées de cette section française avec les illustrations numérotées correspondantes de la section
anglaise de ce guide.
1. CARACTÉRISTIQUES
AVANT
1.
Interrupteur On/Off (marche/arrêt)
(O = arrêt, I = succion, II = succion et brosse)
2. Vide-poussière
3. Grand orifice à débris
4. Couvercle inférieur de la buse (sous la buse)
1.1
GODET À POUSSIÈRE
5. Capuchon du filtre
6. Filtre (à l’intérieur du capuchon
du filtre)
7. Tube déflecteur
8. Bouton de vidange du
vide-poussière
2. ENSAMBLADO
Use estas instrucciones en español junto con las figuras paso-a-paso provistas en el manual de inglés.
1. CARACTERÍSTICAS
1.1
4. MANTENIMIENTO
Cómo Retirar y Volver a Colocar el Depósito Para Polvo y El Filtro
IMPORTANTE: Para obtener mejores resultados, limpie después de cada uso.
MANTENIMIENTO REGULAR: Cada vez que vacíe el depósito para polvo, debe limpiar el filtro con un cepillo.
(El filtro se decolora después del uso. Esto no afectará el rendimiento del filtro).
ARRIÈRE
9. Poignée
10. Bouton de dégagement
du vide-poussière
11 . Bouton de dégagement
de la buse
12. Cordon
Retrait et Nettoyage du Vide-Poussière
Retrait et Nettoyage
du Filtre
Pour retirer le vide-poussière, appuyer sur
le bouton de dégagement supérieur du
vide-poussière et l’éloigner du corps de
l’appareil.
Appuyer sur le bouton de vidange du
vide-poussière au-dessus d’une poubelle
pour expulser les débris.
Refermer le couvercle jusqu’à ce qu’un
déclic se fasse entendre.
4.1 4.2 4.3
4.6 4.7
Sortir le capuchon du filtre. Sortir le filtre et
le brosser pour le nettoyer. Rincer le filtre à
l’eau froide au besoin.
AVERTISSEMENT : Laisser toujours sécher
le filtre 24 heures avant de le remettre en
place.
AVERTISSEMENT : Ne pas utiliser de
détergent ou d’eau chaude pour nettoyer
le filtre.
Retrait et Remplacement du Tube Déflecteur
Remplacement de la Courroie et du Rouleau-Brosse
Tenir le vide-poussière à l’endroit et
appuyer sur le bouton de dégagement
pour ouvrir la porte.
Tourner le tube déflecteur complète-
ment vers la gauche. Le retirer, puis le
secouer au-dessus d’une poubelle pour
faire tomber les débris.
Pour replacer le tube déflecteur, le réin-
sérer dans le vide-poussière, aligner les
fentes et tourner le tube déflecteur vers
la droite jusqu’à ce qu’il se verrouille
en place.
4.12
4.13
4.14
Remplacement du Vide-Poussière et du Filtre
Insérer le filtre dans le capuchon du
filtre.
Insérer le capuchon du filtre dans le
vide-poussière.
Placer la partie inférieure du vide-poussière
dans le compartiment et le mettre en
place en le pivotant, jusqu’à ce que le
bouton de dégagement du vide-poussière
se verrouille.
4.8 4.9 4.10
MISE EN GARDE: Pour réduire les risques de blessures causées par des pièces en mouvement, débrancher
l’appareil avant d’en effectuer l’entretien. MISE EN GARDE: Ne pas utiliser pour toiletter un animal.
Retirer
les vis marquées d’une flèche sur la plaque inférieure de la buse. Lever la plaque pour accéder au rouleau-brosse,
à la courroie et à la buse. Lorsque le remplacement est terminé, s’assurer que la courroie tourne librement. Remettre
la plaque de la buse et les vis en place.
Alinee la boquilla con el cuerpo principal de la
unidad y empuje con fuerza la boquilla dentro
del cuerpo hasta que quede fija en su lugar.
NOTA:
Para retirar la boquilla, empuje el
botón y tire de ella hacia afuera del cuerpo
de la unidad.
Introduzca el mango en el cuerpo de la
unidad.
NOTA:
Asegúrese de que el mango mire
hacia la dirección correcta.
Introduzca un tornillo y apriete hasta que
quede firme.
NOTA:
NO apriete demasiado el
tornillo.
2.1
2.2
2.3
3.1
Sujete la boquilla hacia abajo con el pie e
incline hacia atrás a la posición de reclinado.
PARTE FRONTAL
1. Interruptor de encender/apagar (0=APAGADO,
I=Succión ENCENDIDA, II=Succión y cepillo ENCENDIDOS)
2. Depósito para polvo
3. Abertura grande para residuos
4. Tapa de la boquilla inferior (debajo de la boquilla)
RECIPIENTE DE POLVO
5. Tapa del filtro
6. Filtro (dentro de la tapa
del filtro)
7. Tubo deflector
8. Botón para soltar
el vaciado inferior
ARRIÈRE
9. Mango
10. Botón para soltar el
depósito para polvo
11 . Botón para soltar
a boquilla
12. Cordón
Cómo Retirar y Limpiar el Depósito
Para Polvo
Para retirar el depósito para polvo, oprima el
botón para soltar el depósito para polvo que
se encuentra en la parte superior del depósito
para polvo e inclínelo hacia fuera del cuerpo
de la unidad.
Presione el botón para vaciar el depósito
para polvo sobre el bote de basura a fin de
liberar los residuos.
Empuje la puerta para cerrarla hasta que la
traba haga clic.
4.1
4.2 4.3
Cómo Retirar y Volver a Colocar el Tubo Deflector
PARA RETIRAR
Sujete el lado derecho del depósito para
polvo hacia arriba y presione el botón para
soltar el depósito para polvo inferior para
abrir la puerta de descarga.
Gire el tubo deflector en sentido antihorario
hasta que se detenga. Tire del tubo deflector
para retirarlo, sujételo encima del cubo de la
basura y sacuda los residuos.
VOLVER A ENSAMBLAR
Para volver a colocar el tubo deflector,
introdúzcalo nuevamente en el depósito para
polvo, alinee las ranuras y gire en sentido hor-
ario hasta que el tubo quede fijo en su lugar.
4.11
4.12
4.13
Cómo Volver a Colocar el Depósito Para Polvo y el Filtro
Introduzca el filtro en la tapa del filtro con
el lado.
Introduzca la tapa del filtro en el depósito
para polvo.
Coloque la parte inferior del depósito para
polvo sobre el alojamiento y gírelo en su lugar
hasta que se trabe el botón para soltar el
depósito para polvo.
4.8
4.9
4.10
3.1
Para encender la aspiradora, deslice el interruptor hacia adelante.
(APAGADO) O
(ENCENDIDO) I : Tiene dos modos, cada uno de los cuales está
indicado por un gráfico que aparece en la ventana. El primer modo
es para suelos sin moqueta y el segundo es para moqueta.
PROBLÉME CAUSES POSSIBLES SOLUTIONS POSSIBLES
L’appareil s’arrête
Le vide-poussière est
peut-être plein.
Vider le vide-
poussière.
en cours d’utilisation.
1. Le vide-poussière est peut-être plein. 1. Vider le vide-poussière.
2. Le filtre est peut-être sale. 2. Nettoyer et/ou laver le filtre.
3. Le tube déflecteur est peut-être sale. 3. Retirer le tube déflecteur et le nettoyer.
4. L’entrée d’air est peut-être bouchée. 4. Débrancher l’appareil avant d’en effectuer l’entretien. Retirer la buse en appuyant
sur le bouton de dégagement de la buse et en la tirant vers le bas. Retirer tout
débris coincé dans l’entrée d’air de la buse
(figs. 4.4 - 4.5)
. Remettre la buse en
place sur l’appareil.
5. Daños de los componentes internos. 5. Composer le 1 800 944-9200 pour obtenir de l’assistance.
Le rouleau-brosse ne
démarre pas.
1. Le rouleau-brosse est peut-être obstrué. 1. Débrancher l’appareil avant d’en effectuer l’entretien. Retirer la buse en appuyant
sur le bouton de dégagement de la buse et en la tirant vers le bas.
(figs. 4.4 -
4.5)
Retirer tout débris coincé dans l’entrée d’air de la buse. Remettre la buse en
place sur l’appareil.
2. Le dispositif de protection du moteur s’est
déclenché.
2. Mettre l’appareil en position d’arrêt. L’appareil pourra être redémarré dans
environ 30 minutes.
3. La courroie est cassée. 3. Débrancher l’appareil avant d’en effectuer l’entretien. Retirer le couvercle de la
buse, remplacer la courroie par une courroie recommandée et remettre le cou-
vercle de la buse en place.
4. Des composants internes sont endommagés. 4. Composer le 1 800 944-9200 pour obtenir de l’assistance.
L’aspirateur ne
démarre pas
1. L’aspirateur n’est pas bien branché. 1. Insérer la fiche de l’appareil à fond dans la prise de courant.
2. Des composants internes sont endommagés. 2. Composer le 1 800 944-9200 pour obtenir de l’assistance.
3. Le fusible a sauté ou le disjoncteur s’est
déclenché.
3. Remplacer le fusible ou réenclencher le disjoncteur.
PROBLEMA POSIBLES CAUSAS SOLUCIONES POSIBLES
El producto no aspira la
suciedad
1. El depósito para polvo puede estar lleno. 1. Vacíe el depósito para polvo.
2. El filtro puede estar sucio. 2. Limpie y/o lave el filtro.
3. El tubo deflector puede estar sucio. 3. Retírelo y límpielo.
4. El circuito de aire puede estar tapado. 4. Desenchufe la aspiradora antes de realizar el mantenimiento. Retire la boquilla
presionando el botón para soltar la boquilla y tirando de ella hacia abajo.
Retire cualquier residuo que tape el circuito de aire de la boquilla
(figs. 4.4 -
4.5)
. Vuelva a ensamblar la boquilla al producto.
5. Daños de los componentes internos. 5. Para realizar el servicio, llame al: 1-800-944-9200.
El rodillo de cepillos
no gira
1. El rodillo de cepillos puede estar
obstruido.
1. Desenchufe la aspiradora antes de realizar el mantenimiento. Retire la tapa de la
boquilla y elimine la obstrucción. Vuelva a colocar la tapa de la boquilla y deje
que el dispositivo de protección del motor se reajuste, en aproximadamente
30 minutos.
2. Se disparó el dispositivo de protección
del motor.
2. Coloque el producto en posición Off: el producto se reajustará en aproximada-
mente 30 minutos.
3. Correa rota. 3. Desenchufe la aspiradora antes de realizar el mantenimiento. Retire la boquilla
presionando el botón para soltar la boquilla y tirando de ella hacia abajo.
Retire cualquier residuo que tape el circuito de aire de la boquilla
(figs. 4.4 -
4.5)
. Vuelva a ensamblar la boquilla al producto.
4. Daños de los componentes internos. 4. Para realizar el servicio, llame al: 1-800-944-9200.
La aspiradora no
funciona
1. No está bien enchufada. 1. Enchúfela bien.
2. Daño interno. 2. Para realizar el servicio, llame al: 1-800-944-9200.
3. Fusible quemado o se disparó el
disyuntor.
4. Reemplace el fusible o reajuste el disyuntor.
Si necesita ayuda:
Visite nuestro sitio web en www.hoover.com. Haga clic en el enlace que permite localizar los vendedores autorizados hoover para
encontrar el vendedor más cercano, o marque el 1-800-944-9200 para escuchar un mensaje indicando la dirección de los vendedores
autorizados Hoover
®
(sólo en ee. Uu.) O para hablar con un representante de atención al cliente (de 8 am a 7 pm, hora estándar del
este, de lunes a viernes).
POR FAVOR, NO DEVUELVA ESTE PRODUCTO A LA TIENDA.
Pour obtenir un filtre de rechange, veuillez visiter notre site Web au www.hoover.com pour l’acheter en ligne,
ou appeler le service à la clientèle au 1 800 944-9200. N° de référence 410044001.
Pour obtenir la courroie rechange, veuillez visiter notre site Web au www.hoover.com pour l’acheter en ligne,
ou appeler le service à la clientèle au 1 800 944-9200. N° de référence 001942002.
Pour obtenir de l’assistance :
Visitez notre site web à l’adresse www.hoover.ca. Cliquez sur le lien du localisateur de marchands autorisés Hoover
MD
pour trouver
le marchand le plus près de chez vous, ou composez le 1 800 944 9200 pour écouter un message indiquant les adresses des
marchands autorisés Hoover
MD
(é.-U. Seulement) ou pour parler à un représentant du service à la clientèle (de 8 h à 19 h, hne, du
lundi au vendredi).
VEUILLEZ NE PAS RETOURNER CE PRODUIT AU MAGASIN.
Garantía limitada de DOS años para la aspiradora
vertical ciclónica
(sólo para uso doméstico)
QUÉ CUBRE ESTA GARANTÍA
Siempre que el uso y el mantenimiento de su producto HOOVER
®
se realicen en condiciones de uso doméstico normales y según el Manual
del usuario, el producto estará garantizado contra defectos originales en el material y la fabricación durante de dos años completos desde la
fecha de compra (el “Período de Garantía”). Durante el Período de Garantía, Hoover
®
le proporcionará gratuitamente, como se describe en
esta garantía, la mano de obra y las piezas necesarias para corregir cualquier defecto en los productos comprados en los Estados Unidos,
en una tienda situada en una base militar de los EE. UU. y en Canadá.
CÓMO HACER UN RECLAMO EN VIRTUD DE LA GARANTÍA
Si este producto no se ajusta a las condiciones garantizadas, llévelo a un Concesionario autorizado de servicio de garantía de Hoover
®
junto con el comprobante de compra. Para que le informen de manera automática la ubicación de los centros autorizados de servicio, llame
al: 1-800-944-9200 o visite Hoover
®
en Internet, en hoover.com.
LO QUE ESTA GARANTÍA NO CUBRE
Esta garantía no cubre: el uso del producto con cualquier n comercial (como servicios de limpieza, mantenimiento y de alquiler de equipos),
el mantenimiento inadecuado del producto, los daños provocados por el uso indebido, caso fortuito, hechos de la naturaleza, vandalismo u
otros actos que excedan del control de Hoover
®
, acciones u omisiones del propietario, uso fuera del país en que el producto fue comprado
inicialmente y reventa del producto por parte del propietario original. Esta garantía no cubre el retiro del producto, la entrega, el transporte
ni las visitas a domicilio.
Esta garantía no se aplica a los productos comprados fuera de los Estados Unidos, incluidos sus territorios y posesiones, fuera de una tienda
situada en una base militar de los EE. UU. ni fuera de Canadá. Esta garantía no cubre los productos comprados a una parte que no sea un
minorista, concesionario o distribuidor autorizados de los productos de Hoover
®
.
OTROS TÉRMINOS IMPORTANTES
Esta Garantía no es transferible ni puede cederse. Esta Garantía se regirá e interpretará de conformidad con las leyes del estado de Ohio. El
Período de Garantía no se prorrogará en función de ningún reemplazo o reparación realizados en virtud de esta Garantía.
ESTA GARANTÍA ES LA ÚNICA GARANTÍA Y EL ÚNICO RECURSO QUE HOOVER® PROPORCIONA. TODAS LAS DEMÁS GARANTÍAS,
EXPRESAS O IMPLÍCITAS, INCLUIDAS LAS GARANTÍAS DE COMERCIABILIDAD O APTITUD PARA UN FIN PARTICULAR, QUEDAN
EXCLUIDAS. HOOVER NO SERÁ RESPONSABLE EN NINGÚN CASO POR NINGÚN DAÑO ESPECIAL, INDIRECTO, INCIDENTAL O
MEDIATO DE NINGÚN TIPO O NATURALEZA CON RESPECTO AL PROPIETARIO O A CUALQUIER PARTE QUE REALICE UN RECLAMO
A TRAVÉS DEL PROPIETARIO, YA SEA QUE SE BASE EN RESPONSABILIDAD CONTRACTUAL, NEGLIGENCIA, RESPONSABILIDAD
EXTRACONTRACTUAL O RESPONSABILIDAD CIVIL OBJETIVA POR LOS PRODUCTOS, O EMERGENTE DE CUALQUIER OTRA CAUSA.
Algunos estados no permiten la exclusión de los daños mediatos, por lo cual es posible que la exclusión mencionada no se aplique en su
caso. Esta garantía le otorga derechos especícos; es posible que, además, tenga otros derechos que varían de un estado a otro.
TOUT AUTRE ENTRETIEN DOIT ÊTRE ÉFFECTUÉ PAR
UN REPRÉSENTANT AUTORISÉ
Composer le 1-800-944-9200 USA & Canada.
Pour toute aide supplémentaire, consultez les Pages Jaunes afin de connaître les dépositaires HOOVER
MD
autorisés ou visitez notre site Web, www.dirtdevil.com. Les coûts de transport aller-retour à partir de l’endroit
où sont effectuées les réparations doivent être défrayés par le propriétaire de l’appareil. Les pièces réparables
utilisées dans cet appareil peuvent facilement être remplacées et sont disponibles auprès des dépositaires
ou revendeurs HOOVER
MD
autorisés. Identifiez toujours l’aspirateur par le numéro du modèle et le code de
fabrication lorsque vous demandez des informations ou que vous commandez des pièces de rechange. ( Le
numéro de modèle figure à l’arrière du vide-poussière de l’appareil. )
5. SERVICO
Enrouler le cordon autour des crochets pour
le ranger facilement. Fixer l’extrémité avec la
fiche au cordon.
Pour assurer le rendement optimal de l’appareil, il est recommandé de vérifier si des débris sont
coincés dans le conduit à poussière (A) chaque fois que le vide poussière est retiré pour être
vidé. Si des débris sont coincés, les retirer avant de refixer le vide poussière à l’aspirateur.
Si vous rencontrez encore des problèmes de succion/puissance réduite, retirer la base du
suceur de l’appareil principal (appuyer sur le bouton au dos du suceur pour le dégager,
B) et inspecter la base du suceur (C) à la recherche de débris coincés. Retirer les éventuels
débris avant de refixer la base du suceur à l’appareil principal.
Retrait du bouchon de saleté et des
débris du vide poussière
4.4 4.5
4.11
3. FUNCIONAMIENTO
Para reemplazar la correa, visite nuestro sitio Web en www.hoover.com para comprar en Internet, o llame al
servicio de atención al cliente al 1-800-944-9200. No. de Parte 001942002.
Cómo Volver a Colocar la Correa y el Rodillo de Cepillos
4.14
PRECAUCIÓN:
Para reducir el riesgo de lesiones ocasionadas por piezas en movimiento, desenchufe la aspiradora antes de
realizar el mantenimiento.
PRECAUCIÓN:
No use para asear una mascota. Dé vuelta a la boquilla de la aspiradora. Retire
los tornillos que se indican con flechas en la placa inferior de la boquilla. Levante la placa de la parte inferior de la boquilla para
acceder al cepillo, a la correa y a la boquilla. Luego de volver a colocarlos, gire el rodillo de cepillos y asegúrese de que la correa
gire libremente. Vuelva a colocar la placa de la boquilla y los tornillos.
5. SERVICIO
6. GUÍA DE SOLUCIÓN DE PROBLEMAS
Almacenamiento
del cordón
Envuelva el cordón alrededor de los ganchos
para el cordón para un almacenamiento
cómodo. Conecte el extremo del enchufe
al cordón
2.4
Interruptor de encender/apagar
Posiciones del
mango
•MISE EN GARDE : Cet appareil contient des produits chimiques reconnus par l’État
delaCaliforniecommepouvantcauserlecancerou,entraînerdesmalformationscongénitales
oud’autrestroublesdelareproduction.
•L’appareilestdotéd’unprotecteurthermiqueinternepourleprotégercontrelasurchauffe.Lorsque
leprotecteurthermiqueestactivé,l’appareils’arrête.Sicelaseproduit,procédercommesuit:
1.Éteindrel’appareiletledébrancher.
2.S’assurerquelabasedusuceur,lesentréesduvide-poussièreetleconduitàpoussièrenesont
pasobstrués,etlesdégagers’ilyalieu.
3. Lorsque l’appareil est débranché et que le moteur a refroidi pendant 30 minutes, le
protecteurthermiqueestautomatiquementréinitialisé,etl’appareilpeutdenouveauêtreutilisé.
Sileprotecteurthermiqueestencoreactivéaprèsquevousavezsuivilesétapescidessus,ilsepeut
quel’appareilaitbesoind’entretien.
MISE EN GARDE : POUR RÉDUIRE LES
RISQUES DE DOMMAGES :
•Éviterderamasserdesobjetsdursouauxarêtestranchantesavecl’appareil.Ilspeuventendommager
l’appareil.
•Rangerdansunendroitsec.Nepasexposerl’appareilàdestempératuresdegel.
•Le rouleau-brosse continue à tourner si l’aspirateur estsous tension et lemanche enposition
verticale.Pouréviterd’endommagerlesmoquettes,lescarpettesetlesrevêtementsdesol,éviter
defairebasculerl’aspirateur,deleplacersurunmeubleoudelefairepassersurlesfrangesde
carpettesoudansdesescaliersrecouvertsdetapispendantl’utilisationdesaccessoires.
MISE EN GARDE :
•Afinderéduirelesrisquesdedéchargeélectrique,cetappareilestmunid’unefichepolarisée(une
tigeestpluslargequel’autre). Cettefichenepeutêtre inséréequedansuneprisedecourant
polariséeetuniquementdansunsens.Silafichenes’insèrepascomplètementdanslaprise,il
fautl’inverser.Siellenes’insèretoujourspas,demanderàunélectricienqualifiéd’installerlaprise
appropriée.Nejamaismodifierlafiche.
Cómo Retirar y
Limpiar el Filtro
4.6 4.7
Tire de la tapa del filtro para retirarla.
Tire del filtro para retirarlo y límpielo con
un cepillo. Enjuague con agua fría, según
sea necesario.
ADVERTENCIA: Siempre deje secar el
filtro durante 24 horas antes de volver a
colocarlo.
ADVERTENCIA: No use detergente ni agua
caliente para limpiar el filtro.
A fin de mantener el óptimo rendimiento de su limpiadora, cada vez que retire
el contenedor para polvo a fin de vaciarlo, se recomienda verificar si hay
algún residuo atrapado en el tubo para polvo (A). De ser así, retire el residuo
antes de volver a conectar el contenedor para polvo a la limpiadora.
Si sigue experimentando una reducción de la succión/el rendimiento,
desconecte la base de la boquilla de la unidad principal (presione el botón
que se encuentra en la parte posterior de la boquilla para liberarla, B) e
inspeccione la base de la boquilla (C) para verificar que no haya ningún
residuo atrapado. Retire los residuos que encuentre antes de volver a
conectar la base de la boquilla al cuerpo principal de la limpiadora.
Residuos del contenedor para polvo y
retiro de tapones de suciedad
4.4 4.5
•Useelproductosólocomosedescribeenestemanual.Usesólolosaccesoriosyproductos
recomendadosporelfabricante.
•Nouseesteaparatoconuncordónoenchufedañados.Sielaparatonoestáfuncionando
adecuadamente,sedejócaer,sedañó,sedejóalaintemperieosedejócaerdentrodelagua,
lléveloaunCentrodeservicioantesdecontinuarusándolo.
•Notiredelcordónnitrasladeelaparatojalandodelcordón,nitampocolousecomomanija;
nocierrela puerta cuandoelcordón está atravesadonitire de estealrededorde bordes
oesquinasfilosos.Nocoloqueelproductosobreelcordón.Nohagafuncionarelaparato
encimadelcordón.Mantengaelcordónlejosdesuperficiescalientes.
•Nolodesenchufetirandodelcordón.Paradesenchufarlo,sujeteelenchufe,noelcordón.
•Nuncamanipuleelenchufenielaparatoconlasmanoshúmedas.
•No coloque ningún objeto en las aberturas. No use este aparato con ninguna abertura
obstruida;manténgalolibredesuciedad,pelusa,cabelloycualquierobjetoquepuedareducir
elflujodeaire.
•Mantengaelcabello,laropaholgada,losdedosytodaslaspartesdelcuerpofueradelas
aberturasyotraspiezasenmovimiento.
•Apaguetodosloscontrolesantesdedesenchufarlo.
•Tengaespecialcuidadoallimpiarescaleras.Paraevitarlesionespersonalesodaños,yevitar
quelaaspiradorasecaiga,siemprecolóquelaalpiedelaescalera,enelsuelo.Nocoloque
laaspiradorasobreescalerasnimuebles,yaquepuedeocasionarlesionesodaños.
•Nouseesteaparatoparaaspirarlíquidosinflamablesocombustibles,comogasolina,orestos
demaderalijada,nilouseenáreasdondedichosmaterialespudieranestarpresentes.
•Noaspireningúnobjetoqueseestéquemandooqueliberehumo,comocigarrillos,fósforos
ocenizascalientes.
•Nouseelproductosinelcontenedorparapolvoy/olosfiltroscolocadosensulugar.
•ADVERTENCIA:Esteproductocontienesustanciasquímicasreconocidasporelestadode
Californiacomocausantesdecáncer,defectoscongénitosodañoreproductivo.
•Suaspiradoratieneincorporadounprotectortérmicointernoparaimpedirelsobrecalentamiento.
Cuandoseactivaelprotectortérmico,laaspiradoradejadefuncionar.
Siestosucede,procedadelasiguientemanera:
1.Apaguelaaspiradoraydesconécteladelatomadecorrienteeléctrica.
2.Inspeccionelabasedelaboquilla,lasaberturasdeentradadelcontenedorparapolvoy
eltuboparapolvoafindeverificarquenohayaobstrucciones.Eliminelasobstrucciones,
silashay.
3. Cuando la aspiradora esté desenchufada y el motor se haya enfriado durante 30
minutos, el protector térmico se desactiva, y se puede continuar pasando la
aspiradora. Si el protector térmico sigue activándose después de efectuar los pasos
anteriores,esposiblequesuaspiradoranecesitemantenimiento.
ADVERTENCIA: PARA REDUCIR EL RIESGO DE
DAÑOS:
•Eviteaspirarobjetosdurosyfilososconesteproducto,yaquepuedencausardaños.
•Guardelamáquinaenunlugarseco.Nolaexpongaatemperaturasdecongelamiento.
•Elrodillodecepilloscontinúagirandomientraselproductoestáencendidoyelmangoestá
enposiciónvertical.Paraevitarquelasmoquetas,lostapetes,losmueblesylossuelosse
dañen,eviteinclinarlaaspiradoraoapoyarlasobremuebles,alfombrasdeáreaconflecoso
escalerasenmoquetadasduranteelusodelaccesorio.
ADVERTENCIA:
•Paradisminuirelriesgode choque eléctrico,esteaparatotieneun enchufe polarizado (una
patilla es más ancha que la otra). Este enchufe puede usarse en una toma de corriente
polarizada,deunasolamanera.Sielenchufenoencajacompletamenteenlatomadecorriente,
colóqueloalrevés.Siaunasínoencaja,comuníqueseconunelectricistacalificadoparaque
instalelatomadecorrienteapropiada.Nohaganingúntipodemodificaciónalenchufe.
MISE EN GARDE: Pour réduire
les risques de blessures causées par
des pièces en mouvement, débranch-
er l’appareil avant d’en effectuer
l’entretien.
ADVERTENCIA:
Para reducir el riesgo
de lesiones ocasionadas por piezas en movi-
miento, desenchufe la aspiradora antes de
realizar el mantenimiento.
2. ENSAMBLADO
6. GUIDE DE DÈPANNAGE
Si un problème mineur survient, il est habituellement possible de le résoudre facilement si la cause est déterminée à
l’aide de la liste ci dessous.
Toute autre tâche d’entretien doit être confiée à un représentant de service autorisé.
AVERTISSEMENT : Pour réduire le risque de blessure, retirer la pile avant d’effectuer l’entretien de l’appareil.
Si ocurre un problema menor, generalmente puede resolverse con bastante facilidad cuando se halla la
causa, usando esta lista de verificación.
Cualquier otra tarea de mantenimiento debe ser realizada por un representante de mantenimiento autorizado.
ADVERTENCIA:
Para reducir el riesgo de lesiones personales - retire el paquete de la batería antes de realizar el mantenimiento.
Aligner la buse avec le corps de l’appareil et
la pousser fermement à l’intérieur de l’appareil
jusqu’à ce qu’elle se verrouille en place.
REMARQUE :
Pour enlever la buse,
appuyer sur le bouton de dégagement et tirer
la buse en l’éloignant du corps de l’appareil.
Insérer la poignée dans le corps de
l’appareil.
REMARQUE :
S’assurer que la poi-
gnée est installée dans le bon sens.
Insérer la vis et serrer fermement.
REMARQUE :
NE PAS trop serrer
la vis.
2.1
2.2
2.3
3.2
3.1
Tenir la buse avec le pied et pencher
l’aspirateur vers l’arrière en position inclinée.
Pour mettre l’aspirateur en marche, faire glisser l’interrupteur vers l’avant.
(ARRÊT) O
(MARCHE) I : Il y a deux modes, chacun étant indiqué par une image
sur la fenêtre. Le premier mode est destiné aux planchers à surface dure,
l’autre aux moquettes.
Para reemplazar el filtro, visite nuestro sitio Web en www.hoover.com para comprar en Internet, o llame al servicio
de atención al cliente al 1-800-944-9200. No. de Parte 410044001.
Garantie limitée de DEUX ans
(Usage domestique seulement)
ÉLÉMENTS COUVERTS PAR LA PRÉSENTE GARANTIE
Votre produit HOOVER
MD
est garanti pour des conditions normales d’utilisation et d’entretien domestiques, comme il est stipulé dans le Guide
de l’utilisateur, contre les défauts de matériaux et de fabrication pour une période complète de deux ans à compter de la date d’achat
(la « Période de garantie »). Pendant la Période de garantie, Hoover
MD
fournira, sans frais supplémentaires, les pièces et la main-d’œuvre
nécessaires à la remise en bon état de fonctionnement de tout produit acheté aux États-Unis, au Canada ou par l’intermédiaire du Programme
d’échanges militaires américain.
COMMENT PRÉSENTER UNE RÉCLAMATION AU TITRE DE LA GARANTIE
Si ce produit ne fonctionne pas comme annoncé, l’apporter à un atelier de service garanti autorisé Hoover
MD
, accompagné de la preuve
d’achat. Pour accéder à un service d’aide automatique donnant la liste des centres de service autorisés, composer le 1 800 944-9200 OU
visiter Hoover
MD
sur Internet à hoover.com (clients aux États-Unis) ou à hoover.ca (clients au Canada).
ÉLÉMENTS NON COUVERTS PAR LA PRÉSENTE GARANTIE
La présente garantie ne couvre pas : toute utilisation commerciale du produit (p. ex., utilisation dans le cadre de services ménagers, de
conciergerie ou de location de matériel) Rouleaubrosse, Courroie ; l’entretien inadéquat du produit; les dommages liés à une utilisation
inadéquate, à des cas fortuits ou catastrophes naturelles, au vandalisme, à tout autre acte hors du contrôle de Hoover
MD
ou à tout acte ou
négligence de la part du propriétaire du produit; toute utilisation dans un pays autre que celui où le produit a été acheté initialement, et tout
produit revendu par son propriétaire original. La présente garantie ne couvre pas le ramassage, la livraison, le transport ou la réparation
à domicile du produit. Cette garantie ne s’applique pas aux produits achetés : hors des États-Unis (ce qui comprend ses territoires et
possessions); hors du Programme d’échanges militaires américain; hors du Canada. Cette garantie ne couvre pas les produits achetés chez
un tiers autre qu’un détaillant, marchand ou distributeur autorisé de produits Hoover
MD
.
AUTRE CONDITIONS IMPORTANTES
La présente garantie n’est pas transférable et ne peut pas être cédée. La présente garantie sera régie et interprétée selon les lois de l’État
de l’Ohio. La Période de garantie ne peut pas être prolongée par quelque réparation ou remplacement que ce soit exécuté en vertu de la
présente garantie.
LA PRÉSENTE GARANTIE EST L’UNIQUE GARANTIE ET RECOURS FOURNIS PAR HOOVER
MD
. HOOVER
MD
DÉCLINE TOUTE
RESPONSABILITÉ QUANT À TOUTES LES AUTRES GARANTIES EXPRESSES OU TACITES, Y COMPRIS LES GARANTIES LIÉES À
LA QUALITÉ MARCHANDE OU À LA COMPATIBILITÉ DU PRODUIT POUR UN USAGE PARTICULIER. HOOVERMD NE POURRA
EN AUCUN CAS ÊTRE TENUE RESPONSABLE DE TOUS DOMMAGES-INTÉRÊTS SPÉCIAUX OU DOMMAGES INDIRECTS,
ACCESSOIRES OU CONSÉCUTIFS DE QUELQUE NATURE QUE CE SOIT SUBIS PAR LE PROPRIÉTAIRE DU PRODUIT OU PAR TOUTE
PARTIE RÉCLAMANT PAR L’INTERMÉDIAIRE DU PROPRIÉTAIRE, QU’ILS RELÈVENT DU DROIT DES CONTRATS, DE LA NÉGLIGENCE,
DE LA RESPONSABILITÉ CIVILE DÉLICTUELLE OU DE LA RESPONSABILITÉ STRICTE DU FAIT DES PRODUITS, OU QU’ILS DÉCOULENT
DE QUELQUE CAUSE QUE CE SOIT. Certains États ne permettent pas l’exclusion des dommages consécutifs; par conséquent, l’exclusion
précédente pourrait ne pas être applicable dans votre cas. La présente garantie vous donne des droits spéciques; vous pouvez également
avoir d’autres droits, qui varient d’un État à l’autre.
Fixer le manche
Rangement du
cordon
Fixer le suceur
Interrupteur Marche/ Arrêt
2.4
Positions du manche
3. UTILISATION
Conecte la boquilla
Colocación Del
Mango
CUALQUIER OTRO SERVICIO DEBE SER REALIZADO POR UN REPRESENTANTE
AUTORIZADO DE SERVICIO
Para realizar el servicio, llame al 1-800-944-9200 USA y Canada
En caso de necesitar más ayuda, consulte las Páginas Amarillas para encontrar a un Distribuidor Autorizado HOOVER
®
o visite nuestro
sitio Web en www.hoover.com. Los costos de transporte hacia y desde el sitio de reparación serán pagados por el propietario.
Las partes de repuesto utilizadas en esta unidad son de reemplazo fácil y están disponibles a través de un Distribuidor Autorizado
HOOVER
®
o en otras tiendas. Siempre identifique su aspiradora por medio del número de modelo y el código de fabricación cuando
pida información u ordene partes de repuesto. (El número de modelo está indicado detrás del depósito para polvo del aparato.).
ESPAÑOL
ESTA ASPIRADORA ESTÁ DISEÑADA PARA USO DOMÉSTICO SOLAMENTE.
EL USO COMERCIAL DE ESTE PRODUCTO ANULA LA GARANTÍA.
¡SALVAGUARDIAS IMPORTANTES!
¡GUARDE ESTAS INSTRUCCIONES!
Al usar un aparato eléctrico, observe siempre las precauciones básicas,
incluyendo las siguientes:
LEA TODAS LAS INSTRUCCIONES ANTES DE USAR ESTE APARATO
ADVERTENCIA: PARA REDUCIR EL RIESGO
DE INCENDIOS, CHOQUES ELÉCTRICOS O
LESIONES:
•Ensamblecompletamenteelproductoantesdehacerlofuncionar.
•Hagafuncionarlalimpiadorasolamenteconelvoltajeespecificadoenlaplacadedatosque
seencuentraenlalimpiadora,detrásdelcontenedorparapolvo.
•Nouseesteaparatoenlugaresalairelibreniensuperficieshúmedas.
•Nopermitaqueelaparatoseusecomounjuguete.Noestádiseñadoparaquelousenniños
de12añosomenos.Serequiereunasupervisiónestrictacuandoesteaparatoseusacerca
delosniños.Paraevitarlesioneso daños, mantenga alosniñoslejosdelproductoyno
permitaquecoloquenlosdedosniotrosobjetosdentrodelasaberturas.
4. ENTRETIEN
Retrait et Remplacement du Vide
IMPORTANT : Pour obtenir de meilleurs résultats, nettoyer après chaque utilisation.
ENTRETIEN RÉGULIER : Le filtre devrait être nettoyé chaque fois que le vide-poussière est vidé. (Le filtre se décolorera après
l’utilisation, mais cela n’affectera pas sa performance.)
Utiliser les instructions numérotées de cette section française avec les illustrations numérotées correspondantes de la section
anglaise de ce guide.
1. CARACTÉRISTIQUES
AVANT
1.
Interrupteur On/Off (marche/arrêt)
(O = arrêt, I = succion, II = succion et brosse)
2. Vide-poussière
3. Grand orifice à débris
4. Couvercle inférieur de la buse (sous la buse)
1.1
GODET À POUSSIÈRE
5. Capuchon du filtre
6. Filtre (à l’intérieur du capuchon
du filtre)
7. Tube déflecteur
8. Bouton de vidange du
vide-poussière
2. ENSAMBLADO
Use estas instrucciones en español junto con las figuras paso-a-paso provistas en el manual de inglés.
1. CARACTERÍSTICAS
1.1
4. MANTENIMIENTO
Cómo Retirar y Volver a Colocar el Depósito Para Polvo y El Filtro
IMPORTANTE: Para obtener mejores resultados, limpie después de cada uso.
MANTENIMIENTO REGULAR: Cada vez que vacíe el depósito para polvo, debe limpiar el filtro con un cepillo.
(El filtro se decolora después del uso. Esto no afectará el rendimiento del filtro).
ARRIÈRE
9. Poignée
10. Bouton de dégagement
du vide-poussière
11 . Bouton de dégagement
de la buse
12. Cordon
Retrait et Nettoyage du Vide-Poussière
Retrait et Nettoyage
du Filtre
Pour retirer le vide-poussière, appuyer sur
le bouton de dégagement supérieur du
vide-poussière et l’éloigner du corps de
l’appareil.
Appuyer sur le bouton de vidange du
vide-poussière au-dessus d’une poubelle
pour expulser les débris.
Refermer le couvercle jusqu’à ce qu’un
déclic se fasse entendre.
4.1 4.2 4.3
4.6 4.7
Sortir le capuchon du filtre. Sortir le filtre et
le brosser pour le nettoyer. Rincer le filtre à
l’eau froide au besoin.
AVERTISSEMENT : Laisser toujours sécher
le filtre 24 heures avant de le remettre en
place.
AVERTISSEMENT : Ne pas utiliser de
détergent ou d’eau chaude pour nettoyer
le filtre.
Retrait et Remplacement du Tube Déflecteur
Remplacement de la Courroie et du Rouleau-Brosse
Tenir le vide-poussière à l’endroit et
appuyer sur le bouton de dégagement
pour ouvrir la porte.
Tourner le tube déflecteur complète-
ment vers la gauche. Le retirer, puis le
secouer au-dessus d’une poubelle pour
faire tomber les débris.
Pour replacer le tube déflecteur, le réin-
sérer dans le vide-poussière, aligner les
fentes et tourner le tube déflecteur vers
la droite jusqu’à ce qu’il se verrouille
en place.
4.12
4.13
4.14
Remplacement du Vide-Poussière et du Filtre
Insérer le filtre dans le capuchon du
filtre.
Insérer le capuchon du filtre dans le
vide-poussière.
Placer la partie inférieure du vide-poussière
dans le compartiment et le mettre en
place en le pivotant, jusqu’à ce que le
bouton de dégagement du vide-poussière
se verrouille.
4.8 4.9 4.10
MISE EN GARDE: Pour réduire les risques de blessures causées par des pièces en mouvement, débrancher
l’appareil avant d’en effectuer l’entretien. MISE EN GARDE: Ne pas utiliser pour toiletter un animal.
Retirer
les vis marquées d’une flèche sur la plaque inférieure de la buse. Lever la plaque pour accéder au rouleau-brosse,
à la courroie et à la buse. Lorsque le remplacement est terminé, s’assurer que la courroie tourne librement. Remettre
la plaque de la buse et les vis en place.
Alinee la boquilla con el cuerpo principal de la
unidad y empuje con fuerza la boquilla dentro
del cuerpo hasta que quede fija en su lugar.
NOTA:
Para retirar la boquilla, empuje el
botón y tire de ella hacia afuera del cuerpo
de la unidad.
Introduzca el mango en el cuerpo de la
unidad.
NOTA:
Asegúrese de que el mango mire
hacia la dirección correcta.
Introduzca un tornillo y apriete hasta que
quede firme.
NOTA:
NO apriete demasiado el
tornillo.
2.1
2.2
2.3
3.1
Sujete la boquilla hacia abajo con el pie e
incline hacia atrás a la posición de reclinado.
PARTE FRONTAL
1. Interruptor de encender/apagar (0=APAGADO,
I=Succión ENCENDIDA, II=Succión y cepillo ENCENDIDOS)
2. Depósito para polvo
3. Abertura grande para residuos
4. Tapa de la boquilla inferior (debajo de la boquilla)
RECIPIENTE DE POLVO
5. Tapa del filtro
6. Filtro (dentro de la tapa
del filtro)
7. Tubo deflector
8. Botón para soltar
el vaciado inferior
ARRIÈRE
9. Mango
10. Botón para soltar el
depósito para polvo
11 . Botón para soltar
a boquilla
12. Cordón
Cómo Retirar y Limpiar el Depósito
Para Polvo
Para retirar el depósito para polvo, oprima el
botón para soltar el depósito para polvo que
se encuentra en la parte superior del depósito
para polvo e inclínelo hacia fuera del cuerpo
de la unidad.
Presione el botón para vaciar el depósito
para polvo sobre el bote de basura a fin de
liberar los residuos.
Empuje la puerta para cerrarla hasta que la
traba haga clic.
4.1
4.2 4.3
Cómo Retirar y Volver a Colocar el Tubo Deflector
PARA RETIRAR
Sujete el lado derecho del depósito para
polvo hacia arriba y presione el botón para
soltar el depósito para polvo inferior para
abrir la puerta de descarga.
Gire el tubo deflector en sentido antihorario
hasta que se detenga. Tire del tubo deflector
para retirarlo, sujételo encima del cubo de la
basura y sacuda los residuos.
VOLVER A ENSAMBLAR
Para volver a colocar el tubo deflector,
introdúzcalo nuevamente en el depósito para
polvo, alinee las ranuras y gire en sentido hor-
ario hasta que el tubo quede fijo en su lugar.
4.11
4.12
4.13
Cómo Volver a Colocar el Depósito Para Polvo y el Filtro
Introduzca el filtro en la tapa del filtro con
el lado.
Introduzca la tapa del filtro en el depósito
para polvo.
Coloque la parte inferior del depósito para
polvo sobre el alojamiento y gírelo en su lugar
hasta que se trabe el botón para soltar el
depósito para polvo.
4.8
4.9
4.10
3.1
Para encender la aspiradora, deslice el interruptor hacia adelante.
(APAGADO) O
(ENCENDIDO) I : Tiene dos modos, cada uno de los cuales está
indicado por un gráfico que aparece en la ventana. El primer modo
es para suelos sin moqueta y el segundo es para moqueta.
PROBLÉME CAUSES POSSIBLES SOLUTIONS POSSIBLES
L’appareil s’arrête
Le vide-poussière est
peut-être plein.
Vider le vide-
poussière.
en cours d’utilisation.
1. Le vide-poussière est peut-être plein. 1. Vider le vide-poussière.
2. Le filtre est peut-être sale. 2. Nettoyer et/ou laver le filtre.
3. Le tube déflecteur est peut-être sale. 3. Retirer le tube déflecteur et le nettoyer.
4. L’entrée d’air est peut-être bouchée. 4. Débrancher l’appareil avant d’en effectuer l’entretien. Retirer la buse en appuyant
sur le bouton de dégagement de la buse et en la tirant vers le bas. Retirer tout
débris coincé dans l’entrée d’air de la buse
(figs. 4.4 - 4.5)
. Remettre la buse en
place sur l’appareil.
5. Daños de los componentes internos. 5. Composer le 1 800 944-9200 pour obtenir de l’assistance.
Le rouleau-brosse ne
démarre pas.
1. Le rouleau-brosse est peut-être obstrué. 1. Débrancher l’appareil avant d’en effectuer l’entretien. Retirer la buse en appuyant
sur le bouton de dégagement de la buse et en la tirant vers le bas.
(figs. 4.4 -
4.5)
Retirer tout débris coincé dans l’entrée d’air de la buse. Remettre la buse en
place sur l’appareil.
2. Le dispositif de protection du moteur s’est
déclenché.
2. Mettre l’appareil en position d’arrêt. L’appareil pourra être redémarré dans
environ 30 minutes.
3. La courroie est cassée. 3. Débrancher l’appareil avant d’en effectuer l’entretien. Retirer le couvercle de la
buse, remplacer la courroie par une courroie recommandée et remettre le cou-
vercle de la buse en place.
4. Des composants internes sont endommagés. 4. Composer le 1 800 944-9200 pour obtenir de l’assistance.
L’aspirateur ne
démarre pas
1. L’aspirateur n’est pas bien branché. 1. Insérer la fiche de l’appareil à fond dans la prise de courant.
2. Des composants internes sont endommagés. 2. Composer le 1 800 944-9200 pour obtenir de l’assistance.
3. Le fusible a sauté ou le disjoncteur s’est
déclenché.
3. Remplacer le fusible ou réenclencher le disjoncteur.
PROBLEMA POSIBLES CAUSAS SOLUCIONES POSIBLES
El producto no aspira la
suciedad
1. El depósito para polvo puede estar lleno. 1. Vacíe el depósito para polvo.
2. El filtro puede estar sucio. 2. Limpie y/o lave el filtro.
3. El tubo deflector puede estar sucio. 3. Retírelo y límpielo.
4. El circuito de aire puede estar tapado. 4. Desenchufe la aspiradora antes de realizar el mantenimiento. Retire la boquilla
presionando el botón para soltar la boquilla y tirando de ella hacia abajo.
Retire cualquier residuo que tape el circuito de aire de la boquilla
(figs. 4.4 -
4.5)
. Vuelva a ensamblar la boquilla al producto.
5. Daños de los componentes internos. 5. Para realizar el servicio, llame al: 1-800-944-9200.
El rodillo de cepillos
no gira
1. El rodillo de cepillos puede estar
obstruido.
1. Desenchufe la aspiradora antes de realizar el mantenimiento. Retire la tapa de la
boquilla y elimine la obstrucción. Vuelva a colocar la tapa de la boquilla y deje
que el dispositivo de protección del motor se reajuste, en aproximadamente
30 minutos.
2. Se disparó el dispositivo de protección
del motor.
2. Coloque el producto en posición Off: el producto se reajustará en aproximada-
mente 30 minutos.
3. Correa rota. 3. Desenchufe la aspiradora antes de realizar el mantenimiento. Retire la boquilla
presionando el botón para soltar la boquilla y tirando de ella hacia abajo.
Retire cualquier residuo que tape el circuito de aire de la boquilla
(figs. 4.4 -
4.5)
. Vuelva a ensamblar la boquilla al producto.
4. Daños de los componentes internos. 4. Para realizar el servicio, llame al: 1-800-944-9200.
La aspiradora no
funciona
1. No está bien enchufada. 1. Enchúfela bien.
2. Daño interno. 2. Para realizar el servicio, llame al: 1-800-944-9200.
3. Fusible quemado o se disparó el
disyuntor.
4. Reemplace el fusible o reajuste el disyuntor.
Si necesita ayuda:
Visite nuestro sitio web en www.hoover.com. Haga clic en el enlace que permite localizar los vendedores autorizados hoover para
encontrar el vendedor más cercano, o marque el 1-800-944-9200 para escuchar un mensaje indicando la dirección de los vendedores
autorizados Hoover
®
(sólo en ee. Uu.) O para hablar con un representante de atención al cliente (de 8 am a 7 pm, hora estándar del
este, de lunes a viernes).
POR FAVOR, NO DEVUELVA ESTE PRODUCTO A LA TIENDA.
Pour obtenir un filtre de rechange, veuillez visiter notre site Web au www.hoover.com pour l’acheter en ligne,
ou appeler le service à la clientèle au 1 800 944-9200. N° de référence 410044001.
Pour obtenir la courroie rechange, veuillez visiter notre site Web au www.hoover.com pour l’acheter en ligne,
ou appeler le service à la clientèle au 1 800 944-9200. N° de référence 001942002.
Pour obtenir de l’assistance :
Visitez notre site web à l’adresse www.hoover.ca. Cliquez sur le lien du localisateur de marchands autorisés Hoover
MD
pour trouver
le marchand le plus près de chez vous, ou composez le 1 800 944 9200 pour écouter un message indiquant les adresses des
marchands autorisés Hoover
MD
(é.-U. Seulement) ou pour parler à un représentant du service à la clientèle (de 8 h à 19 h, hne, du
lundi au vendredi).
VEUILLEZ NE PAS RETOURNER CE PRODUIT AU MAGASIN.
Garantía limitada de DOS años para la aspiradora
vertical ciclónica
(sólo para uso doméstico)
QUÉ CUBRE ESTA GARANTÍA
Siempre que el uso y el mantenimiento de su producto HOOVER
®
se realicen en condiciones de uso doméstico normales y según el Manual
del usuario, el producto estará garantizado contra defectos originales en el material y la fabricación durante de dos años completos desde la
fecha de compra (el “Período de Garantía”). Durante el Período de Garantía, Hoover
®
le proporcionará gratuitamente, como se describe en
esta garantía, la mano de obra y las piezas necesarias para corregir cualquier defecto en los productos comprados en los Estados Unidos,
en una tienda situada en una base militar de los EE. UU. y en Canadá.
CÓMO HACER UN RECLAMO EN VIRTUD DE LA GARANTÍA
Si este producto no se ajusta a las condiciones garantizadas, llévelo a un Concesionario autorizado de servicio de garantía de Hoover
®
junto con el comprobante de compra. Para que le informen de manera automática la ubicación de los centros autorizados de servicio, llame
al: 1-800-944-9200 o visite Hoover
®
en Internet, en hoover.com.
LO QUE ESTA GARANTÍA NO CUBRE
Esta garantía no cubre: el uso del producto con cualquier n comercial (como servicios de limpieza, mantenimiento y de alquiler de equipos),
el mantenimiento inadecuado del producto, los daños provocados por el uso indebido, caso fortuito, hechos de la naturaleza, vandalismo u
otros actos que excedan del control de Hoover
®
, acciones u omisiones del propietario, uso fuera del país en que el producto fue comprado
inicialmente y reventa del producto por parte del propietario original. Esta garantía no cubre el retiro del producto, la entrega, el transporte
ni las visitas a domicilio.
Esta garantía no se aplica a los productos comprados fuera de los Estados Unidos, incluidos sus territorios y posesiones, fuera de una tienda
situada en una base militar de los EE. UU. ni fuera de Canadá. Esta garantía no cubre los productos comprados a una parte que no sea un
minorista, concesionario o distribuidor autorizados de los productos de Hoover
®
.
OTROS TÉRMINOS IMPORTANTES
Esta Garantía no es transferible ni puede cederse. Esta Garantía se regirá e interpretará de conformidad con las leyes del estado de Ohio. El
Período de Garantía no se prorrogará en función de ningún reemplazo o reparación realizados en virtud de esta Garantía.
ESTA GARANTÍA ES LA ÚNICA GARANTÍA Y EL ÚNICO RECURSO QUE HOOVER® PROPORCIONA. TODAS LAS DEMÁS GARANTÍAS,
EXPRESAS O IMPLÍCITAS, INCLUIDAS LAS GARANTÍAS DE COMERCIABILIDAD O APTITUD PARA UN FIN PARTICULAR, QUEDAN
EXCLUIDAS. HOOVER NO SERÁ RESPONSABLE EN NINGÚN CASO POR NINGÚN DAÑO ESPECIAL, INDIRECTO, INCIDENTAL O
MEDIATO DE NINGÚN TIPO O NATURALEZA CON RESPECTO AL PROPIETARIO O A CUALQUIER PARTE QUE REALICE UN RECLAMO
A TRAVÉS DEL PROPIETARIO, YA SEA QUE SE BASE EN RESPONSABILIDAD CONTRACTUAL, NEGLIGENCIA, RESPONSABILIDAD
EXTRACONTRACTUAL O RESPONSABILIDAD CIVIL OBJETIVA POR LOS PRODUCTOS, O EMERGENTE DE CUALQUIER OTRA CAUSA.
Algunos estados no permiten la exclusión de los daños mediatos, por lo cual es posible que la exclusión mencionada no se aplique en su
caso. Esta garantía le otorga derechos especícos; es posible que, además, tenga otros derechos que varían de un estado a otro.
TOUT AUTRE ENTRETIEN DOIT ÊTRE ÉFFECTUÉ PAR
UN REPRÉSENTANT AUTORISÉ
Composer le 1-800-944-9200 USA & Canada.
Pour toute aide supplémentaire, consultez les Pages Jaunes afin de connaître les dépositaires HOOVER
MD
autorisés ou visitez notre site Web, www.dirtdevil.com. Les coûts de transport aller-retour à partir de l’endroit
où sont effectuées les réparations doivent être défrayés par le propriétaire de l’appareil. Les pièces réparables
utilisées dans cet appareil peuvent facilement être remplacées et sont disponibles auprès des dépositaires
ou revendeurs HOOVER
MD
autorisés. Identifiez toujours l’aspirateur par le numéro du modèle et le code de
fabrication lorsque vous demandez des informations ou que vous commandez des pièces de rechange. ( Le
numéro de modèle figure à l’arrière du vide-poussière de l’appareil. )
5. SERVICO
Enrouler le cordon autour des crochets pour
le ranger facilement. Fixer l’extrémité avec la
fiche au cordon.
Pour assurer le rendement optimal de l’appareil, il est recommandé de vérifier si des débris sont
coincés dans le conduit à poussière (A) chaque fois que le vide poussière est retiré pour être
vidé. Si des débris sont coincés, les retirer avant de refixer le vide poussière à l’aspirateur.
Si vous rencontrez encore des problèmes de succion/puissance réduite, retirer la base du
suceur de l’appareil principal (appuyer sur le bouton au dos du suceur pour le dégager,
B) et inspecter la base du suceur (C) à la recherche de débris coincés. Retirer les éventuels
débris avant de refixer la base du suceur à l’appareil principal.
Retrait du bouchon de saleté et des
débris du vide poussière
4.4 4.5
4.11
3. FUNCIONAMIENTO
Para reemplazar la correa, visite nuestro sitio Web en www.hoover.com para comprar en Internet, o llame al
servicio de atención al cliente al 1-800-944-9200. No. de Parte 001942002.
Cómo Volver a Colocar la Correa y el Rodillo de Cepillos
4.14
PRECAUCIÓN:
Para reducir el riesgo de lesiones ocasionadas por piezas en movimiento, desenchufe la aspiradora antes de
realizar el mantenimiento.
PRECAUCIÓN:
No use para asear una mascota. Dé vuelta a la boquilla de la aspiradora. Retire
los tornillos que se indican con flechas en la placa inferior de la boquilla. Levante la placa de la parte inferior de la boquilla para
acceder al cepillo, a la correa y a la boquilla. Luego de volver a colocarlos, gire el rodillo de cepillos y asegúrese de que la correa
gire libremente. Vuelva a colocar la placa de la boquilla y los tornillos.
5. SERVICIO
6. GUÍA DE SOLUCIÓN DE PROBLEMAS
Almacenamiento
del cordón
Envuelva el cordón alrededor de los ganchos
para el cordón para un almacenamiento
cómodo. Conecte el extremo del enchufe
al cordón
2.4
Interruptor de encender/apagar
Posiciones del
mango
•MISE EN GARDE : Cet appareil contient des produits chimiques reconnus par l’État
delaCaliforniecommepouvantcauserlecancerou,entraînerdesmalformationscongénitales
oud’autrestroublesdelareproduction.
•L’appareilestdotéd’unprotecteurthermiqueinternepourleprotégercontrelasurchauffe.Lorsque
leprotecteurthermiqueestactivé,l’appareils’arrête.Sicelaseproduit,procédercommesuit:
1.Éteindrel’appareiletledébrancher.
2.S’assurerquelabasedusuceur,lesentréesduvide-poussièreetleconduitàpoussièrenesont
pasobstrués,etlesdégagers’ilyalieu.
3. Lorsque l’appareil est débranché et que le moteur a refroidi pendant 30 minutes, le
protecteurthermiqueestautomatiquementréinitialisé,etl’appareilpeutdenouveauêtreutilisé.
Sileprotecteurthermiqueestencoreactivéaprèsquevousavezsuivilesétapescidessus,ilsepeut
quel’appareilaitbesoind’entretien.
MISE EN GARDE : POUR RÉDUIRE LES
RISQUES DE DOMMAGES :
•Éviterderamasserdesobjetsdursouauxarêtestranchantesavecl’appareil.Ilspeuventendommager
l’appareil.
•Rangerdansunendroitsec.Nepasexposerl’appareilàdestempératuresdegel.
•Le rouleau-brosse continue à tourner si l’aspirateur estsous tension et lemanche enposition
verticale.Pouréviterd’endommagerlesmoquettes,lescarpettesetlesrevêtementsdesol,éviter
defairebasculerl’aspirateur,deleplacersurunmeubleoudelefairepassersurlesfrangesde
carpettesoudansdesescaliersrecouvertsdetapispendantl’utilisationdesaccessoires.
MISE EN GARDE :
•Afinderéduirelesrisquesdedéchargeélectrique,cetappareilestmunid’unefichepolarisée(une
tigeestpluslargequel’autre). Cettefichenepeutêtre inséréequedansuneprisedecourant
polariséeetuniquementdansunsens.Silafichenes’insèrepascomplètementdanslaprise,il
fautl’inverser.Siellenes’insèretoujourspas,demanderàunélectricienqualifiéd’installerlaprise
appropriée.Nejamaismodifierlafiche.
Cómo Retirar y
Limpiar el Filtro
4.6 4.7
Tire de la tapa del filtro para retirarla.
Tire del filtro para retirarlo y límpielo con
un cepillo. Enjuague con agua fría, según
sea necesario.
ADVERTENCIA: Siempre deje secar el
filtro durante 24 horas antes de volver a
colocarlo.
ADVERTENCIA: No use detergente ni agua
caliente para limpiar el filtro.
A fin de mantener el óptimo rendimiento de su limpiadora, cada vez que retire
el contenedor para polvo a fin de vaciarlo, se recomienda verificar si hay
algún residuo atrapado en el tubo para polvo (A). De ser así, retire el residuo
antes de volver a conectar el contenedor para polvo a la limpiadora.
Si sigue experimentando una reducción de la succión/el rendimiento,
desconecte la base de la boquilla de la unidad principal (presione el botón
que se encuentra en la parte posterior de la boquilla para liberarla, B) e
inspeccione la base de la boquilla (C) para verificar que no haya ningún
residuo atrapado. Retire los residuos que encuentre antes de volver a
conectar la base de la boquilla al cuerpo principal de la limpiadora.
Residuos del contenedor para polvo y
retiro de tapones de suciedad
4.4 4.5
•Useelproductosólocomosedescribeenestemanual.Usesólolosaccesoriosyproductos
recomendadosporelfabricante.
•Nouseesteaparatoconuncordónoenchufedañados.Sielaparatonoestáfuncionando
adecuadamente,sedejócaer,sedañó,sedejóalaintemperieosedejócaerdentrodelagua,
lléveloaunCentrodeservicioantesdecontinuarusándolo.
•Notiredelcordónnitrasladeelaparatojalandodelcordón,nitampocolousecomomanija;
nocierrela puerta cuandoelcordón está atravesadonitire de estealrededorde bordes
oesquinasfilosos.Nocoloqueelproductosobreelcordón.Nohagafuncionarelaparato
encimadelcordón.Mantengaelcordónlejosdesuperficiescalientes.
•Nolodesenchufetirandodelcordón.Paradesenchufarlo,sujeteelenchufe,noelcordón.
•Nuncamanipuleelenchufenielaparatoconlasmanoshúmedas.
•No coloque ningún objeto en las aberturas. No use este aparato con ninguna abertura
obstruida;manténgalolibredesuciedad,pelusa,cabelloycualquierobjetoquepuedareducir
elflujodeaire.
•Mantengaelcabello,laropaholgada,losdedosytodaslaspartesdelcuerpofueradelas
aberturasyotraspiezasenmovimiento.
•Apaguetodosloscontrolesantesdedesenchufarlo.
•Tengaespecialcuidadoallimpiarescaleras.Paraevitarlesionespersonalesodaños,yevitar
quelaaspiradorasecaiga,siemprecolóquelaalpiedelaescalera,enelsuelo.Nocoloque
laaspiradorasobreescalerasnimuebles,yaquepuedeocasionarlesionesodaños.
•Nouseesteaparatoparaaspirarlíquidosinflamablesocombustibles,comogasolina,orestos
demaderalijada,nilouseenáreasdondedichosmaterialespudieranestarpresentes.
•Noaspireningúnobjetoqueseestéquemandooqueliberehumo,comocigarrillos,fósforos
ocenizascalientes.
•Nouseelproductosinelcontenedorparapolvoy/olosfiltroscolocadosensulugar.
•ADVERTENCIA:Esteproductocontienesustanciasquímicasreconocidasporelestadode
Californiacomocausantesdecáncer,defectoscongénitosodañoreproductivo.
•Suaspiradoratieneincorporadounprotectortérmicointernoparaimpedirelsobrecalentamiento.
Cuandoseactivaelprotectortérmico,laaspiradoradejadefuncionar.
Siestosucede,procedadelasiguientemanera:
1.Apaguelaaspiradoraydesconécteladelatomadecorrienteeléctrica.
2.Inspeccionelabasedelaboquilla,lasaberturasdeentradadelcontenedorparapolvoy
eltuboparapolvoafindeverificarquenohayaobstrucciones.Eliminelasobstrucciones,
silashay.
3. Cuando la aspiradora esté desenchufada y el motor se haya enfriado durante 30
minutos, el protector térmico se desactiva, y se puede continuar pasando la
aspiradora. Si el protector térmico sigue activándose después de efectuar los pasos
anteriores,esposiblequesuaspiradoranecesitemantenimiento.
ADVERTENCIA: PARA REDUCIR EL RIESGO DE
DAÑOS:
•Eviteaspirarobjetosdurosyfilososconesteproducto,yaquepuedencausardaños.
•Guardelamáquinaenunlugarseco.Nolaexpongaatemperaturasdecongelamiento.
•Elrodillodecepilloscontinúagirandomientraselproductoestáencendidoyelmangoestá
enposiciónvertical.Paraevitarquelasmoquetas,lostapetes,losmueblesylossuelosse
dañen,eviteinclinarlaaspiradoraoapoyarlasobremuebles,alfombrasdeáreaconflecoso
escalerasenmoquetadasduranteelusodelaccesorio.
ADVERTENCIA:
•Paradisminuirelriesgode choque eléctrico,esteaparatotieneun enchufe polarizado (una
patilla es más ancha que la otra). Este enchufe puede usarse en una toma de corriente
polarizada,deunasolamanera.Sielenchufenoencajacompletamenteenlatomadecorriente,
colóqueloalrevés.Siaunasínoencaja,comuníqueseconunelectricistacalificadoparaque
instalelatomadecorrienteapropiada.Nohaganingúntipodemodificaciónalenchufe.
MISE EN GARDE: Pour réduire
les risques de blessures causées par
des pièces en mouvement, débranch-
er l’appareil avant d’en effectuer
l’entretien.
ADVERTENCIA:
Para reducir el riesgo
de lesiones ocasionadas por piezas en movi-
miento, desenchufe la aspiradora antes de
realizar el mantenimiento.