Brother CE8080 Sewing Machine

Operation Manual

For CE8080. Also, The document are for others Brother models: 888-E30, 888-E31, 888-E37, 888-E38, 888-E39, 888-V61, 888-V63, 888-V65, 888-V67

PDF File Manual, 72 pages, Read Online | Download pdf file

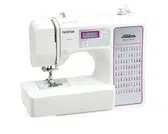
CE8080 photo
APPENDIX
UTILITY STITCHES
SEWING BASICS
KNOWING YOUR
SEWING MACHINE
Operation Manual
Product Code: 888-E30/E31/E37/E38/E39/V61/V63/V65/V67
Sewing Machine
Be sure to read this document before using the machine.
We recommend that you keep this document nearby for future reference.
Loading ...
Loading ...
Loading ...

Other documents for Brother CE8080

The following documents are available:
User Manual Other Documents
  • Accessories catalog - (English) Download
Photos

Specifications

Brother CE8080 Questions and Answers

Find answers or Ask a question.


  • Total questions: 1
  • Questions unAnswered : 1

#1 How do I draw up the lower thread by hand? (For models equipped with the quick-set bobbin)

Pass the thread along the slit in the direction of the arrow, and leave it there without cutting it
The bobbin cover should still be removed.
Raise the presser foot using the presser foot lever
Lightly hold the end of the upper thread
While holding the end of the upper thread, raise the needle either by turning the handwheel toward you (counterclockwise) so that the mark on the wheel points up or by pressing needle position button (needle position button) (for models equipped with the needle position button) once or twice.
Pull on the upper thread to draw up the lower thread
Pull out about 10 cm (4 inches) of both threads and pull them toward the back of the machine under the presser foot
Replace the bobbin cover

#2 How do I wind the bobbin?

As shown, press down on the spool pin lever with your finger.
The spool pin swings up.
Remove the spool cap
Fully insert the spool of thread for the bobbin onto the spool pin.
Slide the spool onto the pin so that the spool is horizontal and the thread unwinds to the front at the bottom.
Slide the spool cap onto the spool pin.
With the slightly rounded side of the spool cap positioned toward the left, slide the spool cap onto the spool pin as far as possible to the right so that the spool is moved to the right end of the spool pin.
While holding the spool with your right hand, and then pass the thread under the thread guide
Pass the thread under the thread guide cover from the back to the front.
Hold the thread with your right hand so that there is no slack in the thread that is pulled out, and then pass the thread under the thread guide cover with your left hand.
Pull the thread to the right, pass it under the hook of the bobbin-winding thread guide, and then wind the thread counterclockwise between the discs, pulling it in as far as possible.
Put the bobbin onto the bobbin winder shaft and slide the bobbin winder shaft to the right.
Turn the bobbin clockwise, by hand, until the spring on the shaft slides into the notch in the bobbin.
Make sure to pull out 7 to 10 cm (2-3/4 to 3-15/16 inches) of thread from the hole on the bobbin.
Turn on the sewing machine
While holding the end of the thread, gently press the foot controller to wind the thread around the bobbin a few times.
Then stop the machine.
Trim the excess thread above the bobbin
Press the foot controller.
When the bobbin seems full and begins spinning slowly, take your foot off the foot controller
Cut the thread, slide the bobbin winder shaft to the left and remove the bobbin.

#3 How do I remove or attach the presser foot holder?

Remove the presser foot holder when cleaning the sewing machine or when installing a presser foot that does not use the presser foot holder, such as the quilting foot. Use the disc-shaped screwdriver to remove the presser foot holder.
Remove the presser foot.
For details, refer to How do I remove or attach the presser foot?
Use the disc-shaped screwdriver to loosen the presser foot holder screw.
Turn the screw toward the back of the machine (counterclockwise).
Remove the presser foot holder.
Align the presser foot holder with the lower-left side of the presser bar
Hold the presser foot holder in place with your right hand, and then tighten the screw using the screwdriver in your left hand.
Turn the screw toward you (clockwise).

#4 How do I remove or attach the presser foot ?

Raise the needle by turning the handwheel toward you (counterclockwise) so that the mark on the wheel points up.
Turn off the sewing machine.
Raise the presser foot lever.
Press the black button at the back of the presser foot holder in order to remove the presser foot.
Place a different presser foot below the holder so that the presser foot pin is aligned with the shank in the holder.
Slowly lower the presser foot lever so that the presser foot pin snaps into the shank in the presser foot holder
Raise the presser foot lever to check that the presser foot is securely attached.