Loading ...
Loading ...
Loading ...
UTILITY STITCHES
49
3
1
Stitch category selection key
2
Character stitch indicator
<For models equipped with 2 font types of
character stitches>
Press the character stitch key once or more
and confirm that the desired font type of
character stitch indicator is lit.
1
Character stitch key
2
Character stitch indicator (Gothic font)
3
Character stitch indicator (Script font)
Mem
o
•When you select a character, check that
there are no characters in memory.
1
This indicator shows that no character is stored.
If there are any characters in memory,
delete them. (For details, refer to “Deleting
characters” (page 51).)
3
Press (stitch selection keys) to select
pattern No. 03.
•For details, refer to step
3
of “Selecting a
stitch” (page 26).
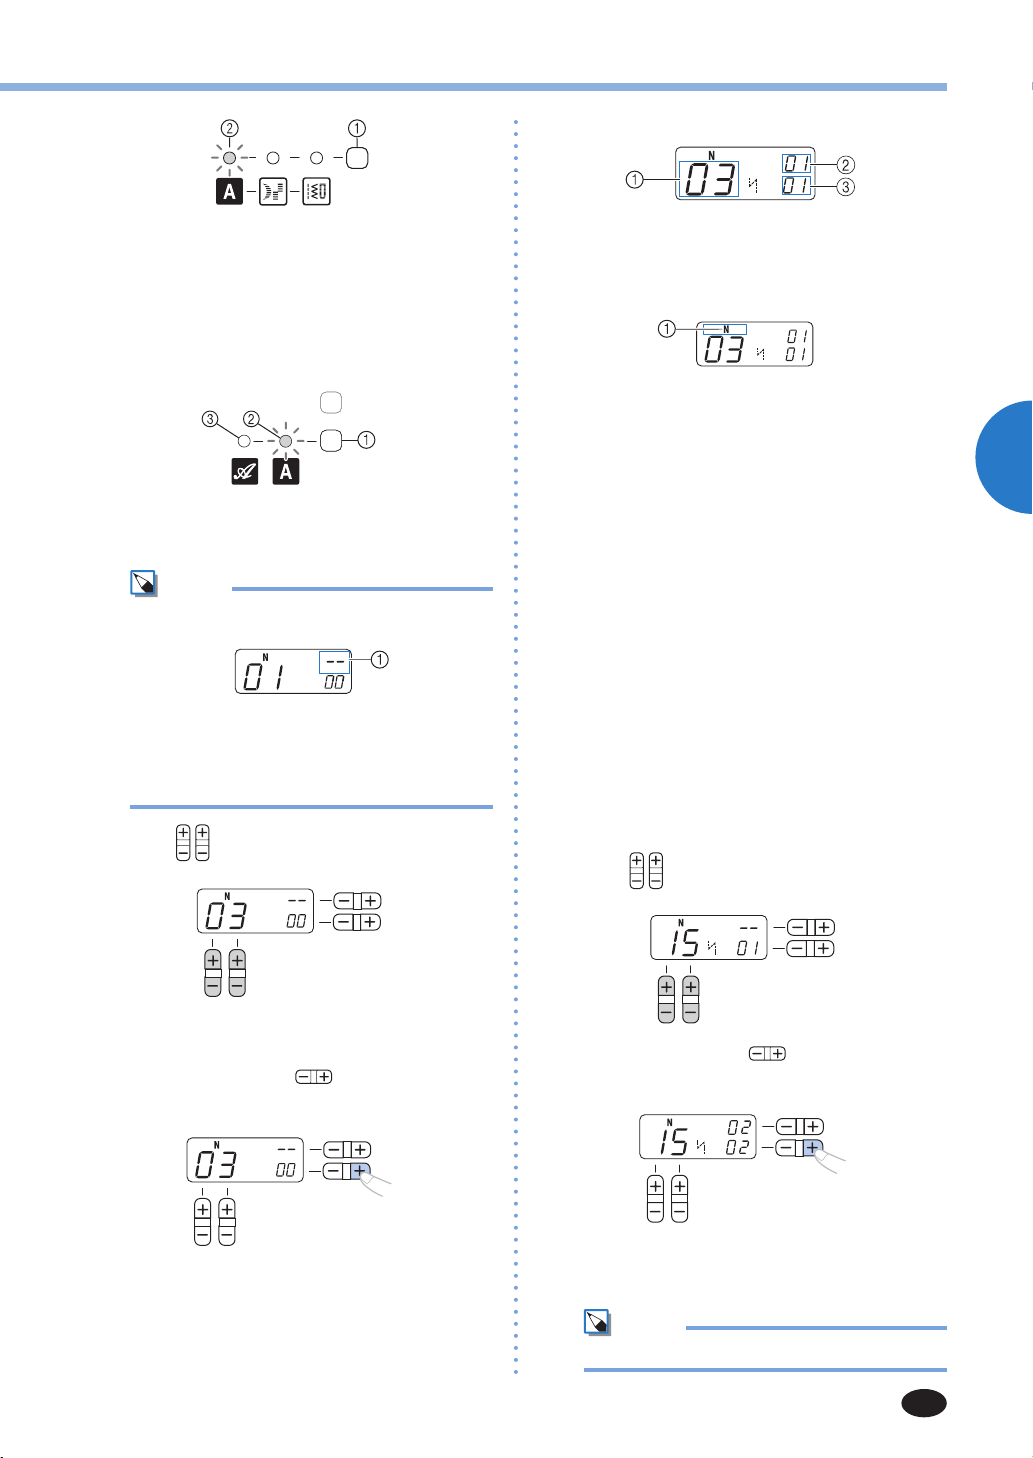
4
Press the “+” side of (stitch width
adjustment key) to enter the selected
character.
X
The following display is shown on the LCD.
1
Selected pattern No.
2
The position of the selected pattern No.
3
The total number of entered characters
5
Attach the presser foot indicated on the LCD.
1
The presser foot to use
•For details, refer to “Replacing the presser
foot” (page 23).
6
If you would like to only sew this single
character, start sewing.
If you would like to sew a sequence of
characters, see the following procedure.
•For details on sewing characters, refer to
“Sewing the character stitches” (page 51).
■
Combining characters
You can easily sew names, messages, etc. by
combining the character stitches. Up to 35
characters can be combined.
[Example] Selecting stitches “COME” (No.
03)+(No. 15)+(No. 13)+(No. 05)
1
Follow steps 1 through 5 in “Selecting
characters” (page 48) to select the first
character “C” (No. 03).
2
Press (stitch selection keys) to select the
next character, “O” (No. 15).
3
Press the “+” side of (stitch width
adjustment key) to enter the selected
character.
4
Repeat steps 2 and 3 to add “M” (No. 13)
and “E” (No. 05).
Mem
o
•To enter a space, select “_” (No. 30).
Loading ...
Loading ...
Loading ...