Loading ...
Loading ...
Loading ...
UTILITY STITCHES
35
3
■
If the needle catches too much of the hem fold
If the needle catches too much of the hem
fold, adjust the stitch width so that the needle
slightly catches the fold by pressing the “+”
side of the stitch width adjustment key.
<Thick fabric>
<Normal fabric>
1
Wrong side of fabric
2
Right side of fabric
■
If the needle does not catch the hem fold
If the needle does not catch the hem fold,
adjust the stitch width so that the needle
slightly catches the fold by pressing the “-” side
of the stitch width adjustment key.
<Thick fabric>
<Normal fabric>
1
Wrong side of fabric
2
Right side of fabric
•For details on changing the stitch width, refer
to “Selecting a stitch” (page 25).
12
Sew with the fold of the hem against the
presser foot guide.
13
Remove the basting stitching and turn the
fabric right side up.
1
2
1
Wrong side of fabric
2
Right side of fabric
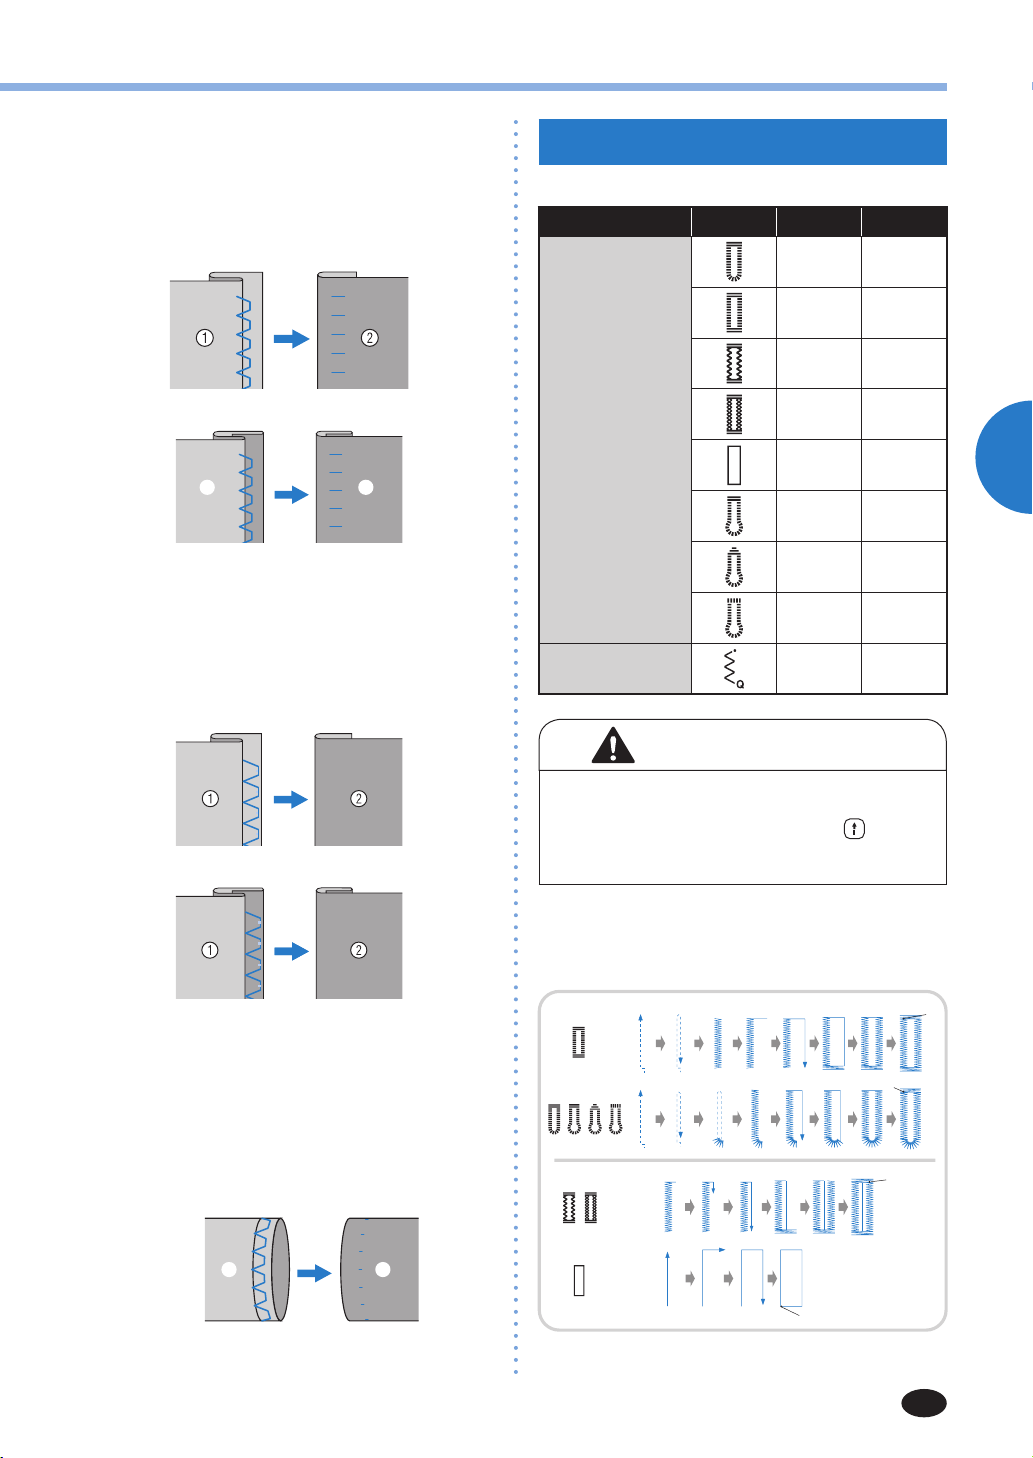
BUTTONHOLE SEWING
Buttonholes can be sewn and buttons can be sewn on.
Stitch Name Pattern
Presser Foot
Pattern No.
Buttonhole stitch
A 37
A 38
A 39
A 40
A 41
A 42
A 43
A 44
Zigzag stitch
(for quilting)
J 49
CAUTION
• Be sure to turn off the main power before
replacing the presser foot. Otherwise, injuries
may occur if the foot controller or
(start/
stop button) is accidentally pressed and the
machine starts sewing.
The maximum buttonhole length is about 28 mm
(1-1/8 inches) (diameter + thickness of the button).
Buttonholes are sewn from the front of the presser
foot to the back, as shown below.
1
Reinforcement stitching
Loading ...
Loading ...
Loading ...