Loading ...
Loading ...
Loading ...
UTILITY STITCHES
45
3
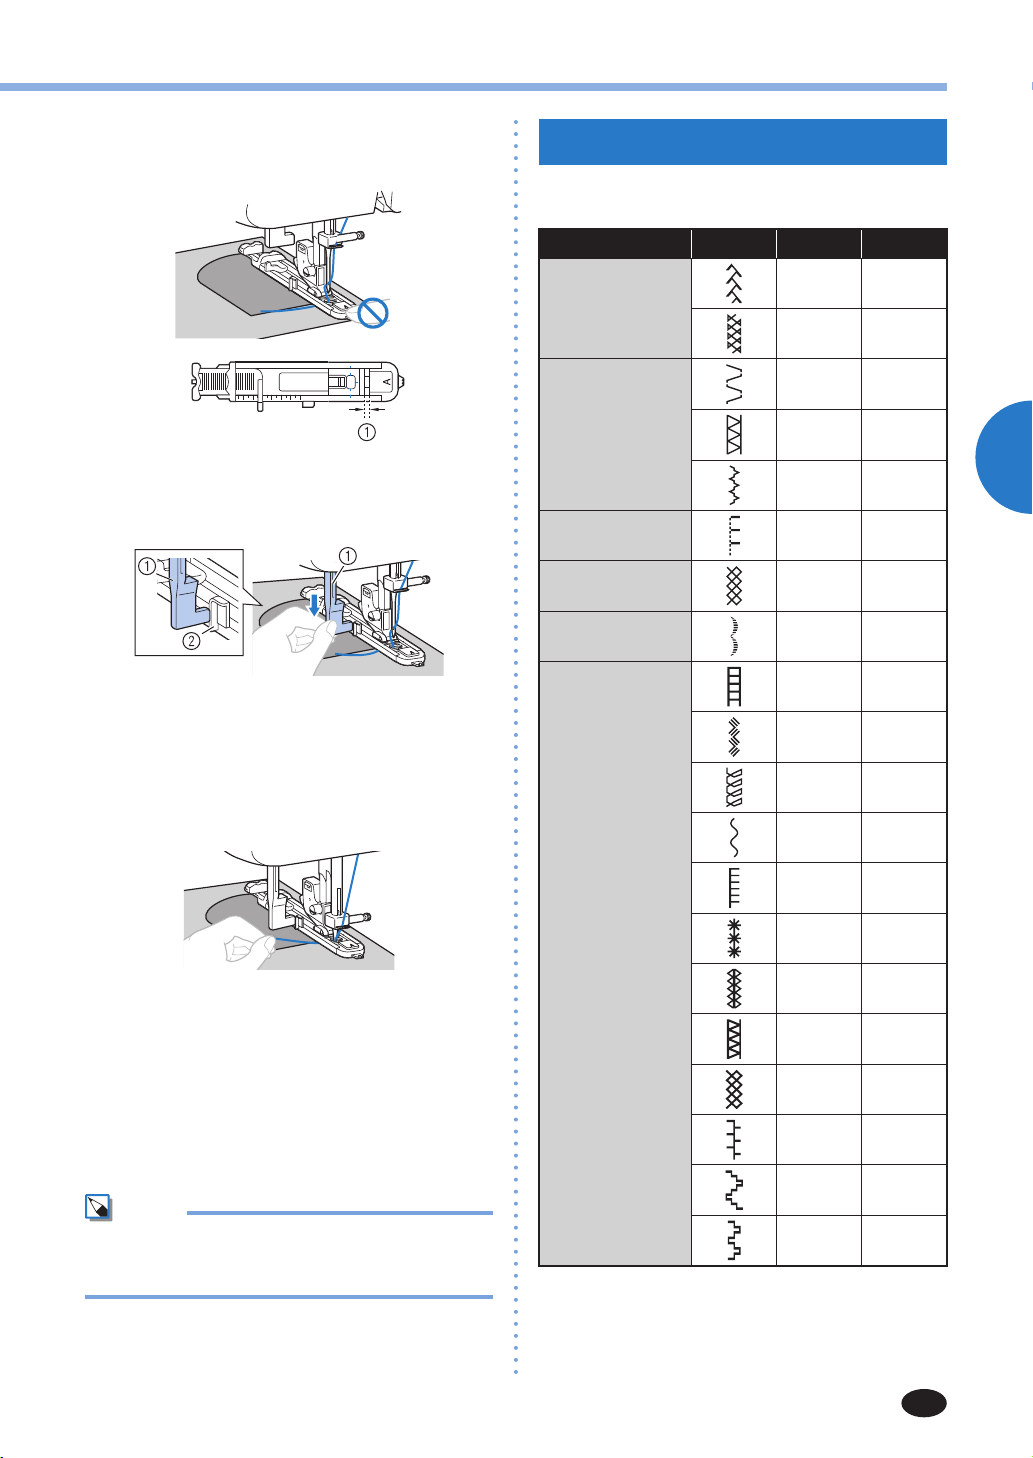
•When lowering the presser foot, do not push
in the front of the presser foot, otherwise the
bar tack will not be sewn with the correct size.
1
Do not reduce the gap.
5
Pull down the buttonhole lever as far as
possible.
1
Buttonhole lever
2
Bracket
The buttonhole lever is positioned behind the
bracket on the buttonhole foot.
6
Gently hold the end of the upper thread in
your left hand, and then start sewing.
X
Once sewing is completed, the machine
automatically sews reinforcement stitches,
then stops.
7
Raise the needle and the presser foot lever,
remove the fabric, and cut the thread.
8
Raise the buttonhole lever to its original
position.
Mem
o
•If the fabric does not feed, for example, because it
is too thick, increase the stitch length. For details,
refer to “Selecting a stitch” (page 25).
DECORATIVE STITCHING
Various decorative stitches can be sewn with this
sewing machine.
Stitch Name Pattern
Presser Foot
Pattern No.
Fagoting stitch
J 22
J 23
Joining stitch
J 18
J 19
J 20
Shell tuck stitch
J 16
Smocking stitch
J 21
Satin scallop
stitch
N 17
Decorative stitch
J 25
J 26
J 27
N 28
N 29
N 30
N 31
N 32
N 33
N 34
N 35
N 36
Loading ...
Loading ...
Loading ...