Loading ...
Loading ...
Loading ...
18
Care & Cleaning
Switch the rice cooker off at the power outlet
and unplug the cord.
WARNING
Allow all parts of the rice cooker to cool before
disassembling and cleaning.
1. Ensure that all parts of the rice cooker have
completely cooled before attempting to
disassemble or clean the rice cooker.
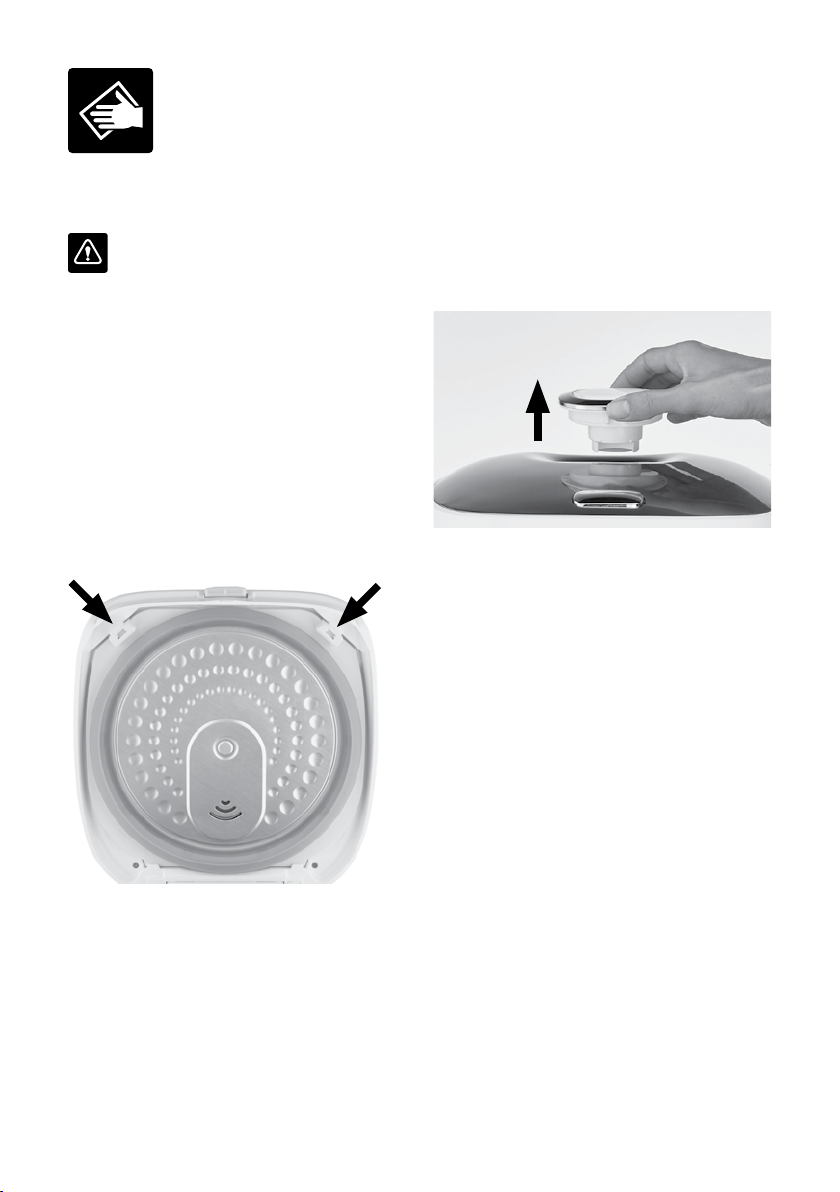
2. Open the rice cooker lid and detach the
lid seal assembly. Use both hands to
simultaneously press on the clips at the top
left and right of the lid housing until the lid
seal assembly is detached from the lid
(Fig. 4).
Press Press
Fig. 4
3. Use an absorbent sponge or paper towel
to wipe the moat around the cooking bowl
cavity for any liquid that may have collected
during the cooking process.
4. Close the lid of the rice cooker and remove
the steam vent from the lid. Place your
fingers under the back edge of the vent and
lever upwards, until the vent pops out
(Fig 5.).
Fig. 5
5. On the underside of the vent, the locking
graphic indicates how to separate the two
parts of the vent for cleaning.
6. Open the lid of the rice cooker and remove
the removable cooking bowl from the bowl
cavity. Wash the removable cooking bowl,
lid seal assembly, steam vent, steaming tray,
serving spoon, serving ladle and measuring
cup in hot, soapy water, rinse and dry
thoroughly.
7. Once fully dried, place the removable
cooking bowl into the bowl cavity in the rice
cooker housing then reattach the lid seal
assembly, and steam vent.
8. Slide the base of the lid seal assembly into
the grooves at the base of the lid, then lift
and press the clips on the lid seal assembly
into the lid until they click into place.
9. Reassemble the steam vent, ensuring the
parts are locked into place. Place the steam
vent into the hole on the lid of the rice
cooker, with the steam hole at the back.
Press down on the front and then the back
of the steam vent until it clips securely into
place.
Loading ...
Loading ...