Loading ...
Loading ...
Loading ...
5
*depending on model
vegetables or stewed fruit, etc., never fill your pressure
cooker more than half full - fig. 5.
• For soups, we recommend you carry out a fast
decompression (refer to section "End of cooking").
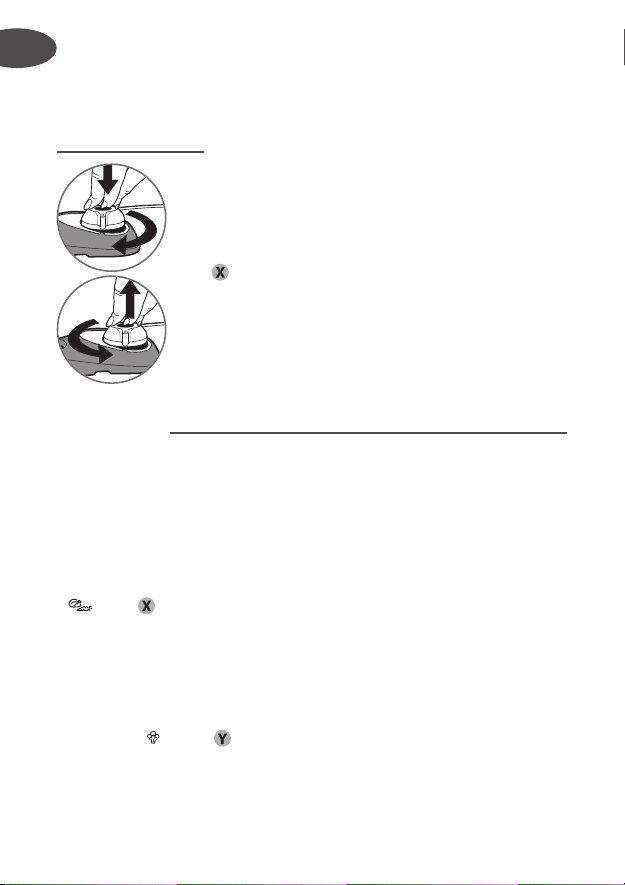
Using the operating valve (A)
To fit the operating valve (A):
Caution: these operations must be carried out when the
appliance is cold and not in use.
• Place the operating valve (A) while lining up the
positioning mark (H) as shown in the diagram on the left.
• Press down on the valve and turn to the required position
- fig. 6 - 7.
To remove the operating valve:
Caution: these operations must be carried out when the ap-
pliance is cold and not in use.
• Press down on the valve and turn it to align its positioning
mark (H) as shown in the diagram on the left.
• Remove the valve.
First use
Dark spots on the aluminum that may appear after using the
product do not compromise its safety. To control the problem,
follow these steps:
• Place the basket support* (K) in the bottom of the pan and
place the basket* (J) on top of it.
• Fill two-thirds of the pan (O) with water (maximum fill mark).
• Add 2 tablespoons of baking soda.
• Close the pressure cooker.
• Move the operating valve (A) to a stop after the pictograms
(mark ) -
fig. 6 - 7.
• Place the pressure cooker on a heat source set to maximum
power.
• When steam starts escaping through the valve, reduce the heat
source and set the timer to 20 minutes.
• After 20 minutes, turn off the heat.
• Gradually turn the valve (A)
- fig. 8 choosing the speed at which
you want to release the pressure until the valve stops after the
pictogram (mark ) - fig. 6 - 7.
• When the pressure indicator (D) drops back, your pressure
cooker is no longer under pressure.
• Open the pressure cooker
- fig. 1 - 2.
• Rinse the pressure cooker with water and dry.
This maintenance can be done periodically.
EN
Loading ...
Loading ...
Loading ...