Loading ...
Loading ...
Loading ...
Kelvinator Air Conditioning Indoor unit installation 7
Indoor unit installation
Drilling the wall
1. Choose the hole position to be either on the left or right side
of the installation plate and mark the position according to the
dimensions shown in gure 2. Note most simple installation is
with hole on the right side.
2. Drill the piping hole with a hole core drill of the following
size: 65mm for models: KSV25CRH, KSV25HRH,
KSD25HRH, KSV35CRH, KSV35HRH, KSD35HRH.
75mm for models: KSV50HRH, KSD50HRH, KSV71CRH,
KSV71HRH, KSD71HRH.
90mm for models: KSV90HRH, KSD90HRH.
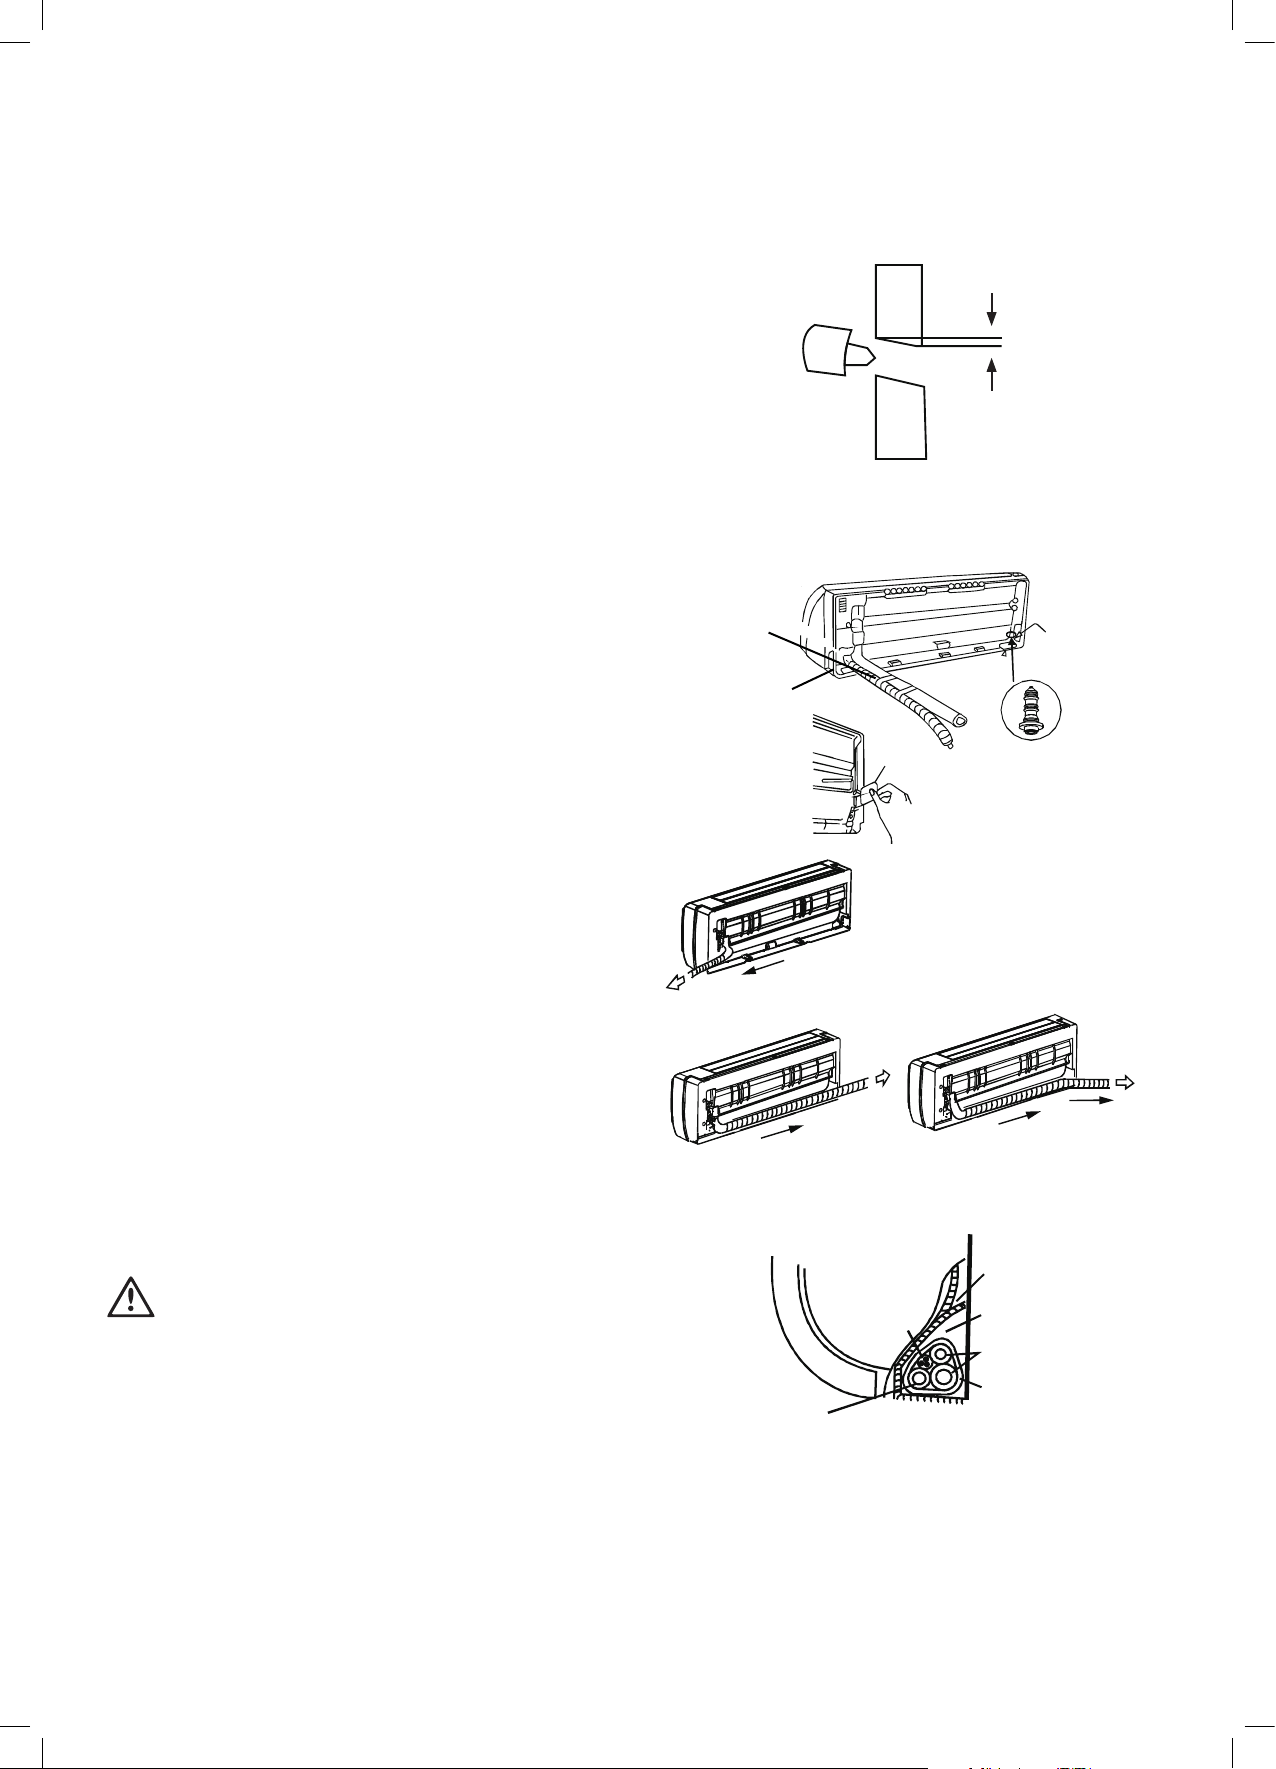
3. Drill the hole with slight (5-10mm) downward angle from indoor
to outdoor side so that the outside end is lower than the inside
end to help drainage, see gure 3.
4. Insert a wall pipe or other
means of protection to prevent the
pipes and electrical wires from toughing sharp edges within
the wall.
Connective pipe installation
1. For the left-hand and right-hand piping, remove the pipe
cover from the side panel.
2. For the right back and left back piping, install the piping
as shown.
NOTE: Bundle the pipes, connecting cable, and drain hose
with tape securely, evenly as shown in gure 4 on the right.
The drain connection can be on the right side, left side or
both. If choosing to drain from both sides, another drain pipe
will need to be supplied by the installer. If choosing one side
drainage connection, make sure the drain hole on the other
side is well plugged. For 2.5kW & 3.5kW models, if ch
oosing
left-hand or left-back piping, please choosing left side
drainage connection. The connection of the drain pipe hose
must be connected by a qualied installer in accordance with
these instructions to prevent leakage.
3. Attach the drain hose to the underside of the refrigerant pipes
with adhesive vinyl tape.
4. Bundle the pipes, connecting cable, and drain hose with tape
securely, evenly as shown in Fig. 4.
5. Pass them through the wall hole.
6. Ensure that the drain hose has a continual downward fall from
the indoor side to the outdoor side to ensure the water ows
out smoothly. Failure to do this can result in water gathering in
and leaking from the indoor
unit.
WARNING
caution
• Do not put anything inside the condensate drain pan (refer to
gure 5), as this space is required to collect the condensate
prior to draining out of the indoor unit.
5-10mm
Wall OutdoorIndoor
Move and tape
the drain hose
with piping in
a position as
mentioned in
Fig. below
Fig. 3
Fig. 4
Fig. 5
Cover for
the left piping
Cover for
the piping
Cover for
the piping
Right piping
Left piping Left back
piping
Indoor unit
Condensate
drain pan
Pipe room
Connective
pipe
Wrapping
belt
Drain hose
Connective
cable
Rubber plug
Loading ...
Loading ...
Loading ...