Loading ...
Loading ...
Loading ...
12 Outdoor unit installation Kelvinator Air Conditioning
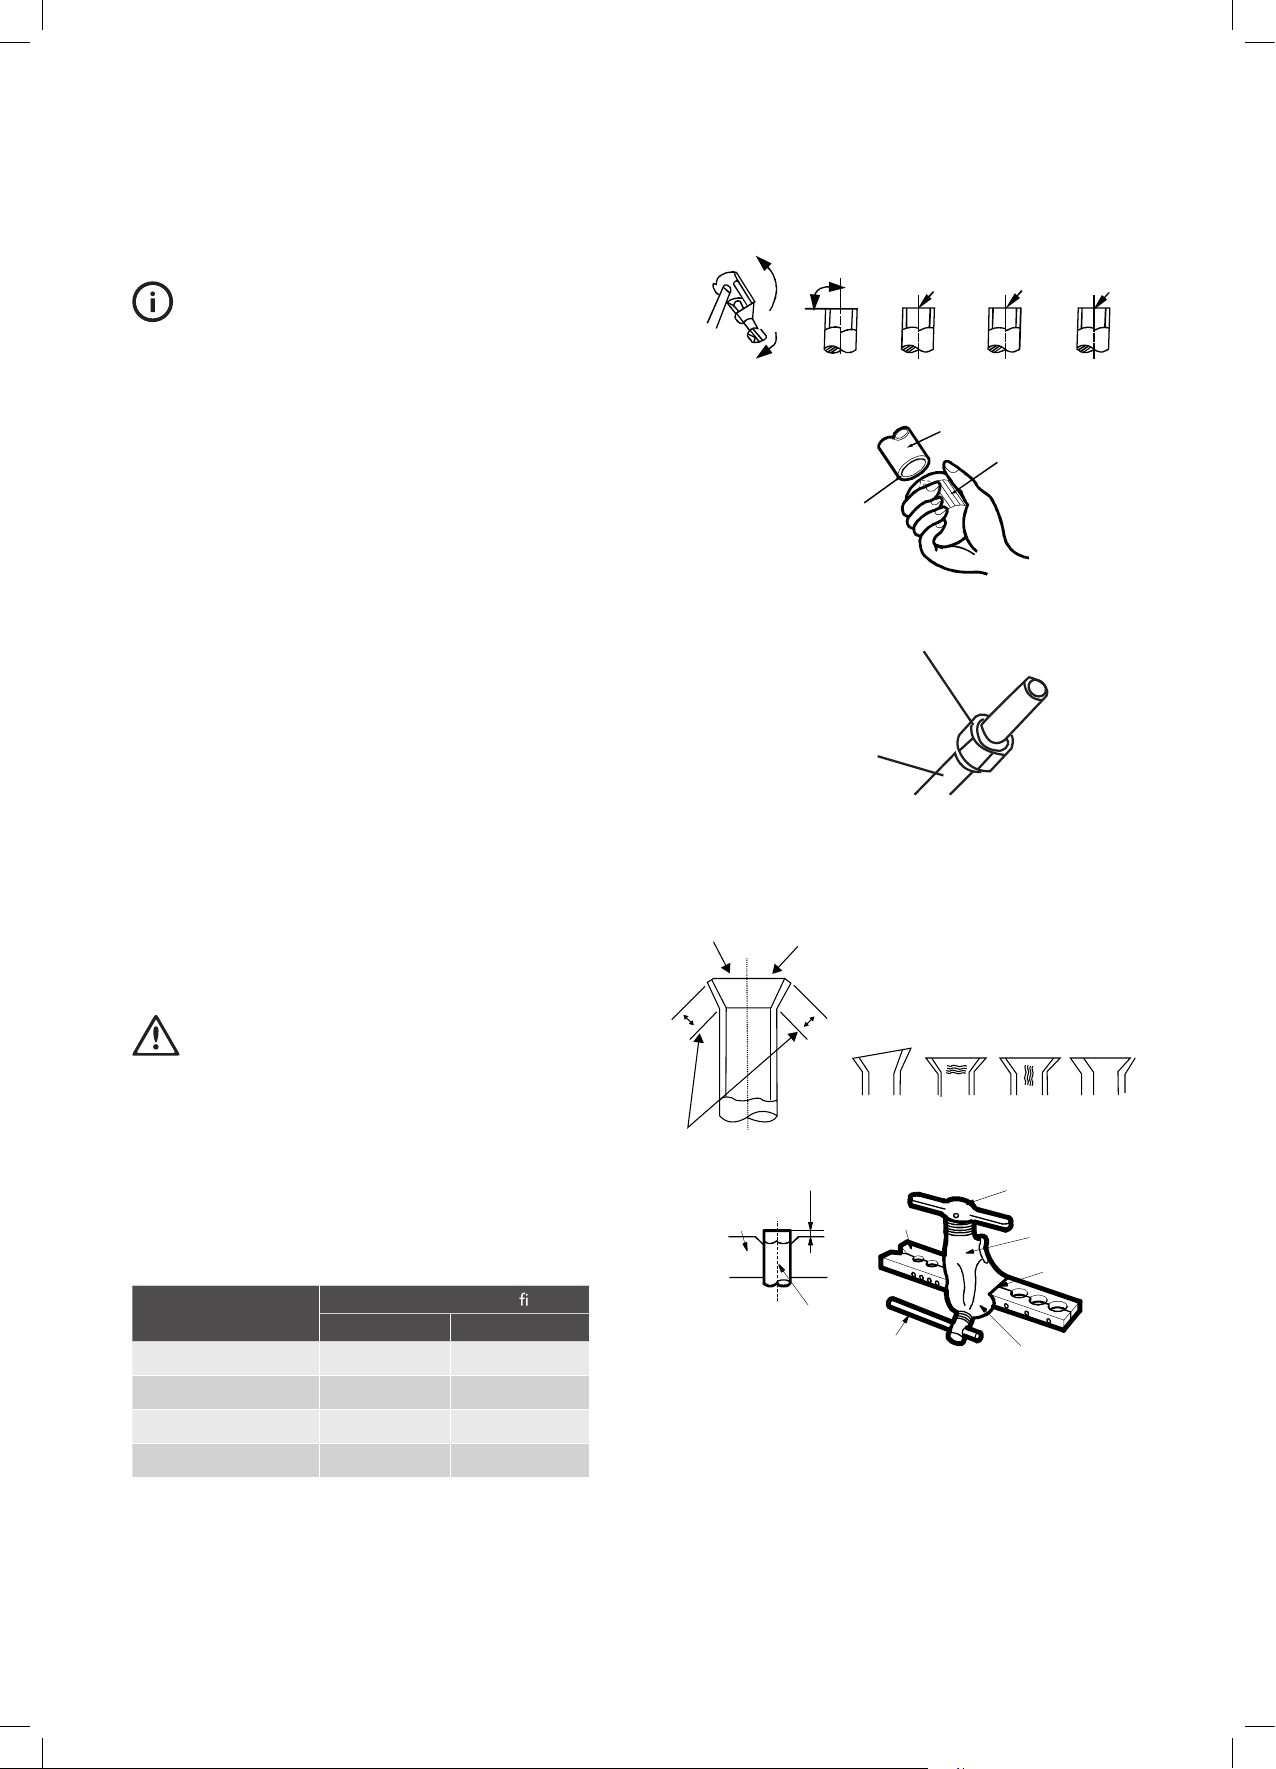
Flaring work
TIPS & INFORMATION
important
For installer
It is critical that the installer follows the correct flaring procedure
using the right tools to produce good quality flares in order to
ensure installation without refrigerant gas leaks.
Service calls caused by poor installation are the responsibility of
the installer, and these service calls will be referred back to the
installer accordingly.
Please take care to make the flare connection carefully and test for
refrigerant leaks before commissioning the air conditioner.
Main cause for refrigerant leakage is due to defect in the flaring
work. Carry out correct flaring work using the following procedure:
Cut the pipes and the cable
1. Purchase the appropriate pipe size locally according to the
table on page 11.
2. Measure the distance between the indoor and the
outdoor unit.
3. Cut the pipes a little longer than the measured distance.
4. Cut the cable 1.5m longer than the pipe length.
5. Cut pipes must follow the requirements shown in figure 12.
Burr removal
1. Completely remove all burrs from the cut cross section
of the pipe.
2. Put the end of the copper pipe in a downward direction as you
remove burrs in order to avoid dropping burrs into
the the pipe, as shown in figure 13.
WARNING
caution
Putting nut on
Remove flare nuts attached to indoor and outdoor unit, then put
them on pipe/tube having completed burr removal (not possible to
put them on after flaring work).
Flaring work
Carry out flaring work using a flaring tool as shown in figure 15, and
ensure dimension A is maintained within the tolerance as indicated
in the table below.
Outer diameter (mm)
Dimension A (mm) as per
g. 15
Max. Min.
ø 6.35 (1/4") 1.3 0.7
ø 9.52 (3/8") 1.6 1.0
ø 12.7 (1/2") 1.8 1.0
ø 15.9 (5/8") 2.4 2.2
"
✗ ✗ ✗✓
90°
Oblique
Fig. 12
Fig. 13
Fig. 14
Point down
Copper tube
Flare nut
Pipe
Reamer
Roughness Burr
Checking flare work
Compare the flare work with the adjacent diagram. If the pipe has
any defect, cut off the flared section and redo the flare until it meets
the requirements.
Fig. 15
Bar
Copper
pipe
Clamp
handle
Bar
Handle
Yoke
Cone
Red arrow mark
A
Outdoor unit installation
Loading ...
Loading ...
Loading ...