Loading ...
Loading ...
Loading ...
41
Installation Procedure
Basic Guide Installation Procedure
Assembly and Installation
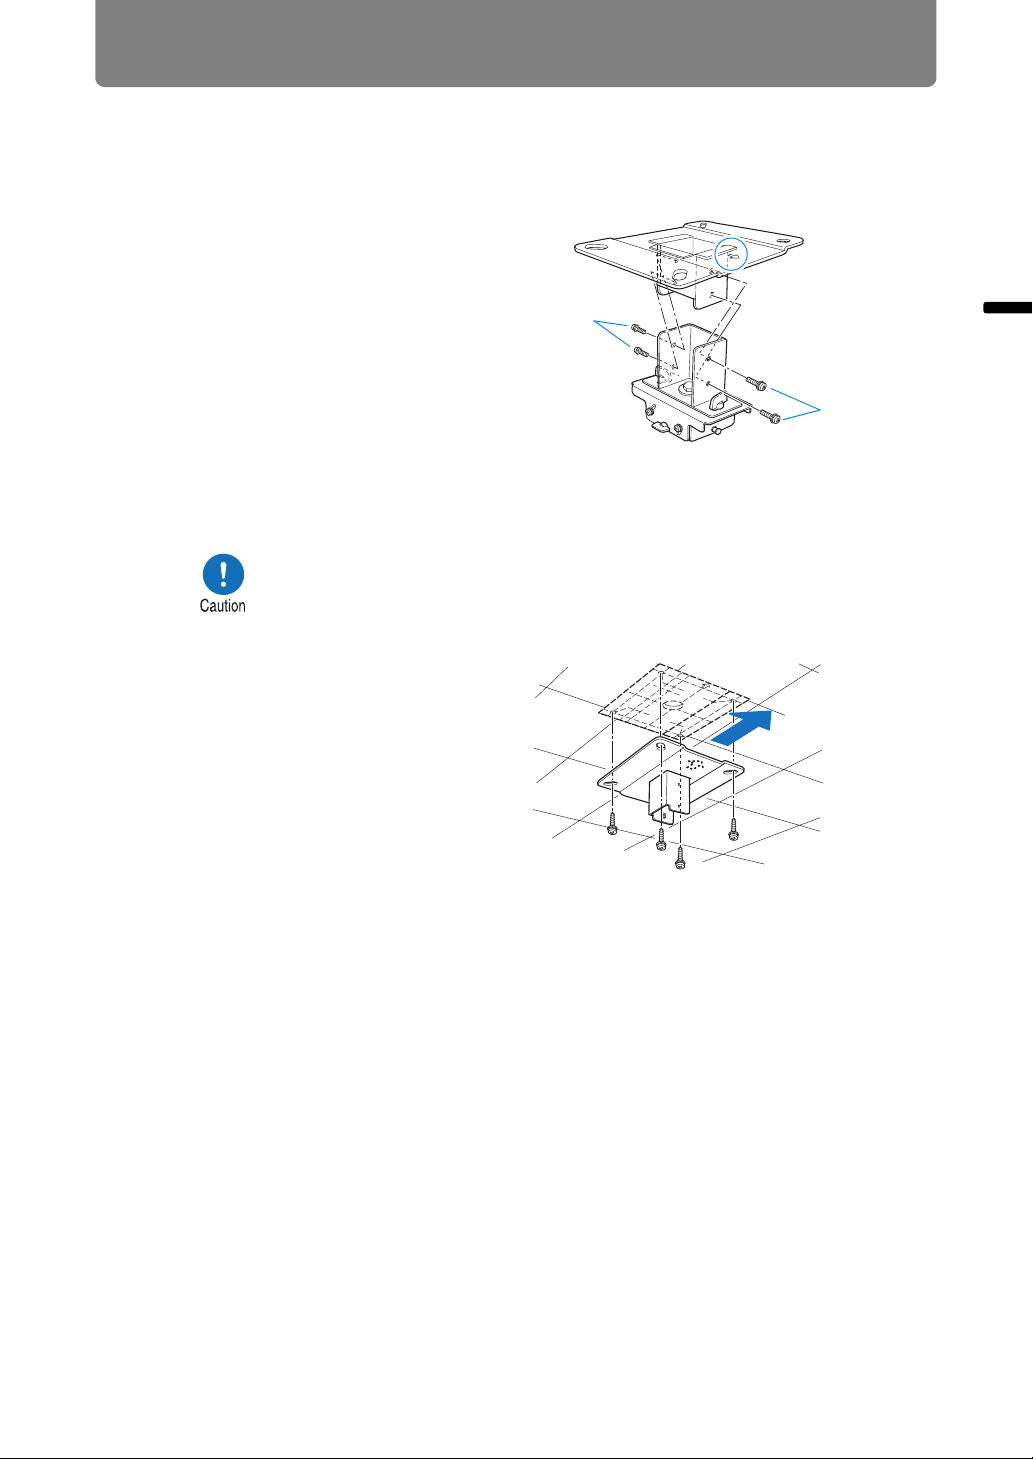
■ Installation to flat and level Ceiling
Preparation: Separate the Joint
fitting from the Ceiling-mount
bracket temporarily
Remove four M5 screws (A) to separate
Joint fitting from the Ceiling-mount bracket.
1 Make a hole in the ceiling
• Use the template sheet (T2) to make
holes in the ceiling for securing the
Ceiling-mount bracket.
• Make holes to thread cables
through.
2 Secure the Ceiling-mount
bracket to the ceiling
Use four M13 screws, to secure the
Ceiling-mount bracket to the ceiling
with the arrow facing toward the
screen.
• Before securing the Ceiling-
mount bracket, be sure to remove
the template sheet (T2).
• The M13 screws are not included
in the supplied parts. Prepare the
M13 screws suitable for the
ceiling structure.
• Always use the included template sheet (T2) to determine where to
make holes.
• The template sheet (T2) is labeled with the direction to the screen, as
well as the optical axis (center of the lens).
A
A
Direction to the
screen
Direction to the
screen
Loading ...
Loading ...
Loading ...