Loading ...
Loading ...
Loading ...
Operating Instructions
5
When you push the button to change operation modes, the unit will make a beeping sound to
indicate that it is changing modes.
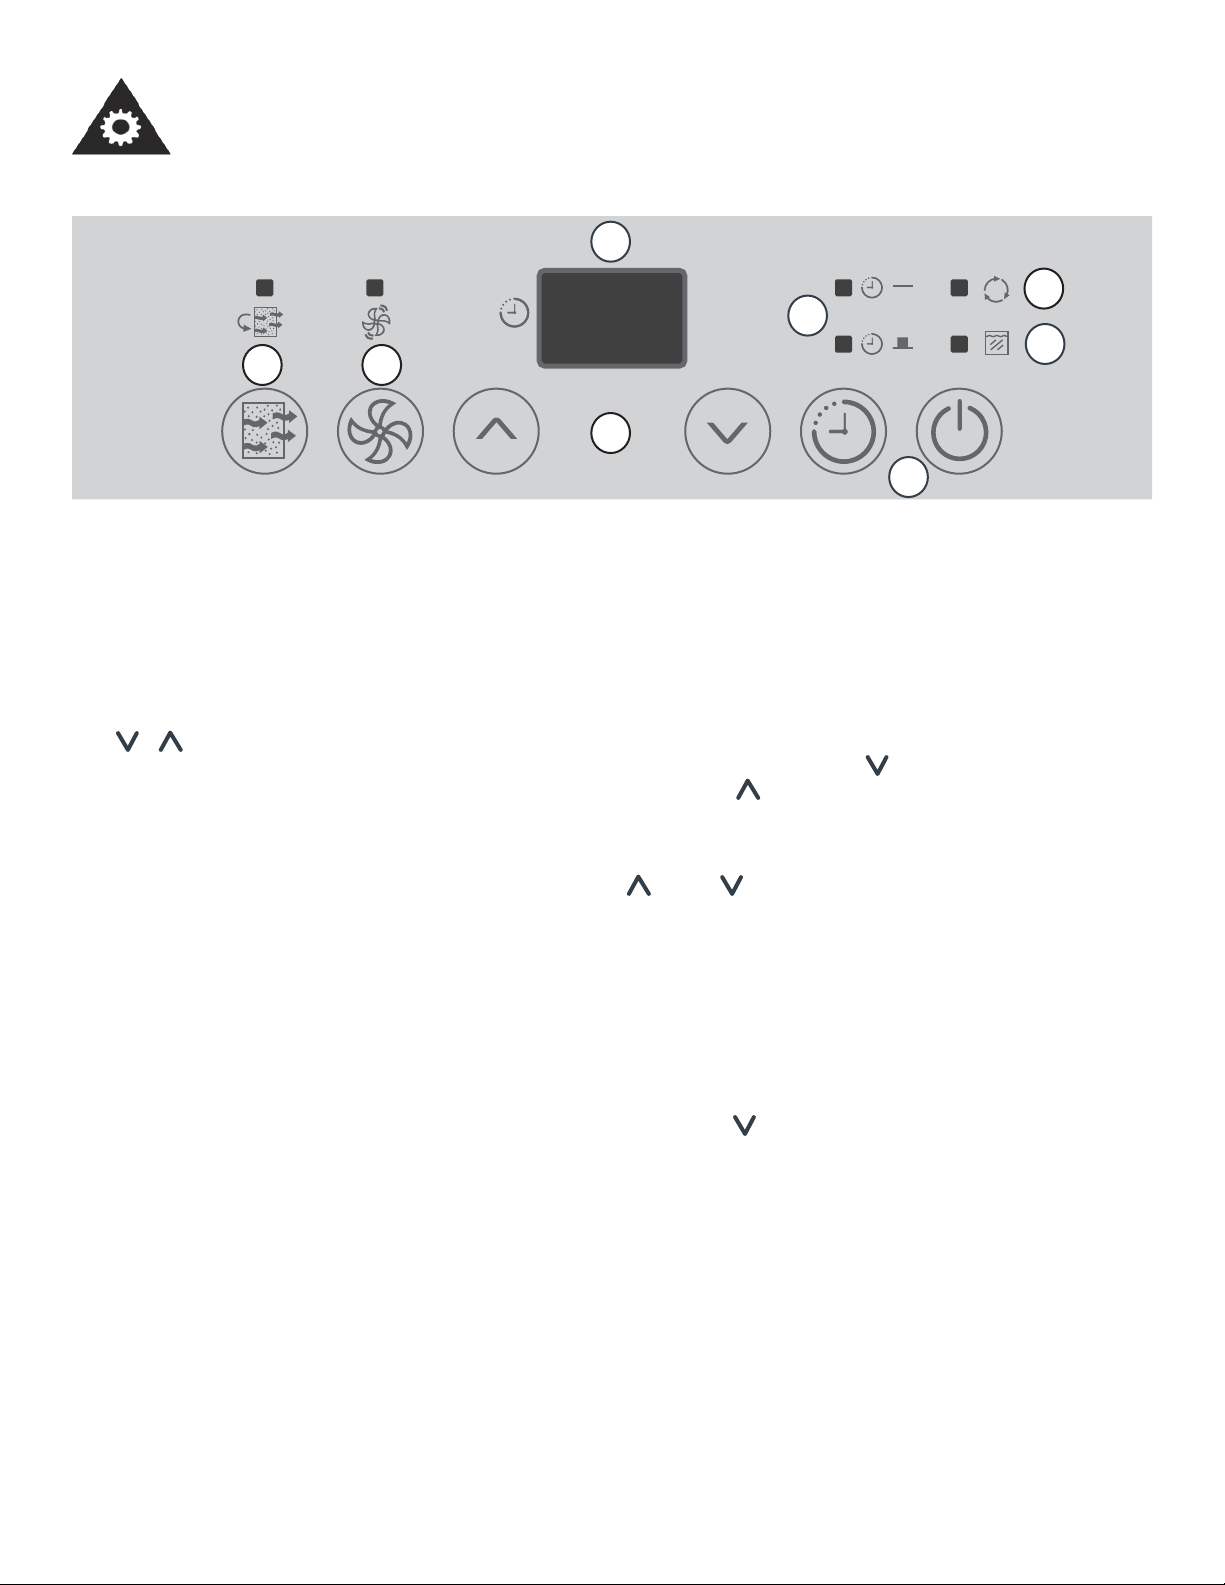
1. Filter Button and Indicator Light: The check fi lter light will illuminate after 250 hours of opera-
tion. After cleaning the fi lter, press the fi lter button to reset this function and the light will go off.
2. Fan button and Indicator Light: Controls the fan speed. Press to select either low or high fan
speed. The indicator light will illuminate on high fan speed and will turn off on low fan speed.
3. ( / ) Buttons: The humidity level can be set within a range of 35% RH (Relative Humidity) to
80% RH in 5% increments using these buttons. For drier air, press the ( ) button and set to a
lower percentage value (%). For more damp air, press the ( ) button and set a higher percentage
value (%).
4. Timer Button and Indicator Lights: Press to initiate the auto-start and auto-stop feature. Set a
start or stop time from 0.0 to 24 hours using the ( ) and ( ) buttons.
5. Power Button: Press to turn the dehumidifi er on or off.
6. Bucket Full Indicator Light: When the bucket is full or incorrectly positioned inside the unit, the
bucket full light will turn on and remain on until the bucket is emptied or correctly re-positioned.
The compressor and fan motor operation will stop. When the bucket is emptied or correctly reposi-
tioned, the dehumidifi er will resume operation automatically.
Note: It may take 2-3 minutes before operating conditions resume.
7. Continuous Mode: To reach continuous mode, press the ( ) button until CO shows on the dis-
play. This setting will disregard the ambient humidity and will run the compressor continuously to
reach the driest conditions possible.
8. Display: Shows the actual (± 5% accuracy) room humidity level in a range of 35% RH to 80% RH.
Otherwise, displays selection when programming humidity or timer.
Note: The fan does not shut off the moment you remove the bucket, the fan will shut off after
2-3 minutes.
CONTROL PANEL INSTRUCTIONS
1
2
3
4
5
6
7
8
Loading ...
Loading ...
Loading ...