Loading ...
Loading ...
Loading ...
English-8 | oster.comEnglish-7 | oster.com
To Use The ConveCTion bake fUnCTio
n
• Arrange food on the wire rack or in the baking pan.
• Set function to CONVECTION BAKE
3
. Both the top and bottom heater elements
will operate.
• Turn the Temperature Control Knob
1
to the desired temperature.
• Turn the Timer Knob
4
to the desired time.
• When baking is complete, open door completely and remove food.
WARNING:
Cooked food, metal rack, and door can be very hot, handle with care.
Do not leave the unit unattended.
NOTE: If cook time is less than 20 minutes, you must turn Timer past the 20 minutes mark
to engage the timer back to desired time.
NOTE: The top and bottom heating elements will cycle ON and OFF to maintain the
desired temperature.
faQs aboUT ConveCTion baking
What is Convection?
Answer: In your Countertop Oven there is a built in fan that circulates the hot air in the
oven chamber to better heat the food.
How do I adjust the time for Convection?
Answer: On average, convection will shorten the cooking time by 30% but it varies by food.
It is suggested to go with a shorter cooking time to start with and then add time if it is needed.
What are the best foods to use with Convection?
Answer: While a shorter cook time is often desirable, baked goods in particular benefit from
convection cooking as the circulating air keeps oven temperature consistent throughout.
To Use The variabLe broiL fUnCTion
• Select desired oven rack position. (See “Positioning Rack” Section)
• Place broil rack in oven with pan mounted on the guides under it.
(See “Positioning Pan” Section)
• Arrange food on broiler rack.
• Close the door to the first notch, leaving a small gap at the top. This will ensure adequate
airflow during broiling.
• Set function to BROIL
3
. Only the top heater element will operate.
• Turn the Temperature Control Knob
1
to the desired temperature.
• Turn the Timer Knob
4
to the desired time. Turn food over about halfway through the
broiling time.
NOTE: If cook time is less than 20 minutes, you must turn Timer past the 20 minutes mark
to engage the timer back to desired time.
WARNING:
Cooked food, metal rack, and door can be very hot, handle with care. Do not leave
the unit unattended.
Figure 4
To Use The Warm fUnCTion
NOTE: The Warm Function is for warming and keeping food warm after heating.
• Arrange food on the Wire Rack or in the Baking Pan.
• Set Function to WARM
3
. Only the bottom heating element will operate.
(The heater elements will cycle ON and OFF to maintain temperature.)
• Turn the Temperature Control Knob
1
to the desired temperature or 175°.
• Turn the Timer Knob
4
to the desired time.
NOTE: If cook time is less than 20 minutes, you must turn Timer past the 20 minutes mark
to engage the timer back to desired time.
WARNING:
Cooked food, metal rack, and door can be very hot, handle with care. Do not leave
the unit unattended.
CLeaning YoUr CoUnTerToP oven
1. Before cleaning your OSTER
®
countertop oven, unplug it and allow it to cool.
2. To clean, wipe with damp cloth.
DO NOT IMMERSE IN WATER!
Make sure to use only mild, soapy water. Abrasive cleaners, scrubbing brushes and
chemical cleaners will damage the
unit. Empty crumb tray frequently to avoid
accumulation
of crumbs.
Oven racks are dishwasher safe (top of dishwasher only).
This appliance has no user serviceable parts. Any servicing beyond that described in the
Cleaning Section should be performed by an Authorized Service Representative only.
See Warranty Section.
sToring YoUr CoUnTerToP oven
Allow the appliance to cool completely before storing. If storing the countertop oven
for long periods of time, make certain that the countertop oven is clean and free of food
particles. Store the countertop oven in a dry location such as on a table or countertop or
cupboard shelf. Other than the recommended cleaning, no further user maintenance
should be necessary.
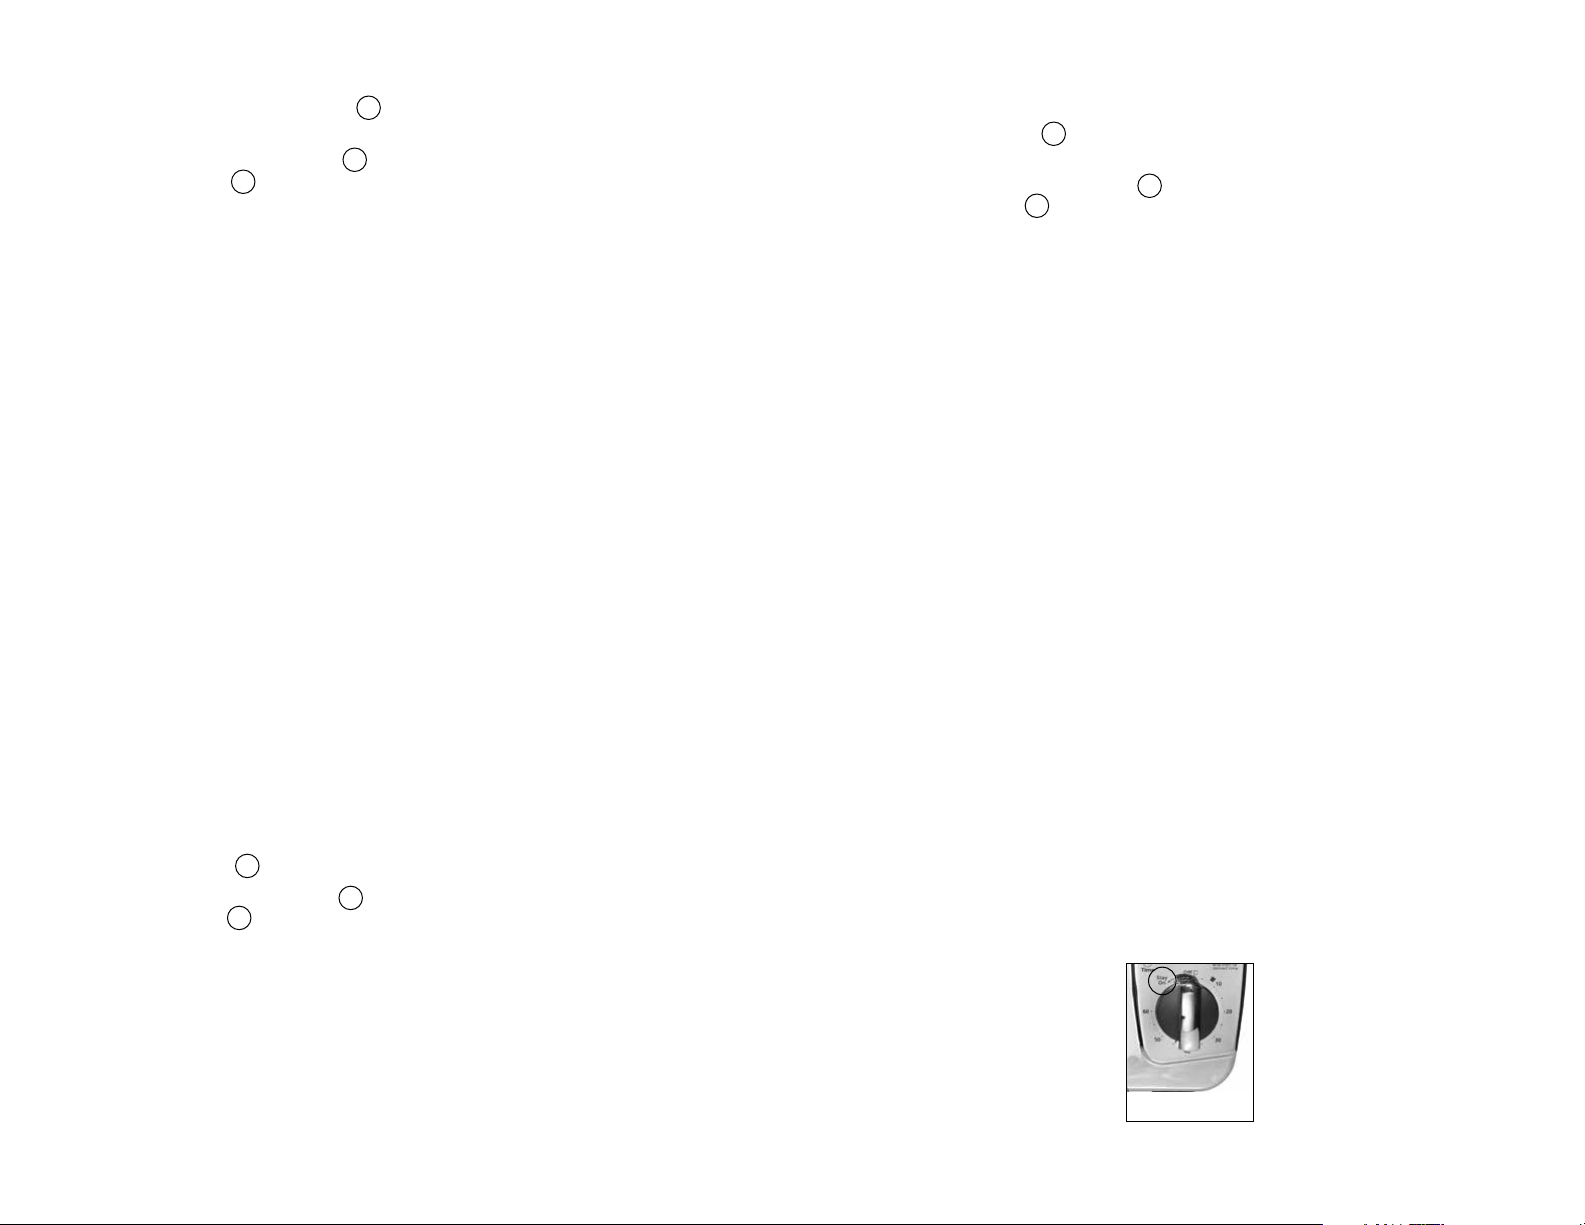
To Use The Timer anD sTaY on feaTUre (see fig. 4)
After rotating the Temperature Dial to your desired temperature, then you must select
from the following options on the Timer Dial.
• For items requiring shorter cooking times, rotate the Timer Dial clockwise
to the desired time. At the sound of the bell, the oven will automatically
turn “Off.”
• For longer cooking times, rotate the Timer Dial counterclockwise to the “Stay
On” setting. Cooking will continue until the Timer Dial is manually turned to
the “Off” position and the bell will sound.
Loading ...
Loading ...
Loading ...