Loading ...
Loading ...
Loading ...
13
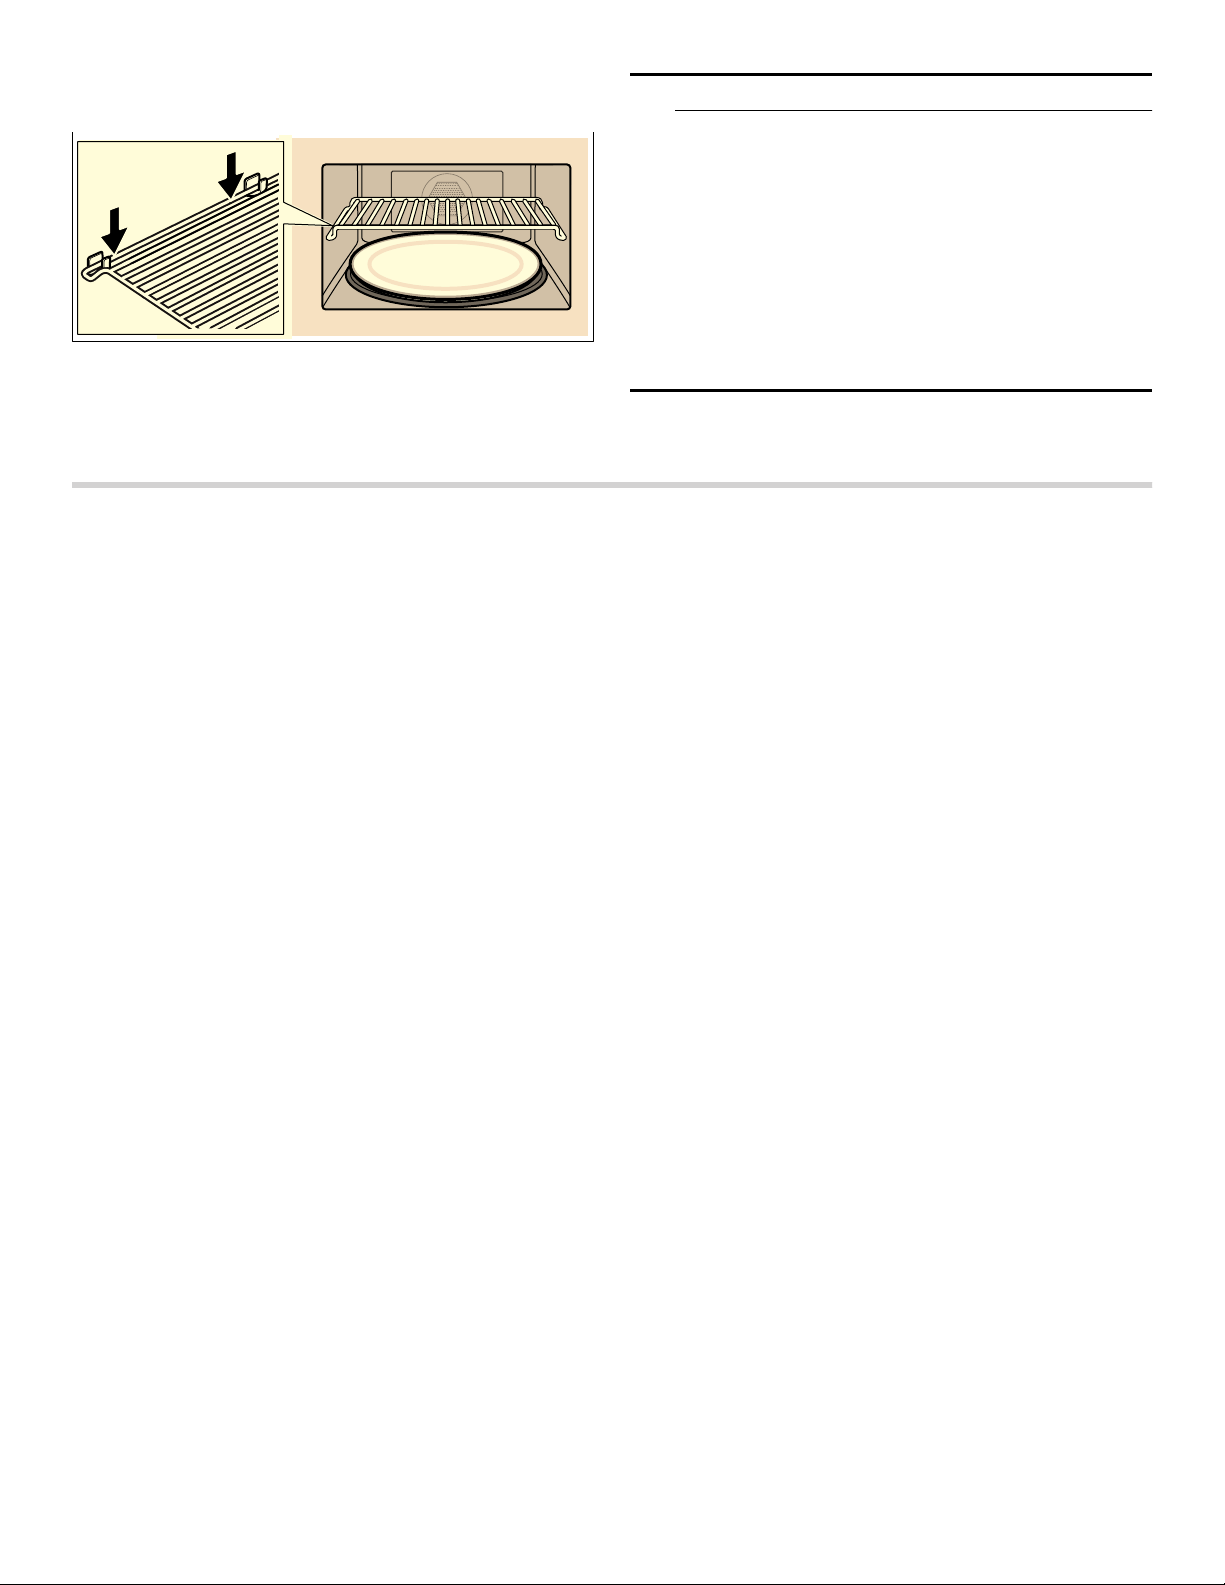
Inserting the wire rack
1.
Place rack securely in the four plastic supports.
Note: Rack must not touch metal walls or back of
microwave.
2.
Place food on the rack.
9 CAUTION
▯ Do not use the rack to pop popcorn.
▯ The rack must be on the four plastic supports
when used.
▯ Do not cook with rack on the bottom of the oven
cavity.
▯ For regular microwave cooking use the ceramic
tray and remove the rack.
▯ The rack can get hot during cooking. Allow the
rack to cool down before handling.
▯ When not in use, store the rack outside of the
microwave in a cabinet.
Before Using the Appliance for the First Time
▯ Appliance must be properly installed by a qualified
technician before use.
▯ Remove all packing materials from inside and outside
the oven.
▯ While cool, wipe with a clean, damp cloth and dry.
▯ There may be a slight odor from your new appliance;
this is normal and will disappear after a short time.
▯ Optimum cooking results depend on proper cookware
being used.
▯ Read and understand all safety precautions and Use
and Care Manual information.
Execute the following sections prior to operating:
Setting the clock
Once the appliance has been properly connected,‚ƒ:‹‹
will be displayed as the time of day. To set the correct
time, proceed as follows:
1.
Touch Clock.
2.
Enter the correct time using the number keys.
Example: To set the clock to 12:41 type in 1 2 4 1.
3.
Touch Start/Enter to confirm.
The clock will also be displayed when your appliance is
turned off. Please refer to the chapter “Basic Settings” on
how to hide the clock.
Heating up the appliance
To remove the new oven smell, heat up the appliance
when it is empty and closed. One hour with Convection
at 350° F (180 °C) is ideal. Ensure that no packaging
remnants have been left in the oven cavity.
1.
Touch Convection
2.
Enter the numbers 3 5 0 with the number keys.
3.
Touch Start/Enter.
The oven light turns on and the appliance starts
heating.
Cleaning accessories
Before using accessories for the first time, thoroughly
clean them with hot soapy water and a soft dish cloth.
Applying the program label
Apply the included program label in the desired
language to the side of the oven cavity, as idicated on
the leaflet that carries the program label.
Loading ...
Loading ...
Loading ...