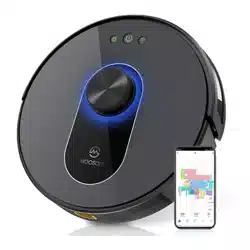
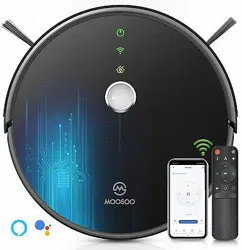
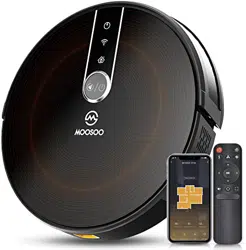
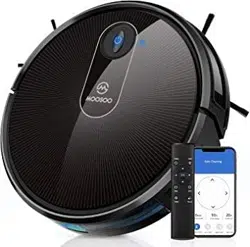
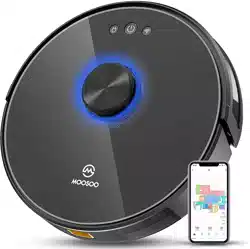
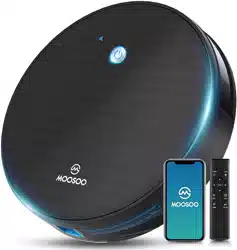
Moosoo MT-501 Robot Vacuum Cleaner
Product's Documents
Below are documents related to this product, you can read online or download:
- User Manual - (English) Read Online | Download pdf
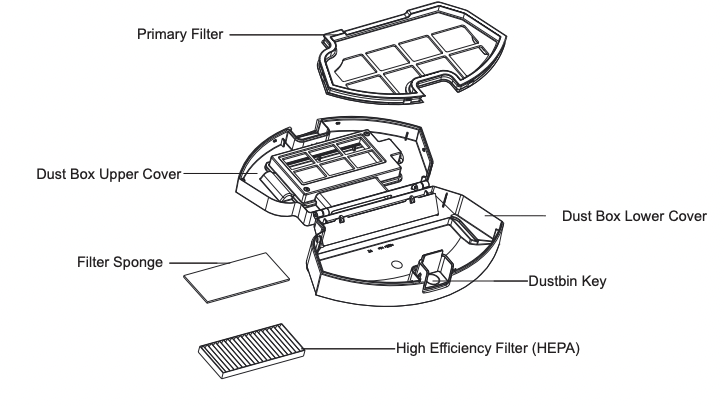
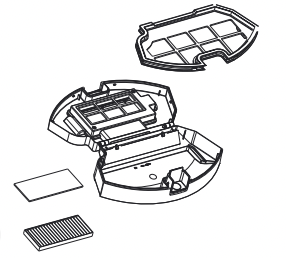
Assembly Name
Master
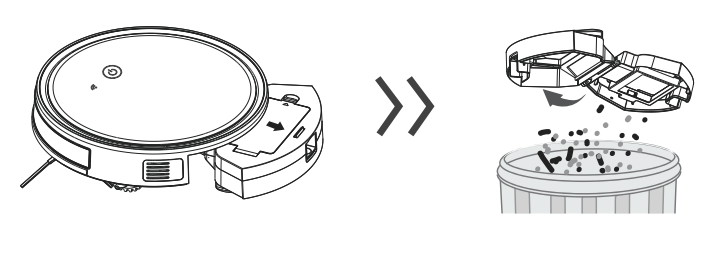
Dust box
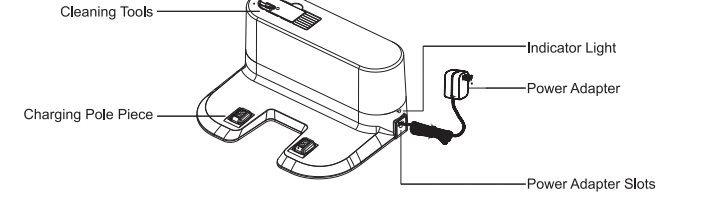
Changing Stand Assembly
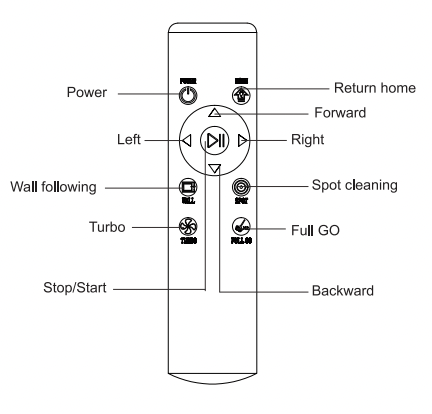
Remote Control
 Install 2 AAA batteries before using the remote control for the first time. Make sure the positive and negative ends are facing the correct polarity direction as marked in the battery compartment.
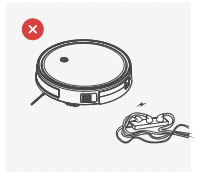
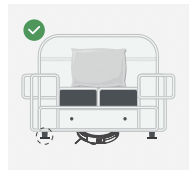
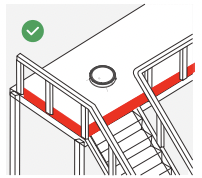
Please refer to the following guidelines to check the cleaning area before the cleaner works.
1. Power lines and other debris scattered on the ground may trip up product must be removed.
2. Please roll the carpet tassels or work on short-hair rugs.
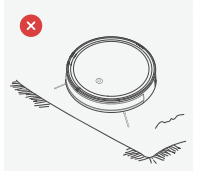
3. Agap of less than 8 cm on the bottom of the furniture may catch the product. If you need to clean it, please remove the furniture.
4. A guardrail should be placed at the edge of the duplex to ensure safe operation of the product.
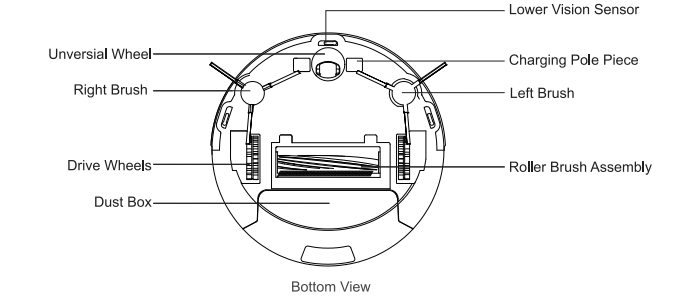
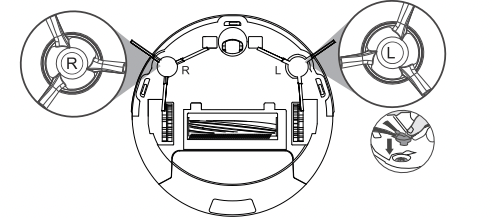
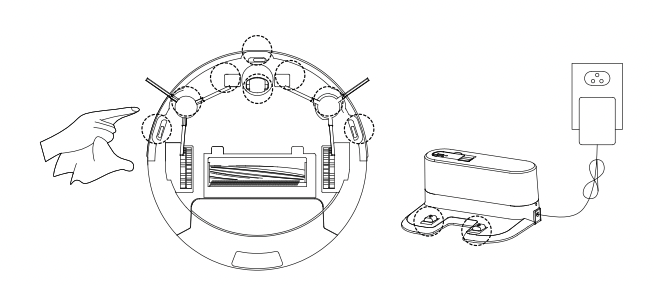
Install The Side Brushes
Please install the right brush into the right bottom mounting port of the machine, the left brush into the left bottom mounting port of the machine. and ensure that the two side brushes are in place.
Changing Operation
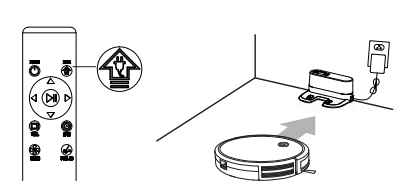
1. Connect the adapter to the charging stand.
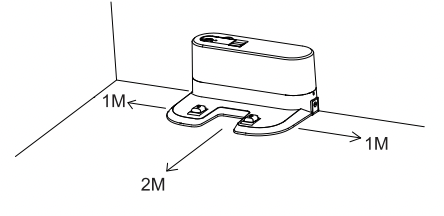
Place the charging stand flat against the wall. Do not place objects in the left and right 1M and the front 2M, and do not have objects with strong reflection surfaces such as mirrors.

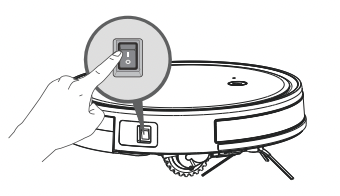
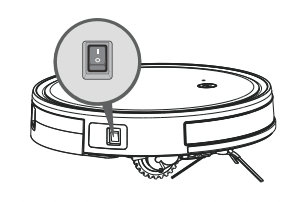
Tur on the side power switch. After the master finishes working. it is recommended not to shut down; keep the master in a state of charge so that it can perform its next job better.
Place the master in the charging stand and pay attention to the charging pole piece.
Tum on the power switch. the robot will enter standby mode.
 Red light flashes indicates that the battery need to be charged.
Blue light breathing light flashes indicate charging.
When the blue light is off means charging is completed. For the first use. please charge continuously for more than 6 hours.
Note: Please match the charging pole piece.
Please match the charging pole piece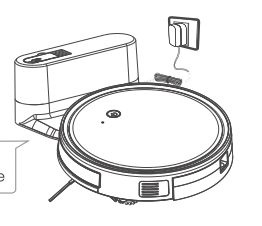
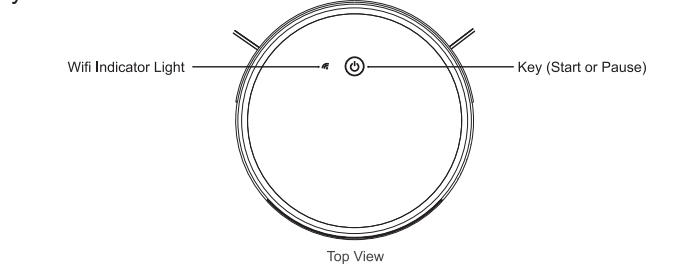
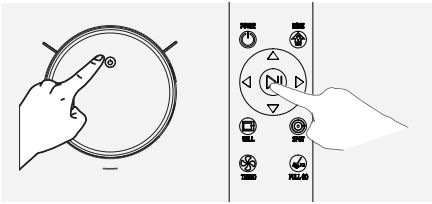
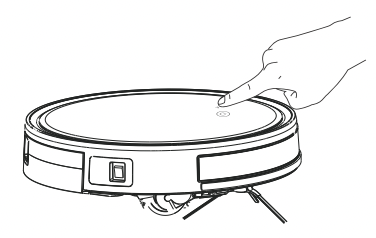
1. Start or stop by pressing the master's key or the remote control's / key.
key.
Note: Before starting the mode, make sure that the outer ring of the key is blue and the master is in the state of being awakened.
If the master does not wake up. short press the master to wake it up.
The master enters the sleep state after 10 minutes of standby, and the key lights of.
2. If you need to select another mode, please refer to the(Mode Selection)section.
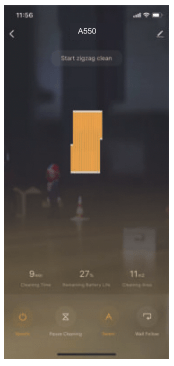
In order to adapt to different ground conditions and achieve deep cleaning. this product has a variety of cleaning modes. which can be selected by remote control as needed.
The remote control can switch any mode directly.
Before starting the mode. make sure thatthe outer ring of the key is blue and the master is in the state of being awakened. If the master does not wake up. short press the master to wake it up.
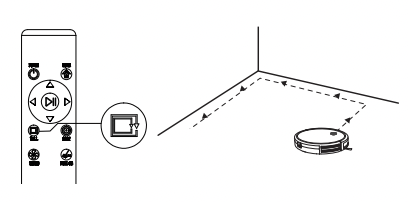
It is suitable for the ground environment where the garbage is concentrated. The master centralized cleaning in the designated area. and master centralized cleaning with the "spiral" route.

It is suitable for cleaning at the corners of the room.
The master is cleaned around the periphery of a fixed object (such as a wall) and cleaned back to the charging stand.
During the cleaning process. the master can sense that its power is insufficient. and automatically find the charging stand for charging.
You can press the “home” button or press the "power" button twice to make the master return to the charging stand for charging.
NOTE: In the regular cleaning mode. the maximum run time of the master could be 100 minutes while it would automatically return charging for next task if it has completed present one.
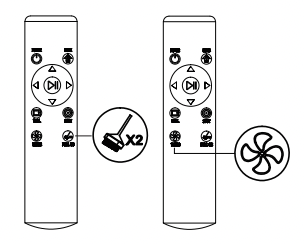
Press the “Full Go” button on the remote control.
After the first time cleaning. robot will go back to charge to full and continue the second time cleaning automatically.
Press the “Turbo” button on the remote control.
With three modes of suction power(Max/Standard/Low). Standard mode can be used for daily cleaning while the Max mode would increase the suction and Low mode would lower the noise.
Low suction mode can be used for cleaning wood floor and tile floor. standard mode for common household cleaning while the max mode can be used for cleaning rugs.
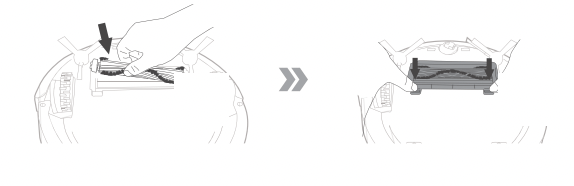
Remove the roller brush brush cover plate. remove the roller brush. cut off the hair wound on it and then use the cleaning brush to clean it.
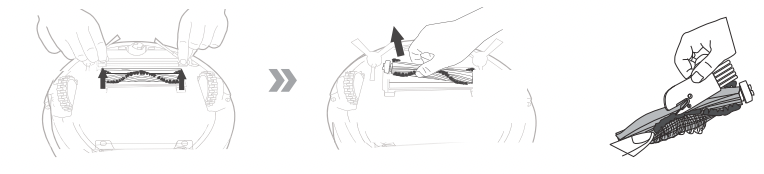
Set roller brush assembly: take out sucking assembly first. set the roller brush. cover the board and press it to lock.
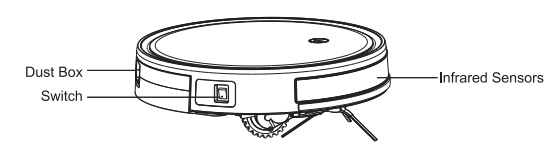
When cleaning and maintaining the master and its accessories. turn off the master and unplug the charging stand.


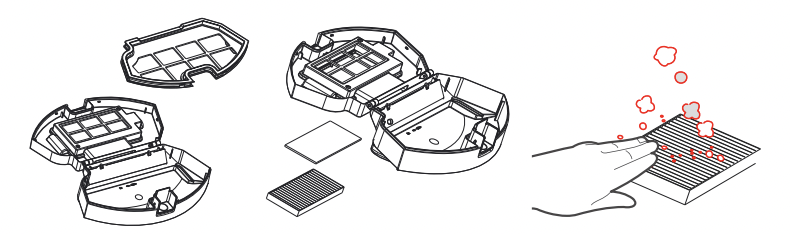

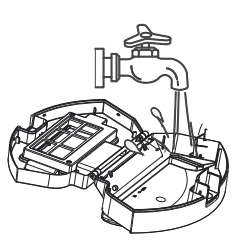

Please let these parts dry naturally for more than 24 hours.
Cleaning Side Brushes
Pull out the side brush and wipe it with a clean rag.
Cleaning the universal wheel to reduce hair entangle.
Clear down the sensor to ensure the sensitivity of the sensor.
To clean the charging pole pieces. use a dry rag to clean the charging poles on the bottom of the master or the charging stand.
If you will not use the product for a long time. please remove the battery and keep it in a safe place. If the battery leaks, remove the battery and wipe the battery compartment clean.
This product uses a high-life battery and does not require frequent replacement. If you need to replace. you can contact our company for after-sales service replacement.

Please install the right brush into the right bottom mounting port of the machine. the left brush into the left bottom mounting port of the machine. and ensure that the two side brushes are in place.
Q: What should I do when it can not work on the carpet ?
A: We don’t suggest you make it clean the carpet. It’s better for you to set the barrier around the carpet on the app.
Q: What if the strength of vacuuming is weak?
A: Fist of all. check whether the dust bin is full and the robot is full charged. If it does, you can try to switch it to the higher mode. For litter which is difficult to collector. try to clean it with Spot Cleaning Mode.
Q: What if my charger has difficulties charging the robot?
A: Please make sure you turn on the charging stand before charging and check if the electrical sheet is connected to the charging stand ( Put it back manually or press the Power button when the robot is 1 meter in front of the charging stand.)
Q: What if the robot can not find the charging stand?
A: The charging stand should be placed against the wall with at least 1 meter clearance each side and 2 meters in front. Sometimes you can just put it back manually.
Q: What should I do if the remote control is out of order?
Q: Why does the master return to charging after cleaning?
A: The working time of the master varies depending on the complexity of the room. the amount of garbage and the cleaning mode.
CUSTOMER CARE
1. The 1-Year Limited Warranty is valid for products purchased from our MOOSOO only. starting from the date of original retail purchase against defects in quality and materials under normal. non-commercial use.
2. According to the requirements outlined in this instruction manual. subject to the following conditions and exclusions.
WHAT IS COVERED
1. The repair or replacement of your MOOSOO appliance if your MOOSOO appliance is found to be defective due to faulty materials. workmanship or function within 1 years of purchase or delivery (if any part is no longer available or out of manufacture. MOOSOO will replace it with a functional replacement part).
2. This warranty provides. at no extra cost to you. all labor and parts necessary to ensure your machine is in proper operating condition during the warranty period.
WHAT IS NOT COVERED
1. Under your MOOSOO guarantee. MOOSOO shall not be liable for costs of repair or replacement of a product incurred as a result of: Accidental damage. faults caused by negligent use or care. misuse. neglect. careless operation or handling of the MOOSOO appliance which is not in accordance with this MOOSOO Operating Manual;
2. Machines purchased from an unauthorized dealer;
3. Use of parts and accessories other than those produced or recommended by MOOSOO;
4. Repairs or alterations carried out by unauthorized parties or agents;
5. Use of the machine other than for normal domestic purposes within the United States. eg. for commercial or rental purposes;
6. Reduction in battery discharge time due to battery age or use.
WARRANTY SERVICE
1. If you have a query about your MOOSOO appliance, please contact the MOOSOO customer service email : [email protected]
2. Please inform us your model name/number, purchase date. order number. machine problem and your requirement.
3. Your model number can be found on rating plate. For information on your rating plate see the inside front cover.
4. Please keep your purchase receipt in a safe place to ensure you have this information.
5.Service under this warranty will not extend the period of this warranty.
SERVICE INFO
Email: [email protected]
Telephone: 818-966-8160
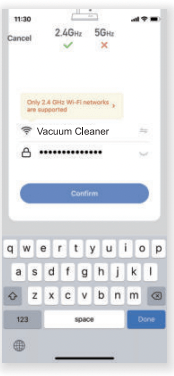
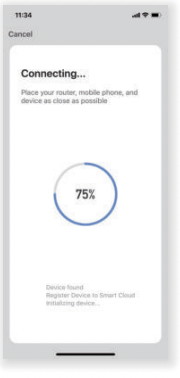
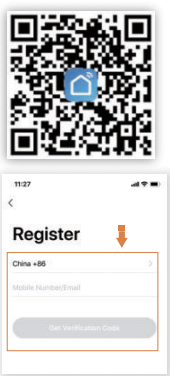
1. Please scan the QR code or search “Smart Life” and download App.
2. After the App is installed, please follow the App instructions to register the account and login.
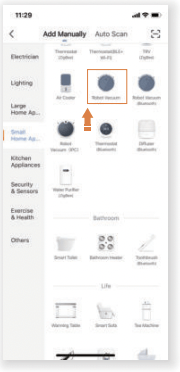
3. Open the APP and click [add device], [SmallHomeApp], [Robot Vacuum]

4. Please make sure that the product is on (like the picture below shows).
5. Long press for 3 seconds. and then
 flashes, click Confirm indicator rapidly blink! on the APP. You can start to connect to Wifi.
6. Input the wifi account and password.(Only supports 2.4G wifi now, 5G wifi can not be connected.)

6. Input the wifi account and password.(Only supports 2.4G wifi now, 5G wifi can not be connected.)