Loading ...
Loading ...
Loading ...
15
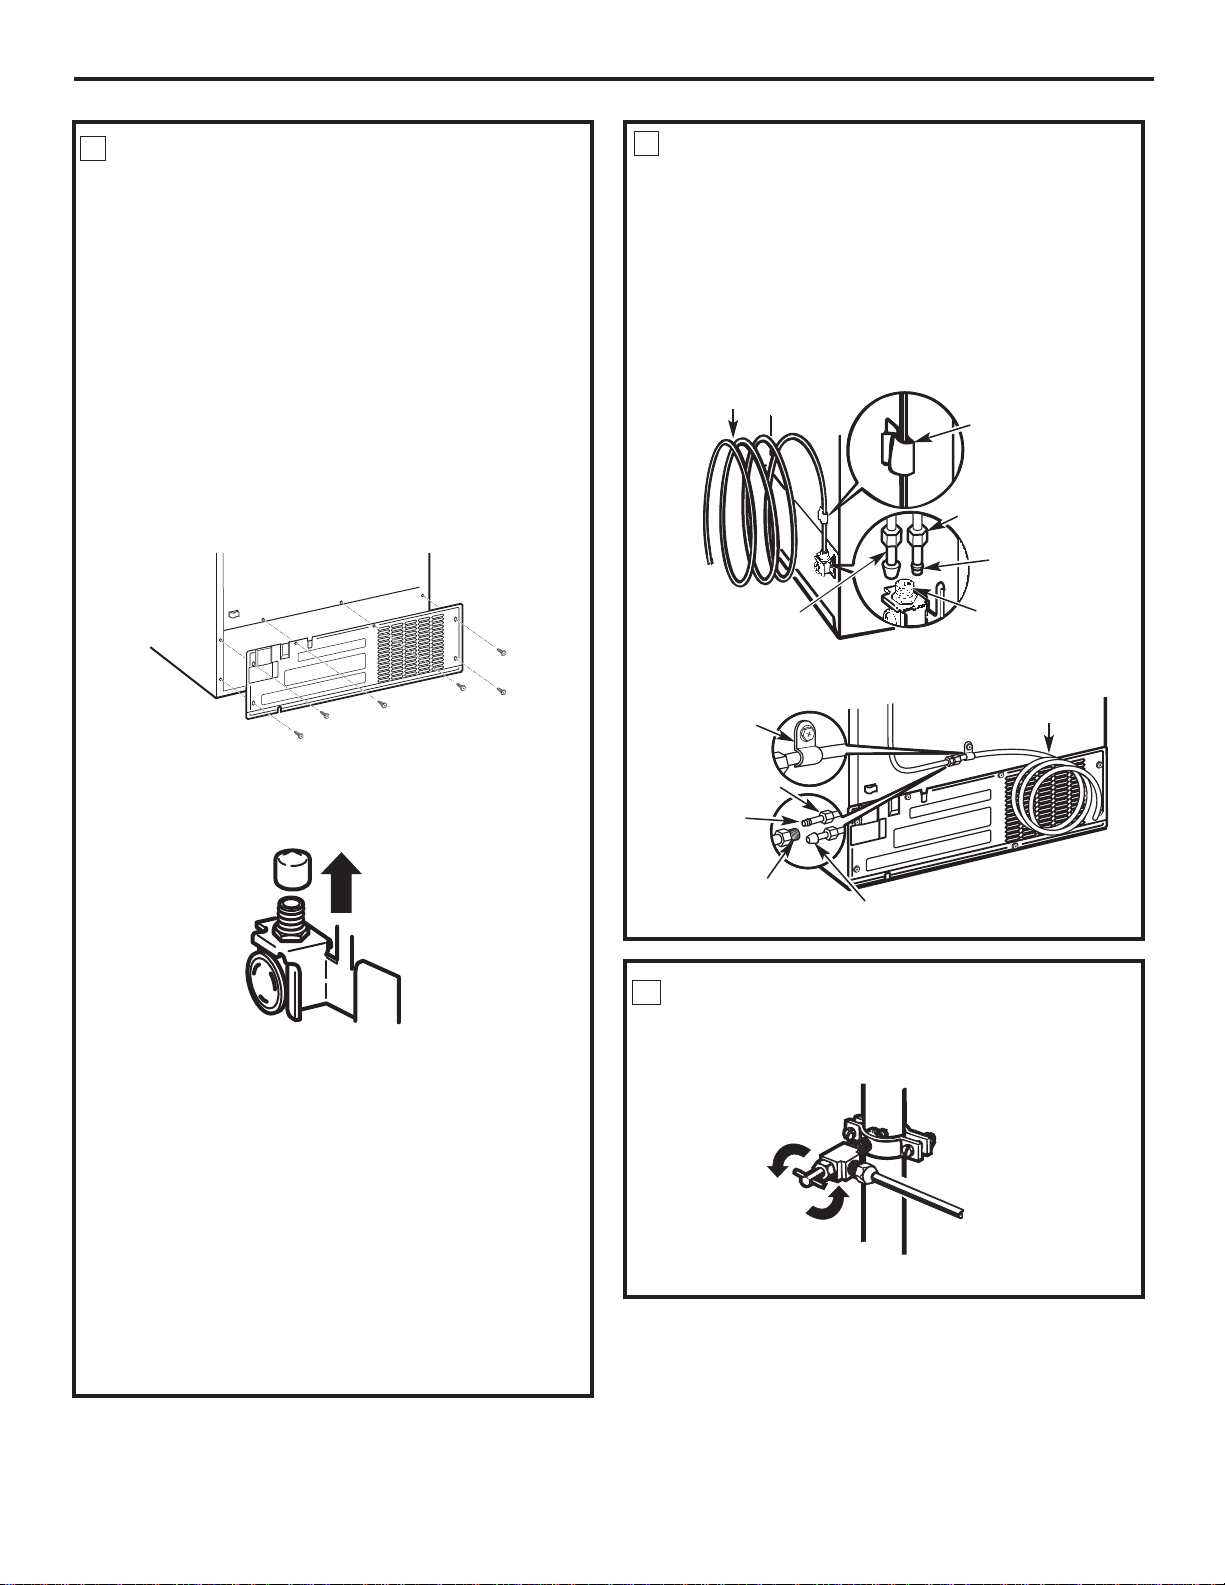
Tighten any connections that leak.
TURN THE WATER ON AT THE
SHUTOFF VALVE
10
Installation Instructions
Place the compression nut and ferrule (sleeve)
onto the end of the tubing as shown. On GE
SmartConnect
™
Refrigerator Tubing kit, the nuts
are already assembled to the tubing.
Insert the end of the tubing into the water valve
connection as far as possible. While holding the
tubing, tighten the fitting.
For plastic tubing from a GE SmartConnect
™
Refrigerator Tubing kit, insert the molded end of
the tubing into the shutoff valve and tighten
compression nut until it is hand tight, then tighten
one additional turn with a wrench. Overtightening
may cause leaks.
Remove the plastic flexible cap from the water valve
(refrigerator connection).
NOTES:
t Before making the connection to the refrigerator,
be sure the refrigerator power cord is not
plugged into the wall outlet.
t We recommend installing a water filter if your
water supply has sand or particles that could clog
the screen of the refrigerator’s water valve. Install
it in the water line near the refrigerator. If using
GE SmartConnect
™
Refrigerator Tubing kit, you
will need an additional tube (WX08X10002) to
connect the filter. Do not cut plastic tube to
install filter.
CONNECT THE TUBING TO THE
REFRIGERATOR
9
CONNECT THE TUBING TO THE
REFRIGERATOR
(CONT.)
9
Remove the access cover.
Reattach the access cover.
Fasten the tubing into the clamp provided to hold
it in a vertical position. You may need to pry open
the clamp.
1/4” Compression Nut
Tubing Clamp
1/4” Tubing
Ferrule (sleeve)
Refrigerator
Connection
SmartConnect
™
Tubing
One of the illustrations below will look like the
connection on your refrigerator.
Icemaker Models without Water Dispenser
1/4” Tubing
Tubing Clamp
1/4” Compression Nut
Ferrule (sleeve)
SmartConnect
™
Tubing
Refrigerator Connection
Water Dispenser Models
Loading ...
Loading ...
Loading ...