Loading ...
Loading ...
Loading ...
18 49-60769
Accessory Installation Instructions
ACCESSORY INSTALLATION INSTRUCTIONS
BEFORE YOU BEGIN
Read these instructions completely and carefully.
• IMPORTANT – Save these instructions for
local inspector’s use.
• IMPORTANT – Observe all governing codes
and ordinances.
• Note to Installer – Be sure to leave these
instructions with the Consumer.
• Note to Consumer – Keeptheseinstructions
for future reference.
• Skill level–Installationofthisappliancerequires
basic mechanical skills.
• Completion time – 20–60 minutes
• Proper installation is the responsibility of the
installer.
• Product failure due to improper installation is not
covered under the Warranty.
Ifyouhavequestions,callGEAppliancesat1.800.GE.CARES or visit our Website at:
GEAppliances.com.InCanada,call1.800.561.3344 or visit our Website at: www.geappliances.ca
Damage – Shipment/Installation
●Iftheunitisdamagedinshipment,returntheunit
to the store in which it was bought for repair or
replacement.
●Iftheunitisdamagedbythecustomer,repairor
replacement is the responsibility of the customer.
●Iftheunitisdamagedbytheinstaller(ifotherthan
the customer), repair or replacement must be made
by arrangement between customer and installer.
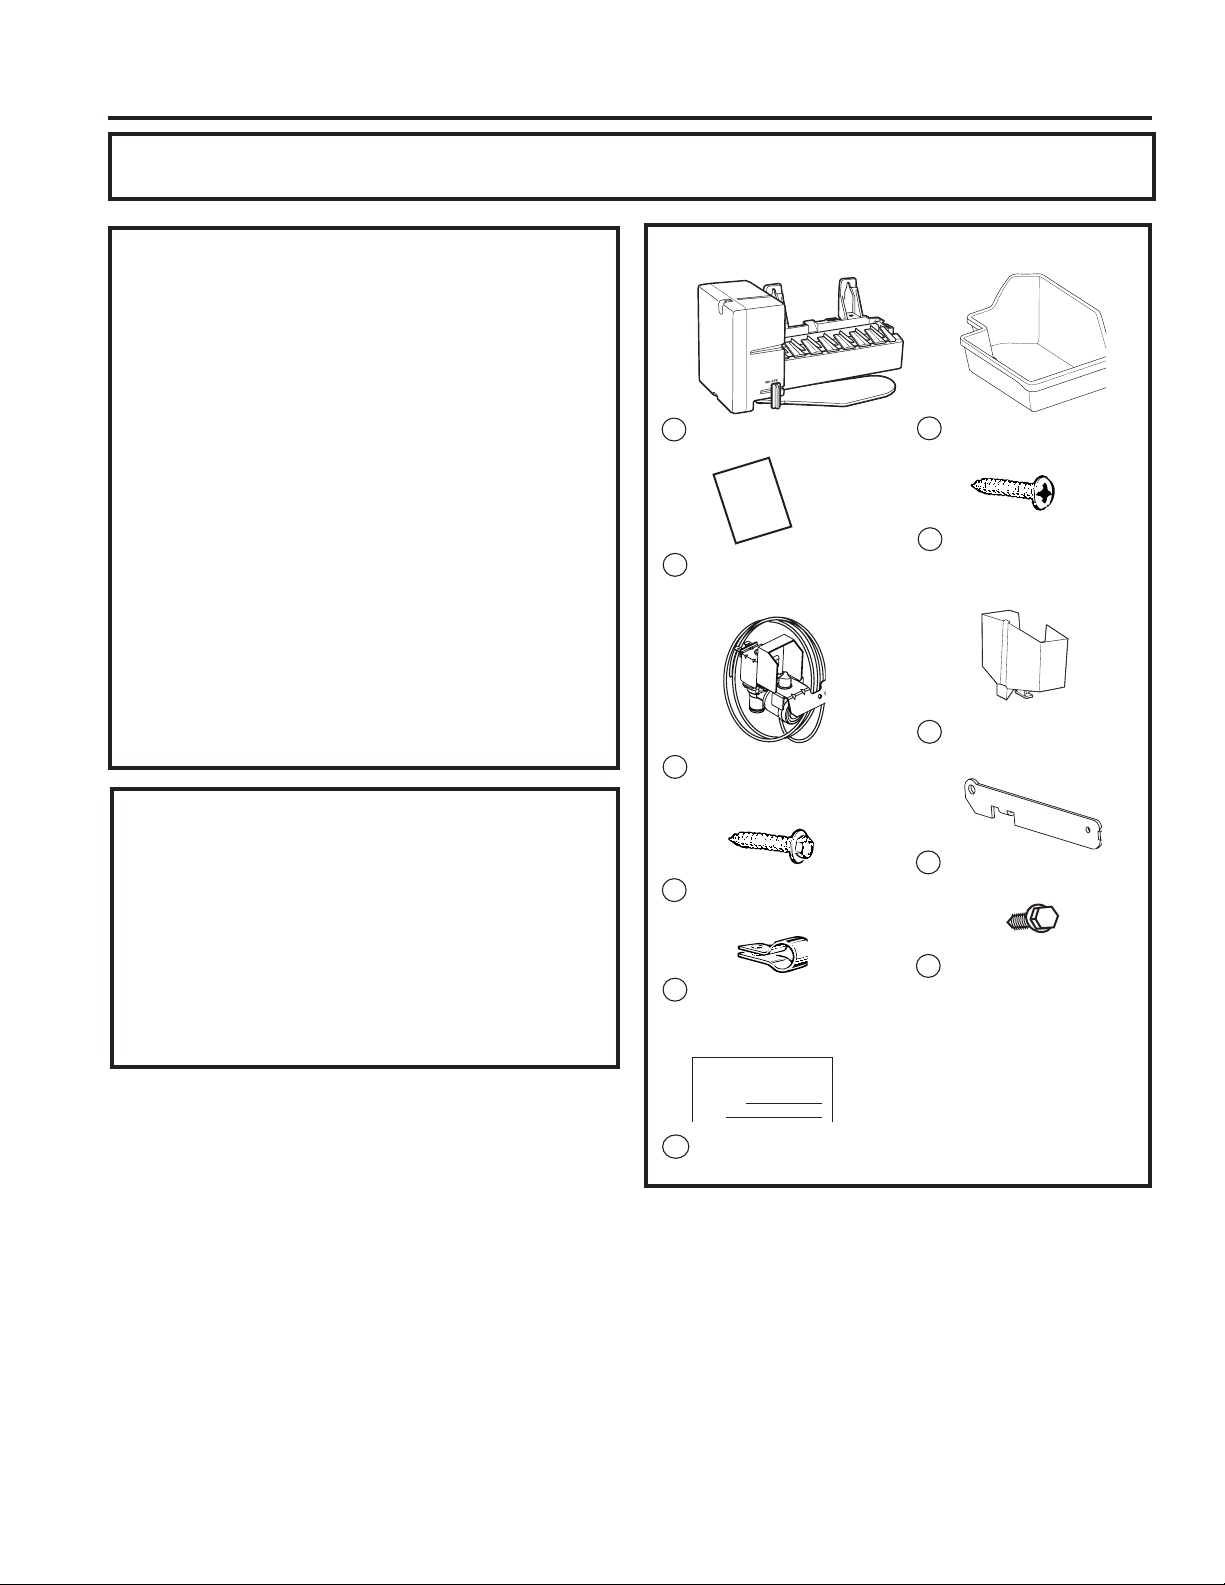
ITEMS NEEDED FROM IM4D KIT
InstallationInstructions
2
Hex-Head Screw
forWaterLineClamp(3/4”)*
5
Water Valve and
Tube Assembly
3
Icemaker
1
Installation
Instructions
IceBucket
8
Water Line Clamp
(strain relief), for
house water line
6
10
Phillips Head Screws,
for mounting icemaker (2)
(7/8”)*
Warranty Label
7
ICEMAKER
WARRANTY VERIFICATION
Date Installed
Dealer
13
17
16
IcemakerFillCup
(side-mounted)
Hex-Head Screws, for
bracket extension (1)
(1/4”)*
Bracket Extension
Loading ...
Loading ...
Loading ...