Loading ...
Loading ...
Loading ...
25
Always unplug the power cord before cleaning the Humidifier Components.
Do not use bleach, chlorine, abrasives, or soaps/detergents that contain solvents.
CLEANING THE HUMIDIFIER COMPONENTS
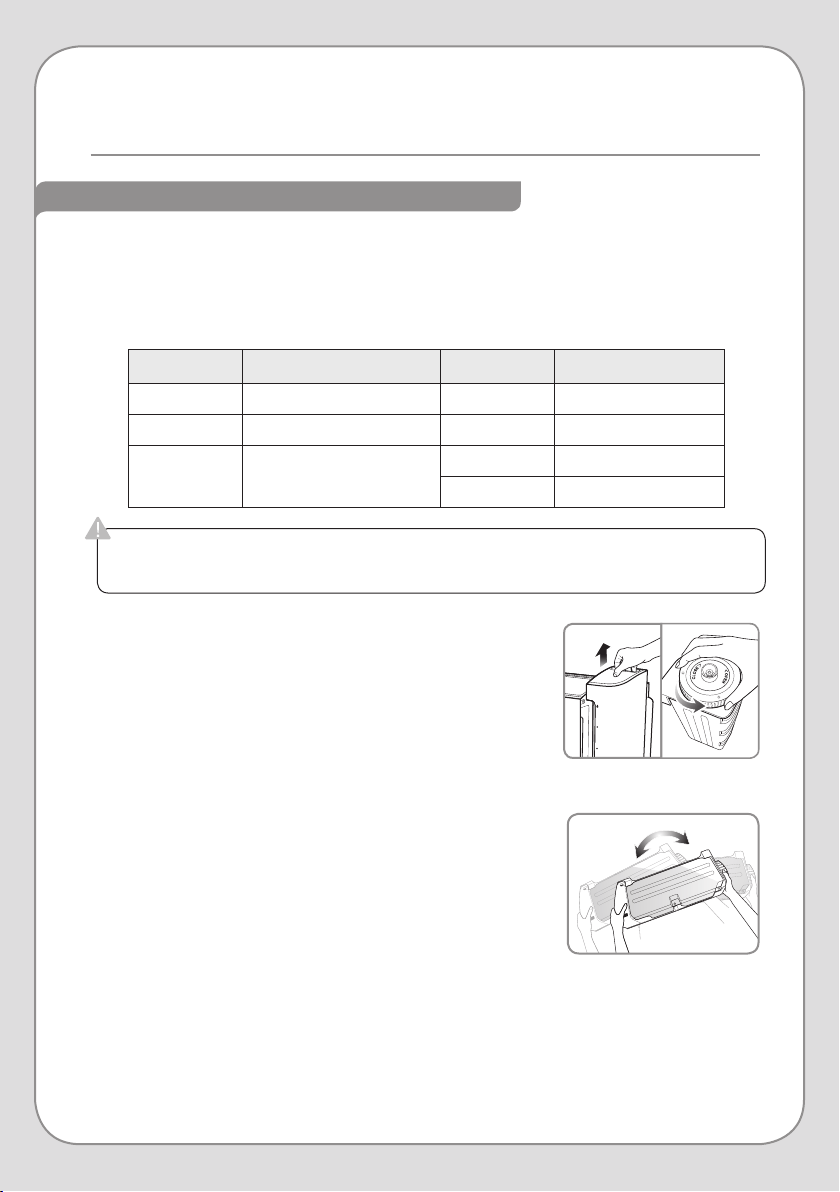
1. Cleaning the Water Tank
a. Remove the Water Tank by pulling the handle up. Then
move the tank away from the machine. Remove the
Water Tank Cap by turning it counter-clockwise.
b. Fill the Water Tank one-third of the way and add a small
amount of neutral detergent. Replace the Water Tank
Cap and shake the Water Tank vigorously to wash the
inside of the tank. Do not use abrasives.
c. Remove the Water Tank Cap and rinse the inside of
the Water Tank thoroughly, ensuring that there is no
leftover soap inside. While rinsing out the inside, wash
down the exterior of the tank. Do not use abrasives.
d. Dry o the exterior of the Water Tank completely. Fill
the Water Tank with cold water and replace the Water
Tank Cap. Reinstall the Water Tank, ensuring that it is
seated correctly.
NOTE: If you do not want the Revive to humidify the air,
do not fill the Water Tank before you re-install it.
Step 1a
Step 1b
Below is a recommended cleaning schedule for the Revive’s Humidifier Components. The
frequency is designed to avoid the build-up of scale, mold and/or mildew in the Water Tank, the
Water Tray, and the Humidifier Filter. The frequency of scale build-up depends on the hardness
of the water put into the system. For maximum eectiveness, use a Brondell H2O+ Water
Filtration unit in combination with the Revive.
HUMIDIFIER MAINTENANCE
LOCATION FILTER/PART METHOD CLEANING CYCLE
Right Side Water Tank Clean Every 2 weeks
Right Side Water Tray Clean Every 2 weeks
Right Side
(Water Tray)
Humidifier Filter
Clean Every 2 weeks
Replace Every 4 months
Loading ...
Loading ...
Loading ...