Loading ...
Loading ...
Loading ...
80
NETWORK menu
Item Description
WIRED SETUP
(continued)
TIME
DIFFERENCE
Use the ▲/▼ buttons to enter the TIME
DIFFERENCE.
Set the same TIME DIFFERENCE as the one
set on your computer. If unsure, consult your IT
manager.
Use the ► button to return to the menu after
setting the TIME DIFFERENCE.
• When this item is set, the same item in the
WIRELESS SETUP menu is overwritten with the
same setting (
75).
DATE AND
TIME
Use the ▲/▼/◄/► buttons to enter the Year (last
two digits), Month, Date, Hour and Minute.
• When this item is set, the same item in the
WIRELESS SETUP menu is overwritten with the
same setting (
76).
• The projector will override this setting and retrieve
DATE AND TIME information from the Time server
when SNTP is enabled. (
3.1.8
Date/Time
Settings in the Network Guide)
• This setting will be reset if the projector is turned
off while STANDBY MODE in the SETUP menu
is set to SAVING (
54), or when the AC power is
turned off.
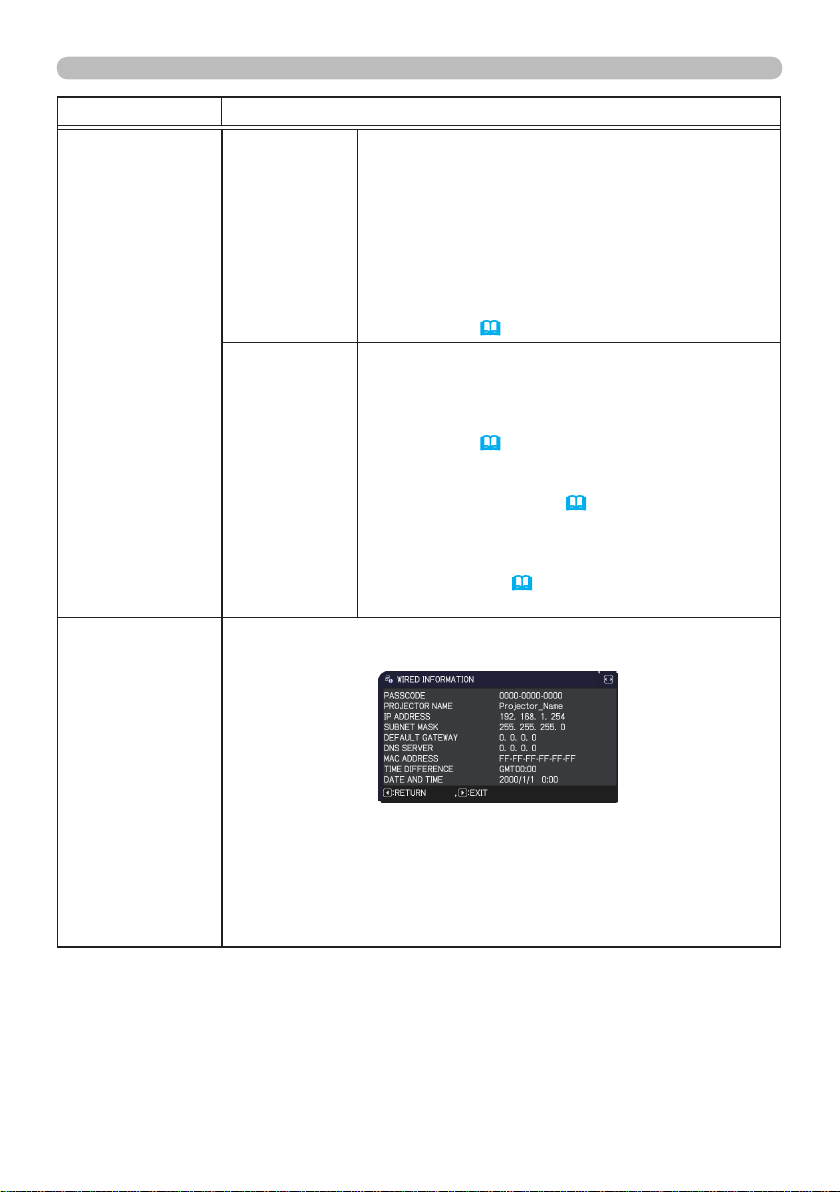
WIRED
INFORMATION
Selecting this item displays the WIRED INFORMATION dialog for
viewing the wired LAN settings.
• For details of PASSCODE, refer to the manual for “LiveViewer”.
• Only the first 16 characters of the PROJECTOR NAME are
displayed.
• IP ADDRESS, SUBNET MASK and DEFAULT GATEWAY indicate
“0.0.0.0” when DHCP is ON and the projector has not gotten address
from DHCP server.
(continued on next page)
Loading ...
Loading ...
Loading ...