Loading ...
Loading ...
Loading ...
13
Cook time
You can use the timer function to set a cook time for any
element. The element will turn off automatically once the
set time has elapsed.
9 CAUTION
▯ When using the timer, always keep an eye on the
cooktop and do not allow anything to boil over or
burn. Boilovers can cause smoke and foods and
oils may catch on fire if left on high temperature
settings.
▯ This function should not be used for long periods
of time, especially at high heat settings.
▯ Make sure the cooktop is turned off with the main
power switch after each use.
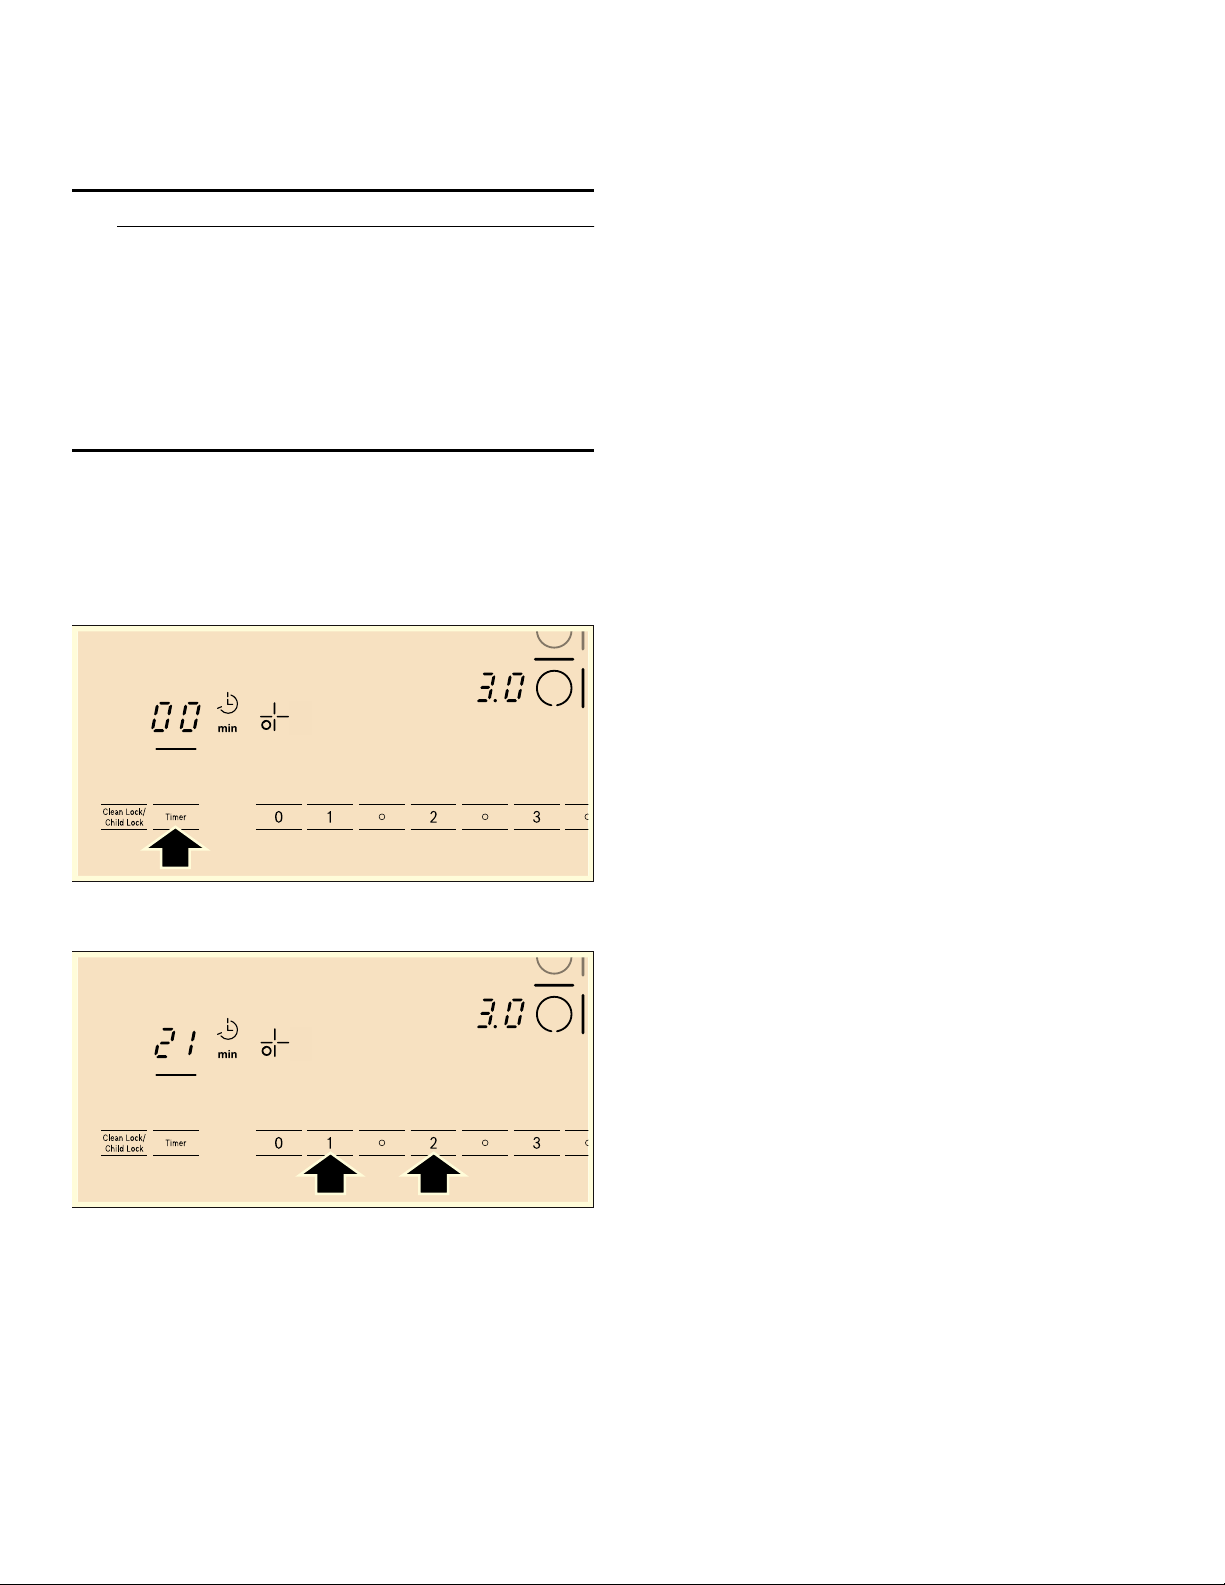
Setting the cook time
1.
Select the desired element and power level.
2.
Touch the Timer key. The ‹‹, min and __ indicators
light up on the timer display. The indicator for the
desired element lights up.
3.
Within the next 10 seconds, set the required time
using the number keys 1 to 9.
After a few seconds, the timer will start to count down.
The last programmed cook time will appear in the
display.
Once the cook time has elapsed
The element turnes off once the set cook time has
elapsed. You will hear a beep. The indicator ‹.‹ appears
in the element display and the timer display shows ‹‹.
Once you touch the Timer key, the indicators and the
beep are turned off.
Changing cook time
Select the element and touch the Timer key twice. Set
the new cook time using the number keys 0 to 9.
Cancelling cook time
Select the desired element and touch the Timer symbol
twice. The min, __ and
r indicators light up. Then
select 0 from the number keys until ‹‹ is displayed.
Automatic timer
With this function you may select a cook time for all
elements. Once an element is turned on, the selected
time will begin to count down. The element will
automatically turn off when the cook time has elapsed.
Instructions on activating the automatic timer are found in
the chapter "Basic settings".
Note: The cook time can be changed or cancelled for
any element:
Touch the Timer key several times until the $ indicator
of the required element lights up. Adjust the cook time
with touch keys 1 to 9 or deactivate with 0.
The timer
The timer can be set for periods of up to 99 minutes. It is
independent of the other settings. This function does not
automatically switch off an element.
Setting the kitchen timer
1.
Touch the Timer key. ‹‹ appears in the timer display.
The __, min and U indicators light up.
2.
Set the required time using the number keys 0 to 9.
After a few seconds, the __ indicator goes out and the
programmed time starts to count down.
Once the time has elapsed
A beep sounds. ‹‹ and U indicators light up. Touch the
Timer key. The indicators go out and the beep stops.
Changing the time
Touch the Timer key. The __ and U indicators light up.
Change the time using the number keys 0 to 9.
Clearing the time
Touch the Timer key. The __ and U indicators light up.
Touch the 0 key until ‹‹ appears on the timer display.
The U indicator goes out.
Notes
▯ If the set time is not displayed, touch the Timer key
several times until the U indicator lights up on the
timer display.
▯ The timer will be deactivated after a power outage.
▯ The automatic off function for an element and the timer
function can both be operated simultaneously.
Loading ...
Loading ...
Loading ...