Loading ...
Loading ...
Loading ...
49-1000364 Rev. 1 23
INSTALLATION INSTRUCTIONS
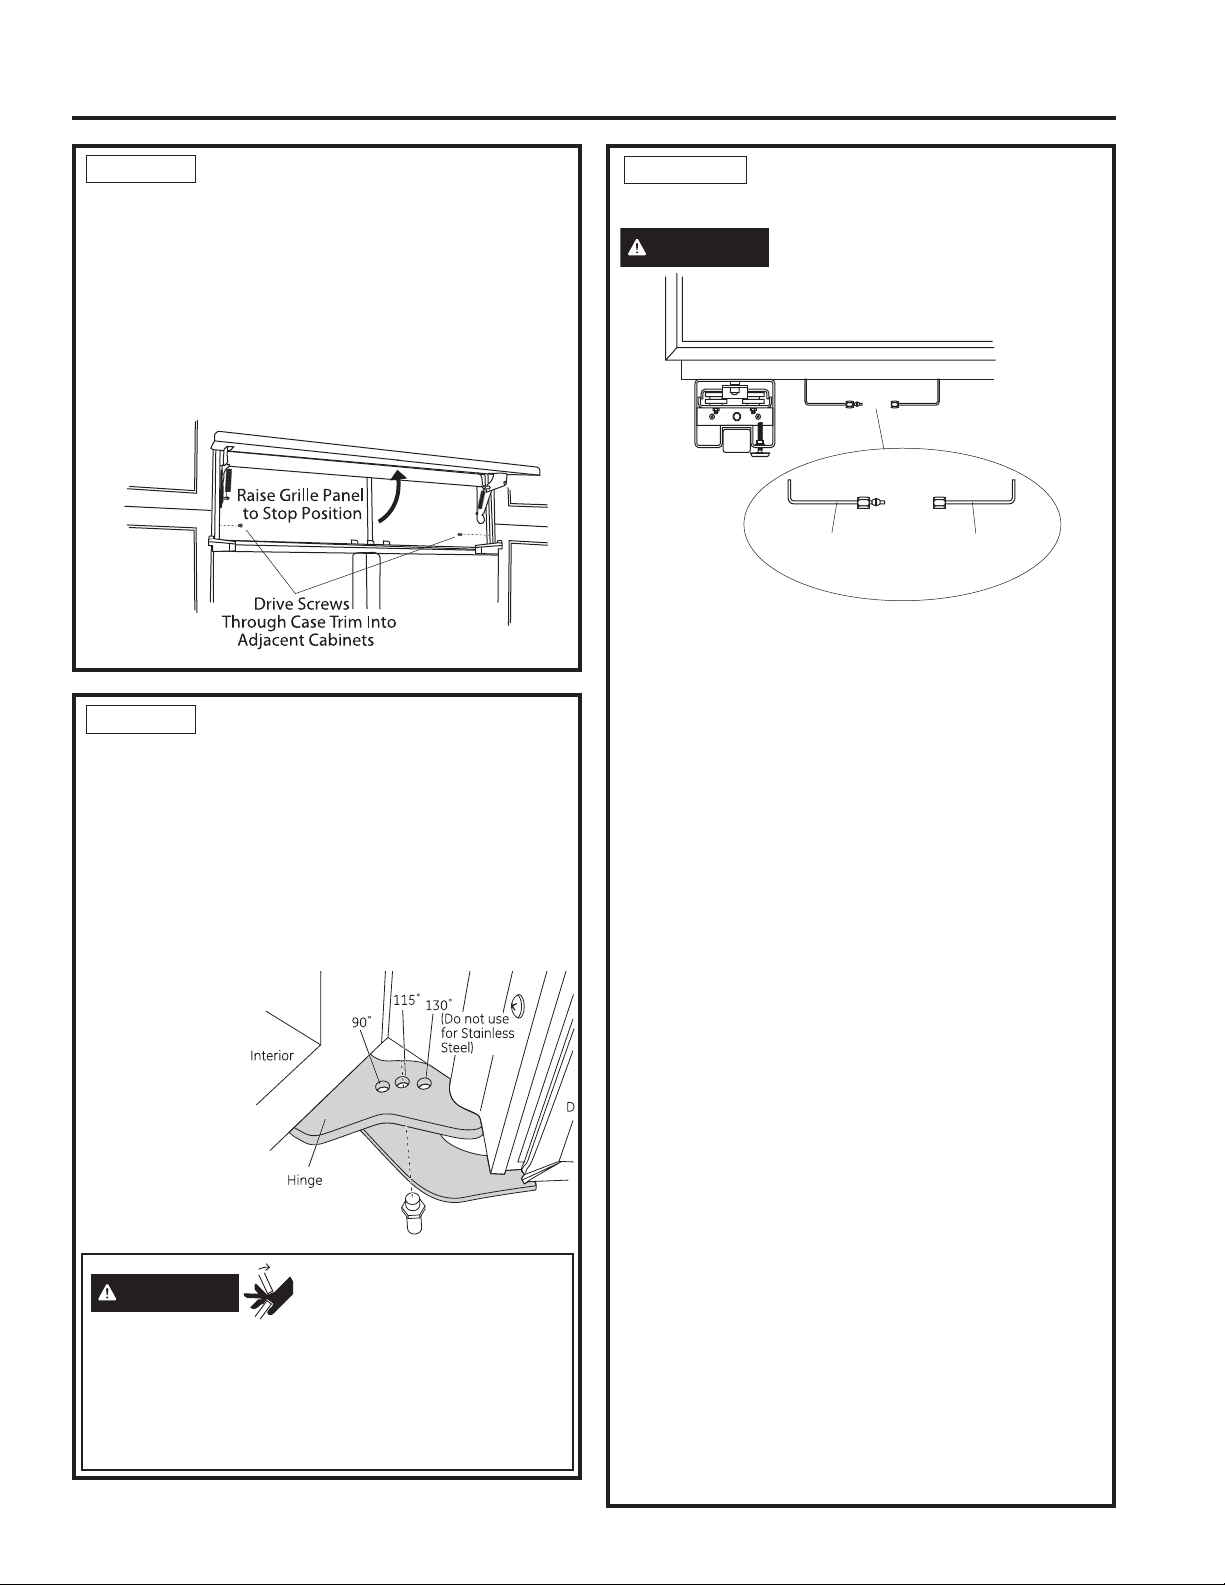
STEP 9 ADJUST DOOR SWING
NOTE: This refrigerator has a 2-position door stop.
When space does not allow the door to swing open
fully to 115°, you may change the door swing to a
90° opening. The 130°, door swing option is not to be
XVHGIRUWKH6[6´DQG´PRGHOVSkip this step
if door opening is satisfactory for your installation
situation.
• Open the door to view the bottom hinge.
Note the door stop pin locations. The pin is factory
installed in
the 115°
position.
• Close the
door. From
below, use
pliers to
unscrew the
door stop
and reinstall
into the 90°
position.
8VHD´ELWWRGULOOWRSLORWKROHVWKURXJKWKH
metal clearance holes and into the wood soffit.
7KHKROHVVKRXOGEHFHQWHUHGLQWKHVRIILWRUD´
(1.91 cm) min. wood brace. The brace spanning the
enclosure must be securely fastened to cabinets on
both sides.
,QVWDOOIRXU´GU\ZDOOVFUHZVLQWRWKHSLORWKROHV
'ULOOVFUHZVLQWRDGMDFHQWFDELQHWVWKURXJKVLGHFDVH
trim.
WARNING
Door Trim Pinch Point
Hazard
,PSURSHULQVWDOODWLRQFDQOHDGWRDILQJHUSLQFKSRLQW
KD]DUGEHWZHHQWKHVLGHGRRUWULPDQGWKHFDELQHWV
when operating the door, especially with children.
7RPLQLPL]HWKLVULVN\RXPXVWIROORZWKHLQVWDOODWLRQ
instructions for cabinet dimensions, trim assembly,
and door stop angle.
STEP 8 ALTERNATE ANTI-TIP
PROCEDURE (Cont.)
Installation Instructions
STEP 10 CONNECT WATER
SUPPLY
WARNING
Connect to potable water supply
only.
• Locate and bring the tubing to the front of the
cabinet.
• Turn the water on to flush debris from the line. Run
about a quart of water through the tubing into a
bucket, then shut off the water.
Copper Tubing:
6OLSD´QXWDQGIHUUXOHSURYLGHGRYHUERWKHQGV
RIWKHFRSSHUWXELQJ,QVHUWWKHWXEHLQWRWKHXQLRQ
fitting on the unit and tighten the nut to the union.
• Turn on the water to check for leaks.
SmartConnect
™
Tubing:
NOTE: The only GE Appliances-approved plastic
tubing is supplied in the SmartConnect
Refrigerator
7XELQJNLWV'RQRWXVHDQ\RWKHUSODVWLFZDWHUVXSSO\
line because the line is under pressure at all times.
Other types of plastic may crack or rupture with age
and cause water damage to your home.
SmartConnect
5HIULJHUDWRU7XELQJ.LWVDUHDYDLODEOH
in the following lengths:
¶P:;;
¶P:;;
¶P:;;
¶P:;;
,QVHUWWKHPROGHGHQGRIWKHWXELQJLQWRWKH
refrigerator connection. Tighten the compression nut
until it is just hand tight.
• Tighten one additional turn with a wrench.
2YHUWLJKWHQLQJFDQFDXVHOHDNV
• Turn on the water to check for leaks.
• Run dispenser, if available, for 2 minutes or 1 gallon
RIZDWHU,WLVQRUPDOIRUWKHGLVSHQVHUWRVSXWWHUIRU
the first few cups.
NOTE: Make sure excess tubing length does not
interfere with the toekick installation.
Refrigerator
Water Supply
House
Water Supply
Loading ...
Loading ...
Loading ...