Loading ...
Loading ...
Loading ...
Trouble shooting en
23
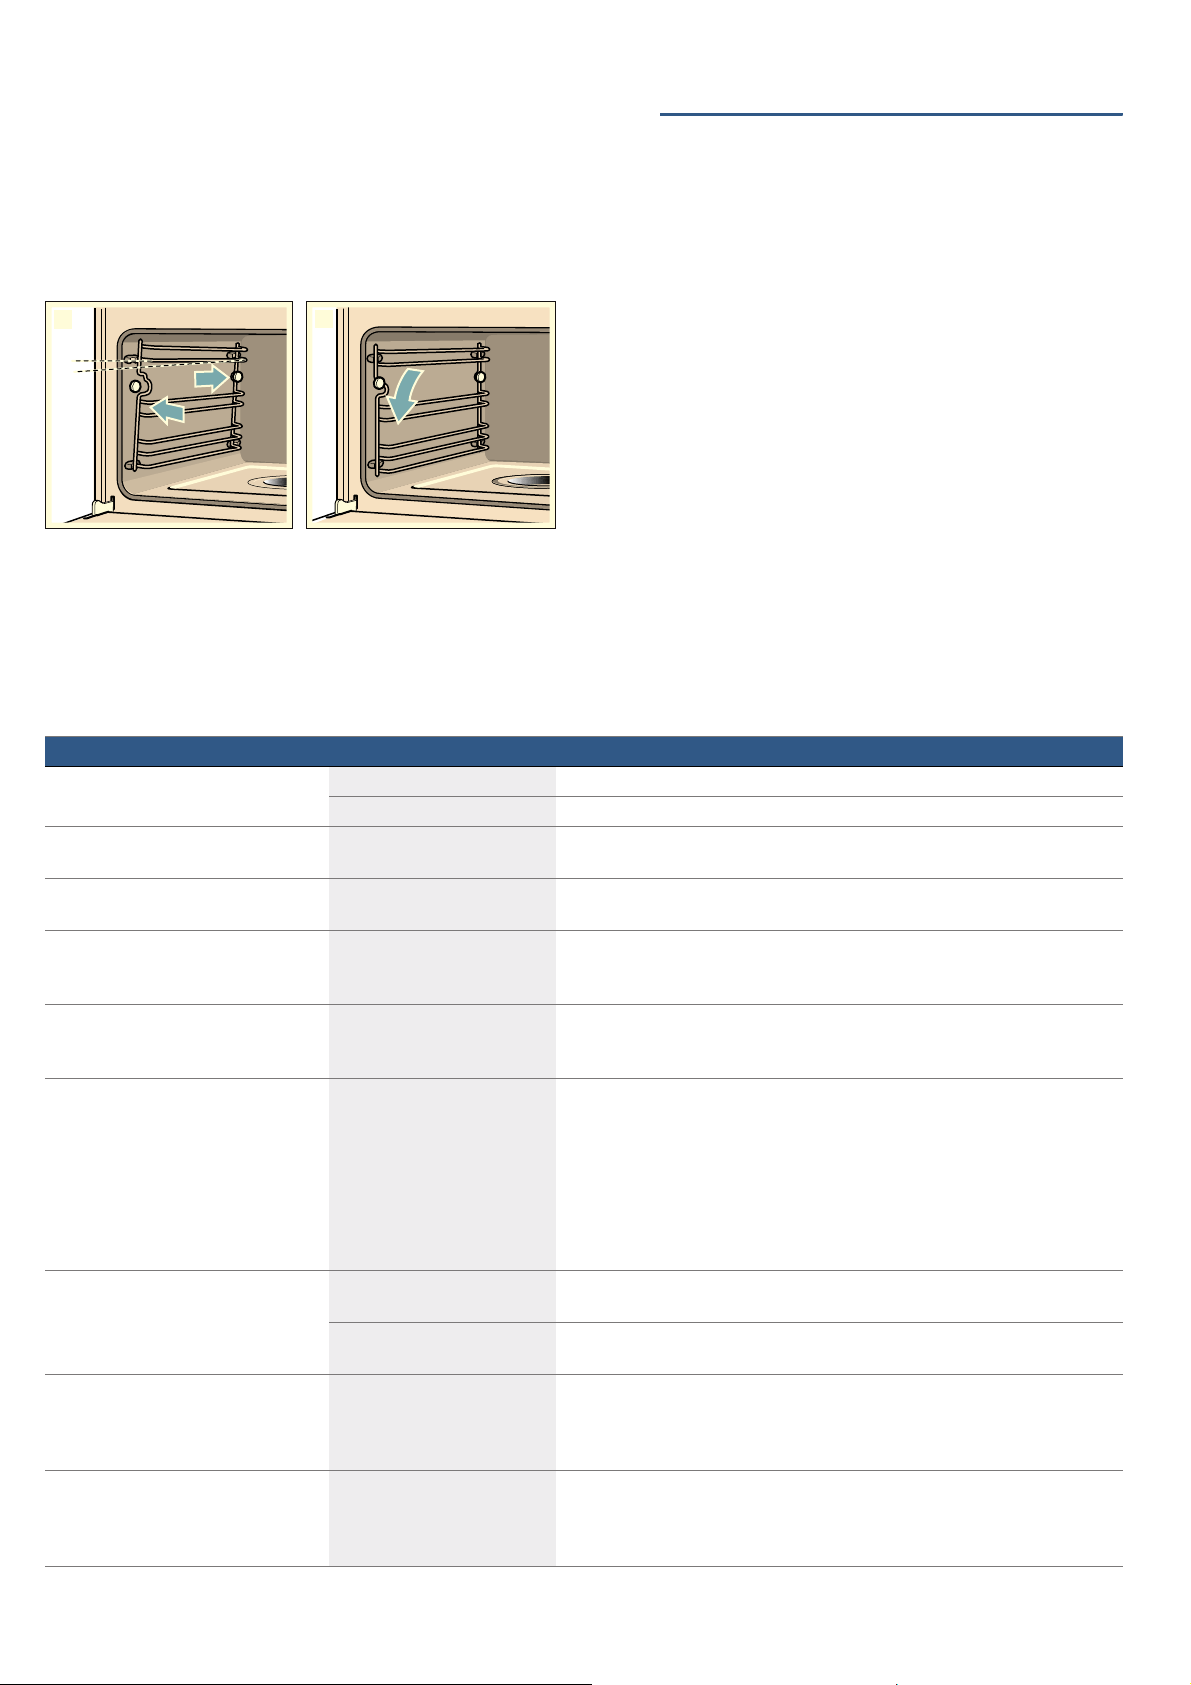
Attaching the rails
1. Position the rail so that the indentations are facing
upwards.
2. Hook the rail in at the back and push it towards the
rear until it engages (fig. #).
3. Hook the front of the rail onto the holder and press
down until it engages and is fixed level in place in
the appliance once more (fig. $).
Each set of rails only fits on one side.
3Trouble shooting
Tr oubl e s hoot i ng
If a fault occurs, there is often a simple explanation.
Before calling the after-sales service, please refer to the
fault table and attempt to correct the fault yourself.
Tip: If a meal does not turn out exactly as you wanted,
refer to the "Tested for you in our cooking studio"
section.Here, you will find plenty of cooking tips and
notes.
:Warning – Risk of electric shock!
Incorrect repairs are dangerous. Repairs may only be
carried out and damaged power cables replaced by
one of our trained after-sales technicians. If the
appliance is defective, unplug the appliance from the
mains or switch off the circuit breaker in the fuse box.
Contact the after-sales service.
Rectifying faults yourself
You can often easily rectify technical faults on the
appliance yourself.
If a dish does not turn out exactly as you wanted, you
can find many tips and instructions for preparation at
the end of the operating manual.
Fault Possible cause Notes/remedy
The appliance does not work. Faulty fuse. Check the circuit breaker in the fuse box.
Power cut Check whether the kitchen light or other kitchen appliances are working.
"Sprache Deutsch" appears on the
display.
Power cut Reset the language and the time.
The time does not appear when the
appliance is switched off.
Basic setting is changed. Change the basic setting for the clock display.
The appliance does not heat up; the
m symbol lights up on the display.
Demo mode is activated in the
basic settings.
Briefly disconnect the appliance from the mains (switch off the circuit breaker
in the fuse box) and then deactivate demo mode in the basic settings within 3
minutes.
The rotary selector has fallen out of
the support in the control panel.
The rotary selector has been
accidentally disengaged.
The rotary selector can be removed. Simply place the rotary selector back in
its support in the control panel and push it in so that it engages and can be
turned as usual.
The rotary selector can no longer be
turned easily.
There is dirt under the rotary
selector.
The rotary selector can be removed. To disengage the rotary selector, simply
remove it from the support. Alternatively, press on the outer edge of the rotary
selector so that it tips and can be picked up easily.
Carefully clean the rotary selector and its support on the appliance using a
cloth and soapy water. Dry with a soft cloth. Do not use any sharp or abrasive
materials. Do not soak or clean in the dishwasher.
Do not remove the rotary selector too often so that the support remains sta-
ble.
The appliance cannot be started The appliance door is not fully
closed
Close the appliance door
The appliance is not switched
off
Switch the appliance off and back on again
The appliance is prompting you to
wipe down the cooking compartment
and fill the water tank
The power supply has been
disconnected or the appli-
ance has been switched off
during the descaling process
Once the appliance is switched on again, rinse it twice
After switching on an operating mode,
a message is shown on the display
which indicates that the temperature
is too high
The appliance has not cooled
down sufficiently
Allow the appliance to cool down and switch the operating mode on again
Loading ...
Loading ...
Loading ...