Loading ...
Loading ...
Loading ...
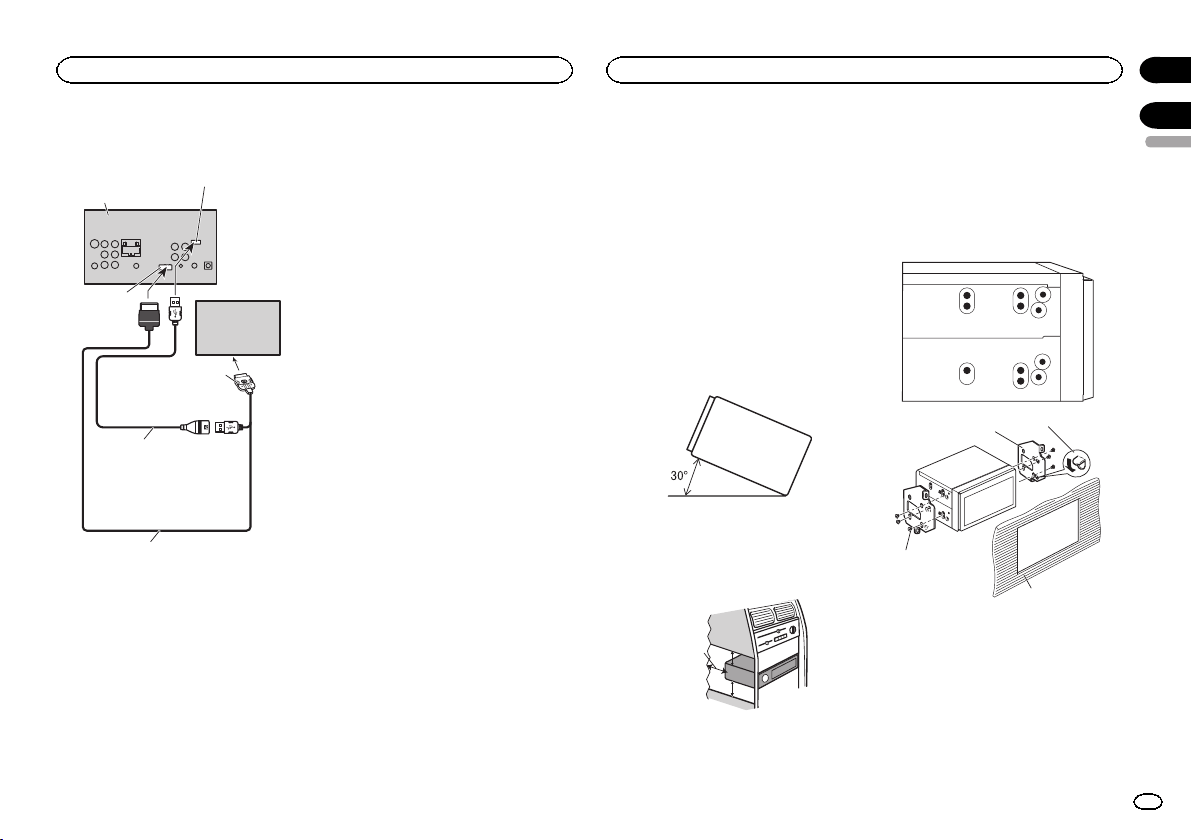
When connecting with optional
CD-IU201S cable
This product
1.5 m (4 ft. 11 in.)
Dock connector
USB cable
(Supplied with this unit)
Connect to separately sold
USB device.
USB/iPod input
iPod with video
capabilities
(sold separately)
RGB input
Interface cable
(CD-IU201S) (sold separately)
Notes
! Check all connections and systems before
final installation.
! Do not use unauthorized parts as this may
cause malfunctions.
! Consult your dealer if installation requires
drilling of holes or other modifications to the
vehicle.
! Do not install this unit where:
— it may interfere with operation of the vehicle.
— it may cause injury to a passenger as a result
of a sudden stop.
! The semiconductor laser will be damaged if
it overheats. Install this unit away from hot
places such as near the heater outlet.
! Optimum performance is obtained when the
unit is installed at an angle of less than 30°.
! When installing, to ensure proper heat dis-
persal when using this unit, make sure you
leave ample space behind the rear panel and
wrap any loose cables so they are not block-
ing the vents.
5cmcm
Leave ample
space
5 cm
5 cm
! To some types of vehicles, this unit cannot be
properly installed. In such case, use the op-
tional installation kit (ADT-VA133).
Installation using the screw
holes on the side of the unit
% Fastening the unit to the factory radio-
mounting bracket.
Position the unit so that its screw holes are
aligned with the screw holes of the bracket, and
tighten the screws at 3 locations on each side.
1
2
3
4
1 If the pawl gets in the way, bend it down.
2 Factory radio mounting bracket
3 Use either truss (5 mm × 8 mm) or flush sur-
face (5 mm × 9 mm) screws, depending on
the bracket screw holes.
4 Dashboard or console
English
Connection
49
Section
Installation
En
25
26
<CRD4703-B/N>49
Loading ...
Loading ...
Loading ...