User Manual for Microwave Oven
Check First
What to Check and Prepare Before Using Your Oven for the First Time
Checking Installation
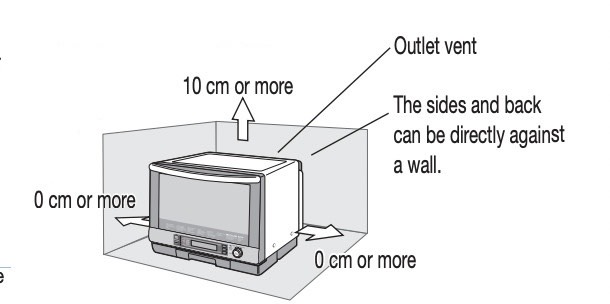
● When you install your oven, leave enough space for heat to radiate, following the diagram shown here.
Note: There is an outlet vent on the top of the oven towards the back. Heat radiates from this outlet vent.
● Although you can align the sides and back of the main unit directly against a wall or furniture, be sure to check the following.
• Is the wall or storage rack weak with respect to heat?
• Leave some space between the wall and oven, because contact with the oven may cause marks on the wall, depending on the wall material. If the wall behind the oven is a glass wall, is there a space of 20 cm or more?
Note: If the oven is close to a glass wall, differences in temperature may cause the glass to break.
● Do not install the oven near curtains or objects that are weak with respect to heat.
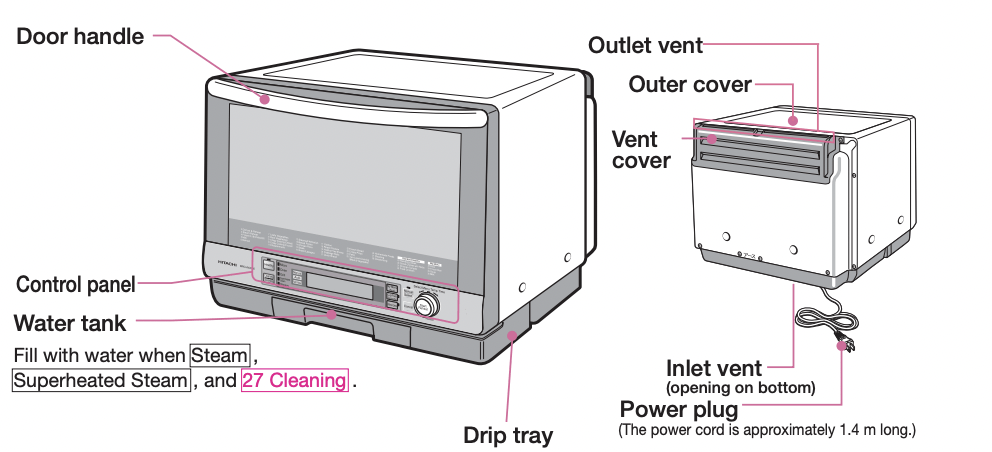
● Do not install the oven so that the inlet vent on the bottom is covered.
How to Turn On the Power
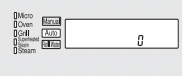
The power turns on when the door is opened ( is displayed in the display area).
|
● To save power when the oven is not in use, the power will not turn on when you simply insert the power plug into an outlet.
● When the door is opened once, the power turns on. The lights light up on the LCD display and is displayed in the display area.
Note: To turn off the light in the LCD display area, press
● When the door is left closed while the power is On, the light in the LCD display area turns off after three minutes. After about 10 minutes, the power turns off automatically. (Standby Power Zero Watt Function)
|
|

 
|
How to Run the Oven Empty (Deodorizing)
• The walls of the oven cavity are coated with oil to prevent rusting. When you use the oven for the first time, run the oven empty (deodorize) to burn off the oil by following the steps below.
| Preparation : Empty the oven cavity and close the door. |
|

|
|
1. Press  and select and select
When you push the button, you can make selections in the order 
• After the oven finishes running empty, the fan spins in order to cool the oven.
|
|
 |
|
2. Press  to start. to start.
When the procedure is complete, a beep will sound.
• After the oven finishes running empty, the fan spins in order to cool the oven.
|
|
 |
CAUTION
 Do not touch
Will result in burns, injury, and fire.
● When running the oven empty (Deodorizing), during the heating and also for some time after the process is complete, do not touch the main unit (door, outer cover, oven cavity, and surroundings).
● When running the oven empty (Deodorizing), do not place anything in the oven cavity.
● When running the oven empty (Deodorizing), there may be a smell of burning oil, or smoke may appear. Open a window or ventilate the area using a fan.
● Move small animals that are sensitive to smoke or odors, such as birds, to a different room.
● Use after the oven cavity has cooled down.
Zero-Point Adjustment (After the oven cavity has cooled down)
● Using Auto Cooking, you do not need to set the heating method, time, temperature, and so on. When you select a menu option and press Start, food is cooked automatically. To cook food more efficiently, the oven is equipped with a weight sensor that measures the weight of the container in which the food is placed. When you use the oven for the first time, perform the zero-point adjustment of this weight sensor by following the steps below.
|
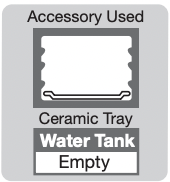
1. Set the ceramic tray on the bottom of the oven cavity, and close the door.
For information on how to set the ceramic tray
|
|

|
|
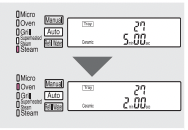
2. Close the door while 0 is displayed in the display area, and press and hold down for at least three seconds.
The buzzer beeps. The oven lamp turns on and “Sensing ” is lit. After a few seconds, the zero-point adjustment is complete. Zero-point adjustment is complete when the oven lamp and “Sensing ” is lit. After a few seconds, the zero-point adjustment is complete. Zero-point adjustment is complete when the oven lamp and “Sensing ” display turn off. ” display turn off.
|
|
 |
In order to maintain good cooking quality, perform the zero-point adjustment once a month.
Part Names / Control Panel / Accessories
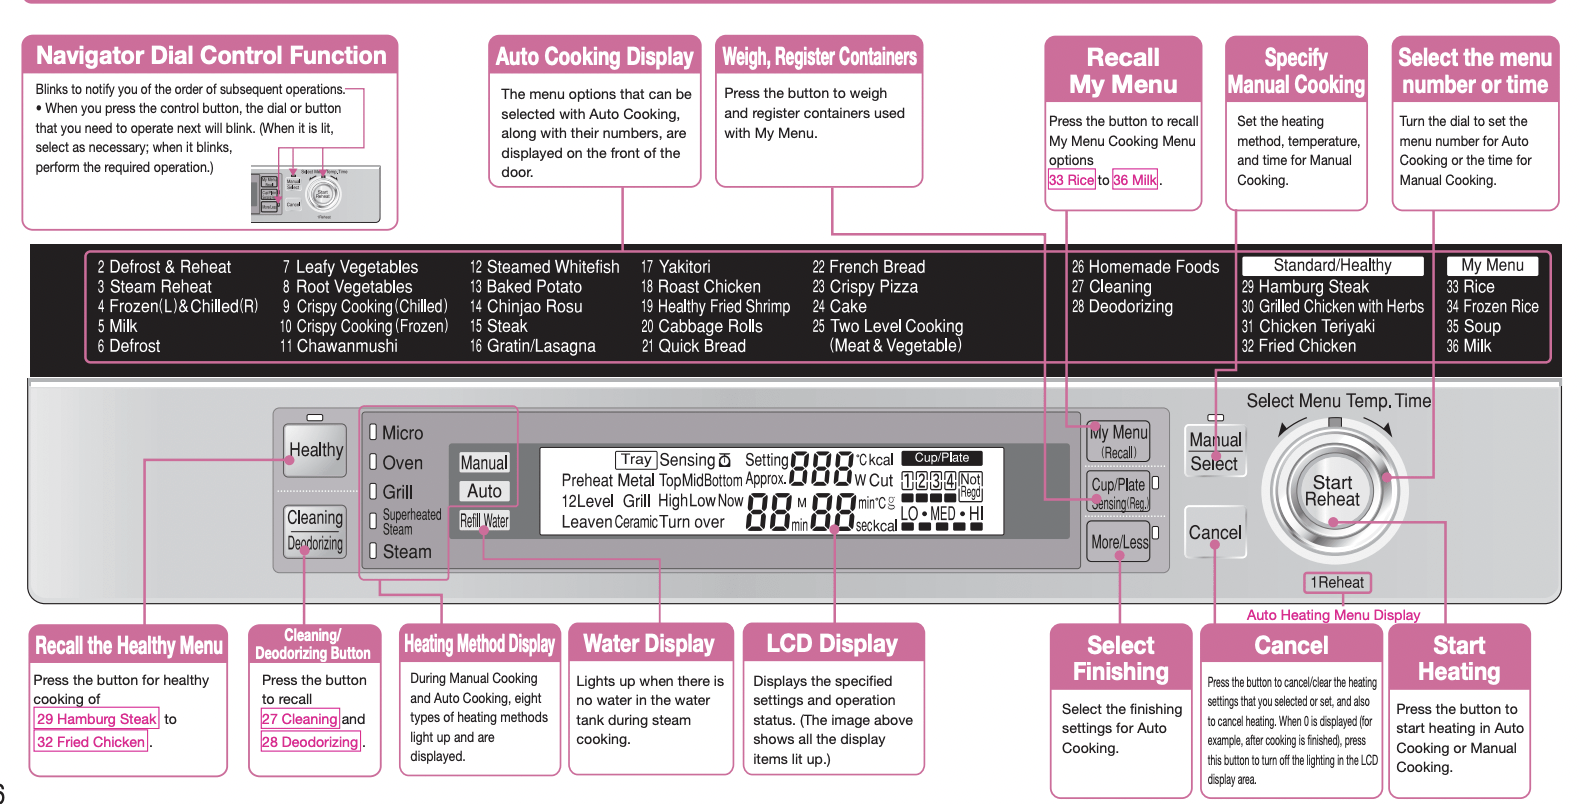
Control Panel Functions
How Heating Works
There are eight different heating methods.
Microwave oven
Heats foods using microwaves (high frequency radio waves). Microwaves have the following three properties:
|

Foods that contain moisture absorb microwaves
|

Microwaves pass through containers made of glass and ceramic
|

Metal reflects microwaves.
|
Microwaves that are absorbed by food excite the movement of water molecules, and this generates heat. The food heats up quickly due to this frictional heat.
 Speedy and economical.
 Because water is not used, nutrients are preserved.
 Color, shape, and taste are preserved.
 Food can be heated even after it is arranged.
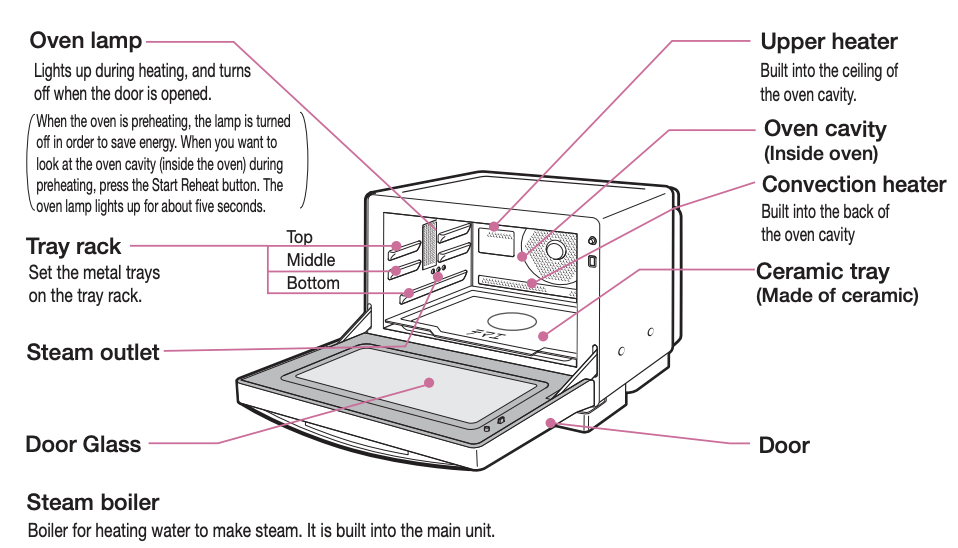
Grill
Food is heated by the upper heater, browning the food and making the inside soft.
Oven
The temperature inside the oven cavity is evenly maintained by the convection heater and upper heater, baking the food in a way that entirely envelops the food.
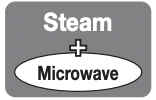
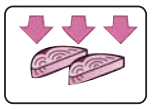
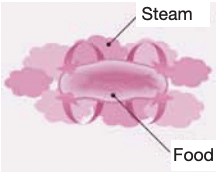
The oven cavity is filled with steam (water vapor around 100°C), and food is heated in conjunction with the microwave oven, grill, or oven. Moisture is added to the food, which makes it tender.
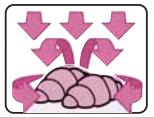
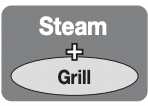
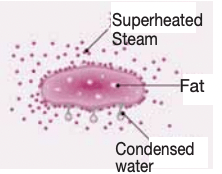
The oven cavity is filled with superheated steam, at a maximum temperature of about 400°C, and food is heated in conjunction with the grill or oven. Excess fat from meat and salt from fish are removed together with condensed water, making the food healthy
How to Use Accessories
How to Insert the Ceramic Tray
| How to Insert |
|
How to Remove |
|

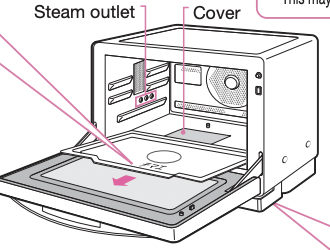
As shown in the diagram, hold the ceramic tray with both hands on either side of the area where there is no rim, and insert it into the oven cavity. Gently place it on top of the three weight sensors.
|
|

Using both hands, push the front of the ceramic tray towards the back with your fingers, and lift the ceramic tray. Next, place the ends of your fingers on the bottom of the ceramic tray, and slowly pull out the ceramic tray, using both hands.
|
CAUTION
Inserting the ceramic tray into, or removing it from, a heated oven cavity may result in burns. Use a thick, dry dishcloth or oven mitts.
How to Set the Legs of the Super Grill Tray Unit
| How to Set the Legs |
How to Remove |
|

Hold the center part of the legs and slowly open them out until you hear a click sound. Before using it, place the super grill tray with its legs opened on the center of the ceramic tray
|

Slowly remove the super grill tray unit together with the ceramic tray.

Slowly remove the super grill tray unit together with the ceramic tray
CAUTION When removing it from the inside of a heated oven cavity, use a thick, dry dishcloth or oven mitts. (The food may slip, resulting in burns.)

How to Close the Legs
Turn the super grill tray unit upside down and place it on top of a level surface. Where the leg is attached to the tray near the arrow on the back of the tray, 1 pull the leg towards you, and 2 collapse it towards the center of the tray to fold it. 3 Close the legs until they lightly touch the super grill tray unit. (The legs will come in contact with the convex part and become fixed.) If you force the legs to fold, the area where the legs are attached to the super grill tray unit may be damaged. Also, be careful not to get your hands caught between the legs and the tray. Note: If food or the like is clogging the area near where the leg is attached to the super grill tray unit, use a toothpick or the like to remove the obstruction.
|
How to Maintain Your Super Grill Tray Unit
The surface of the super grill tray unit is coated with fluorine. A heating element (ferrite rubber) that absorbs microwaves and generates heat is attached to the back surface.
● When you perform maintenance of the super grill tray unit, use a mild detergent for kitchen use to remove dirt from both the front and back sides of the unit, with a soft object such as a sponge scrubber. Afterwards, remove the detergent completely using a well-wrung, damp cloth.
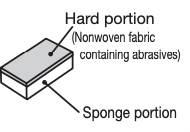
(Reminder) When you perform maintenance of the super grill tray unit, do not scrub the front and back surfaces with the hard part of a sponge scrubber or a nylon scrubber that contains abrasives.
Note: Will cause the fluorine on the surface to peel off, or result in the heating element being damaged.
■ When food is stuck to or burned onto the surface of the super grill tray unit, place the super grill tray unit in hot water (approximately 40–50°C) for about 10 minutes. After soaking the stuck food, remove the food using a soft sponge or the like with a mild detergent for kitchen use.
(Reminder) When you use the super grill tray unit for the first time, there may be an odor from the heating element (ferrite rubber) after cooking food, but this does not affect the cooking of the food. The odor will gradually go away with use of the oven.
How to Use the Water Tank
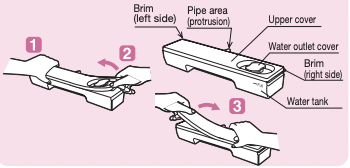
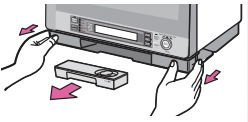
How to Remove
Remove from the main unit Grasp the water tank with your fingers as shown, and pull it out horizontally
How to remove the water tank cover
- Lightly grasp the body of the water tank, but make sure you do not touch the pipe area.
- Using your fingers, push up right side of the brim of the cover, and lift up the entire right side.
- Using your fingers, push up the left side of the brim, lift up the entire left side, and remove the cover.
How to Fill With Water
- Turn the water outlet cover to the left.
- Keep the water tank horizontally level, and fill it with water to the full line.
- Align the water outlet cover with the
 symbol, and secure and close the cover. symbol, and secure and close the cover.
• When the water tank is tilted, water may spill. When you handle the water tank, be sure to keep it level.
|
|


|
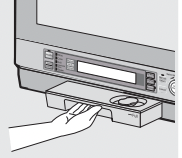
Insert into the Main Unit
Hold the water tank horizontally level, insert it into the main unit, and push it in securely towards the back.
• If the water tank is not inserted securely, water may leak or there may not be enough steam.
• Check that the drip trays are inserted all the way to the back, and push the water tank in so that it is in about the same position as the drip trays on either side -> P. E-52
CAUTION
(Will result in deformation and damage)
 ● Do not fill the water tank with anything other than water. (Filling the water tank with alcohol and the like may result in ignition.)
(Will result in health concerns)
 ● Fill the water tank with fresh water for each use. (The water turns into water vapor and directly contacts food. For sanitary purposes, use fresh water.)
(Will result in burns)
When steam and superheated steam are used in conjunction with the oven or grill, be careful: the water that remains in the water tank will be hot.
Reminder
●Do not use the water tank in environments at or below 5°C. (Steam and superheated steam cooking will not cook food well.)
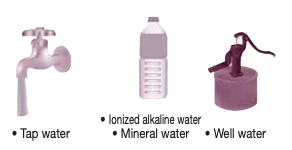
●For the water, use distilled water or soft mineral water. When you use the following types of water, wash the water tank every time you use it, as it is easy for mold and bacteria to develop.
●After steam cooking is complete, clean the water tank and drain the water from the pipe. If it is used without being cleaned, mold and bacteria will reproduce easily.
●When you use steam and superheated steam, fill the water tank with water up to the full line, and securely insert the water tank into the main unit. When the amount of water becomes low, or the water tank is inserted only halfway, Refill Water is displayed, the steam stops, and the food is not cooked well.
●When you are not using the water tank, leave it empty and installed in the main unit.
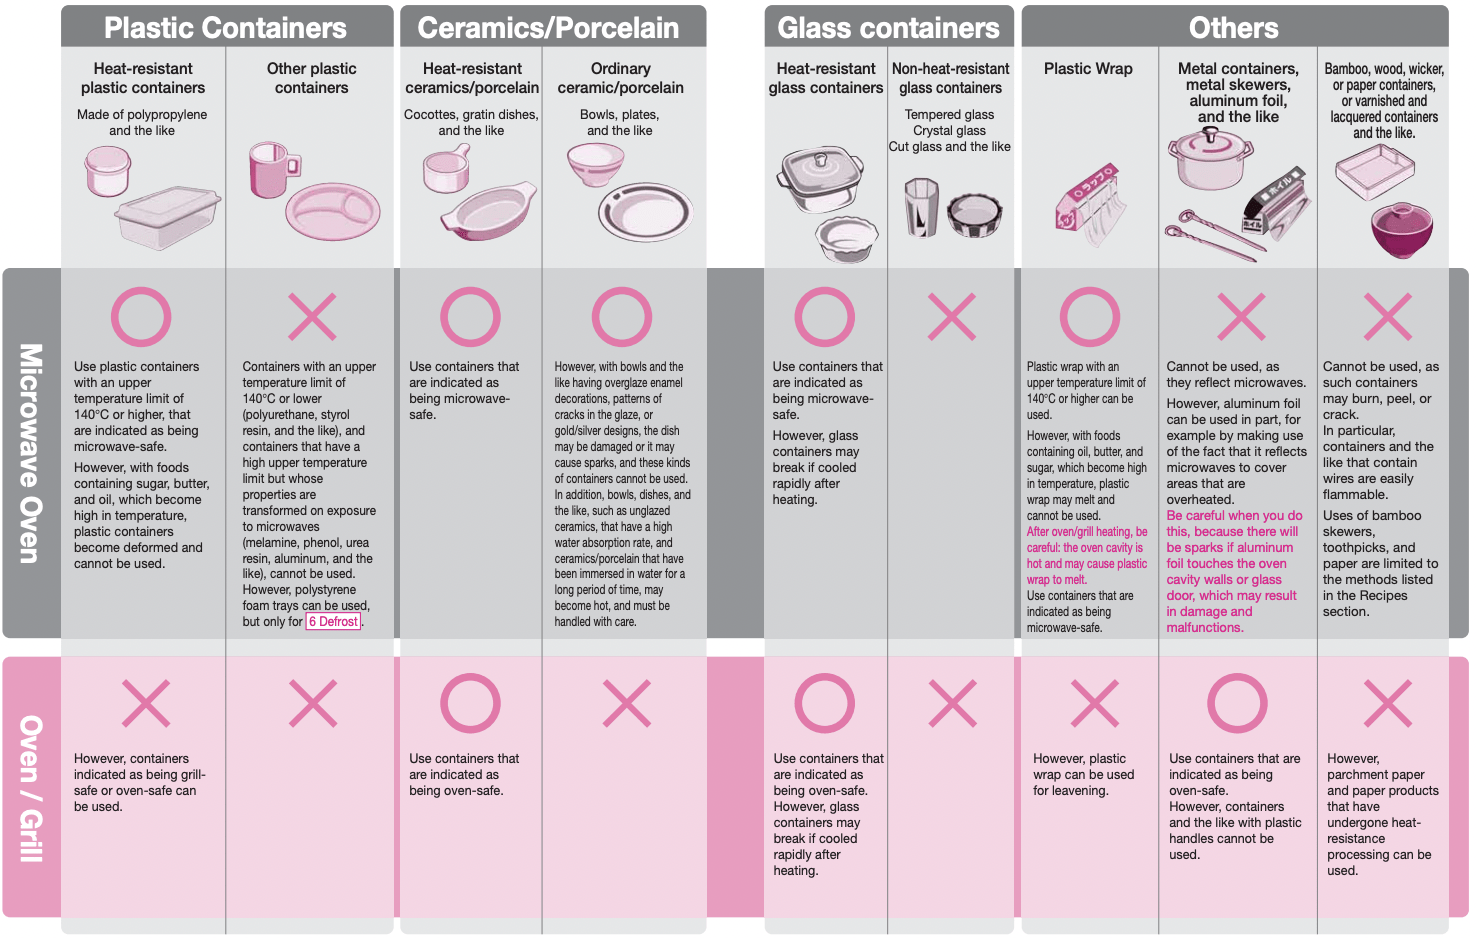
Useable and Unusable Containers
(Only use utensils that are suitable for use in microwave ovens.)
■ Do not make any mistakes selecting microwave heating, oven heating, or grill heating. If you make a mistake in your selection, the food or container may give off smoke or ignite. Before you start heating, check the type of heating selected.
■ For plastics, refer to the upper temperature limit label.
■ Do not use any containers for which the materials or upper temperature limit is unclear
How to Use the Oven, and Helpful Tips
Tips for Using the Oven Efficiently
Amount of Food and Size/Weight of Containers
Reheat
| Amount of food |
Size/weight of containers |
|

With Manual Cooking

With Auto Cooking or Manual Cooking
|

The food should fill about 70–80% of the container.
The weight of the container should be about the same as the amount of food.
|
Cook
|
Auto Cooking

|
For Auto Cooking and Manual Cooking, use the amounts of food and containers described in this manual.
For the amounts of food and appropriate containers, refer to the relevant pages in this manual.

|
|
Manual Cooking

|
Auto Cooking (Reheat)
Reheating Rice and Side Dishes
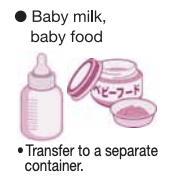
Reheats room-temperature food and chilled food. Beverages (milk, coffee, soy milk, tea, water, and the like) are heated using 5 Milk or My Menu 36 Milk .
Frozen foods (home freezing) are reheated using

Note The power turns on when the door is opened.
Preparation Place the container or plate of food in the center of the ceramic tray, and close the door.
1. Press  to start.
(Room temperature and chilled foods)
- The menu number
 is displayed, and heating starts automatically.
Note: To reheat frozen foods, turn , and select menu number 2
To adjust doneness (Adjust before the heating time is displayed.)
When you hear the completion sound, remove the food.
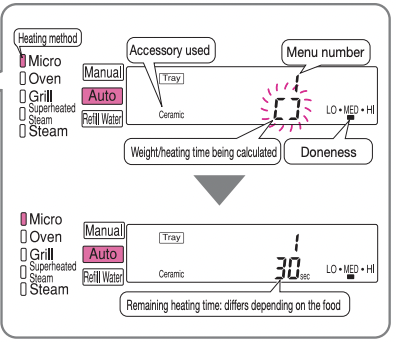
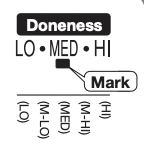
How to adjust doneness
Doneness is automatically set to MED (Standard). To adjust doneness, press  while the doneness lamp is lit, and set the mark to the desired position.
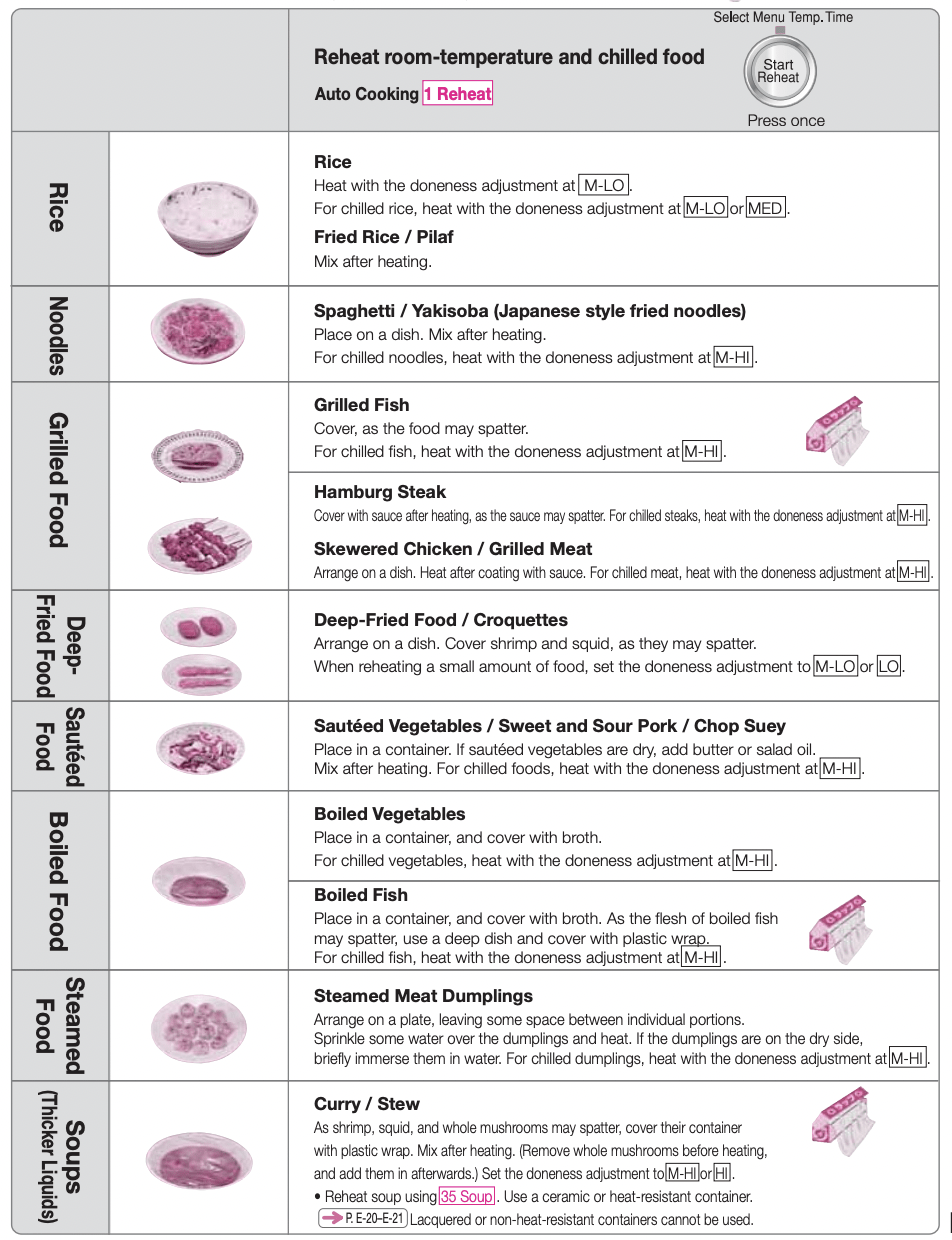
● When reheating rice, use 1 Reheat and M-LO to adjust doneness. When defrosting and reheating frozen rice, heat using 2 Defrost & Reheat
Reheat the following foods using Manual Cooking and keep an eye on the food as it cooks
Cannot be reheated using  ,
,  or
or 
Foods That Can Be Reheated, and How to Reheat Them Skillfully
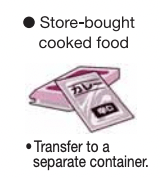
■ With store-bought side dishes or home-cooked food, try to make the weight of the food and the weight of the container about the same.
■ The maximum amount of food that can be reheated at a single time is approximately 100 –1,800 g (food and container combined).
■ The temperature of the food should be approximately 20°C for room-temperature food, and 0-10°C for chilled food.
■ The optimum amount of food that can be reheated using My Menu is one serving.
Maintenance
Maintaining the Main Unit/Accessories
●The oven should be cleaned regularly and any food deposits removed.
●Failure to maintain the oven in clean condition could lead to deterioration of the surface that could adversely affect the life of the appliance and possibly result in hazardous situation.
Ceramic tray
Wipe with a well-wrung wet dishcloth.
● For dirty spots that are difficult to remove with a dishcloth, take out the ceramic tray, apply a store-bought cream cleanser (with an abrasive compound), and scrub and rinse the area.
The ceramic tray may break if it is bumped or struck.
● If the ceramic tray becomes cracked or broken, do not use it in that condition. Please consult with the Service Center. Using the ceramic tray if it is damaged will result in malfunctions.
Steam outlet
Wipe with a well-wrung wet dishcloth.
● Some white spots may remain after you use steam. Wipe the steam outlet frequently with a well-wrung wet dishcloth.
Interior walls, front, inside of door, cover in oven cavity
Wipe with a well-wrung wet dishcloth.
● Wipe off drops of water on the inside of the oven cavity with a well-wrung wet dishcloth.
●If there is excessive dirt, squeeze some mild detergent for kitchen use onto a cloth, and wipe the dirt with the cloth. Make sure to wipe off the detergent afterwards with a well-wrung wet dishcloth.
● Do not use force to scrub the cover. This may result in damage, cracks, and chips.
Exterior • Door seal
Wipe with a soft cloth.
● If there is excessive dirt, squeeze some mild detergent for kitchen use onto a cloth, and wipe the dirt with the cloth. Make sure to wipe off the detergent afterwards with a well-wrung wet dishcloth.
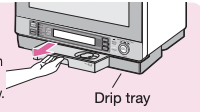
Drip tray
The drip tray can be removed and washed. After you remove the water tank, place your fingers on the indentations in the front on the left and right sides, and pull out the drip tray by lifting it up slightly and pulling it towards you.
Squeeze some mild detergent for kitchen use onto a sponge, remove the dirt, and rinse with water. Be sure to wipe off the water thoroughly.
Remove the drip tray if you lift up the oven.
• When you insert the drip tray, push it in firmly towards the back until you hear a clicking sound. (When the drip tray is not inserted securely, there will be water leakage and insufficient steam.)
Inside of door on the front
● As there is a gap in the joined sections, be careful not to spill any beverages or soups.
Super grill tray unit · Metal tray · Water tank
Squeeze some mild detergent for kitchen use onto a sponge, remove the dirt, and rinse with water. Be sure to wipe off the water thoroughly.
● If the metal tray is immersed in an acidic water solution such as vinegar or baking soda, or in an alkaline water solution, the surface may become bleached.
● Do not place the water tank inside a dishwashing dryer, dish dryer, or dishwasher. The water tank will become deformed and damaged.
● For information on cleaning the super grill tray
If one of the legs of the super grill tray unit comes off, reattach it as described below.
As shown in the diagram below, insert one side of the leg parallel to the other side, push down so that this side of the leg is against the protruding part, and then insert the other side of the leg.
Protruding part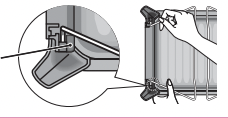
CAUTION
(Will result in rusting)
 Do not scrub the metal tray or rack with a metal scrubbing brush or a sharp object.
(Will result in injury and damage)
Do not scrub the ceramic tray with a metal scrubbing brush or sharp object.
(Will result in rusting, electrical shock, and malfunctions)
Do not spray water onto the outer cover, door, or control panel, or inside the oven cavity
(Will result in scratches and deformation)
Do not wipe the control panel or door with oven cleaners, thinners, benzene, glass polish sprays, bleaching agents, and so on.
★If you use disposable wet wipes, use them according to the instructions provided for the wet wipes.
★Do not use a steam cleaner.
Do not use harsh abrasive cleaners or sharp metal scrapers to clean the oven door glass since they can scratch the surface, which may result in shattering of the glass.
(Will result in sparks, rusting, foul odors)
Do not leave any food crumbs or juices on the inside walls of the oven cavity. The dirt will become difficult to remove.
● The inside of the oven cavity is treated with a coat of paint. As it is easily scratched, do not scrub it with a hard object such as a scrubbing brush.
● Smoke may occur during cooking.
(Will result in injury and damage)
Do not bump or strike the ceramic tray.
How to Drain the Water
After steam cooking is complete, drain the water from the pipe.
Insert the ceramic tray and close the door.

1 Check to make sure that 0 is shown in the display area, and pull the water tank out from the main unit.
2 Press  and select

3 Press and start.
When you hear the completion sound, draining is complete.
Wipe off the drops of water on the inside of the oven cavity using a well-wrung wet dishcloth.
How to Clean the Oven Cavity
Steam is generated, making it easy to wipe off the dirt inside the oven cavity.
Insert the ceramic tray and close the door.
- Check to make sure that 0 is shown in the display area, and insert the water tank into the main unit.
- Press
 and select 27 Cleaning .
- Press
 and start.When you hear the completion sound, clean the oven cavity according to the following procedure.
- Wipe off the dirt after the oven cavity has cooled down.
- After you finish cleaning the oven cavity, drain the water from the pipe (inside the main unit). For the operating procedure, refer to How to Drain the Water at the top of this page.
When Food Does Not Turn Out Well
In order to ensure that food is cooked efficiently, perform zero-point adjustment once a month
| Cooking results are not good. |
● Are you using the correct cooking procedure, wrapping method, food amount, accessories, containers, and so on? (Check this manual again.) For Auto Cooking, if the food is undercooked or overcooked even after you check these points, perform zero-point adjustment of the Triple Weight Sensor.
● If you cook consecutive batches of cakes and cookies, use the metal tray after it has cooled down. If the metal tray is too hot, it can result in the food being burned.
|
| Food is not cooked well when cooking based on oven recipes from a store-bought cookbook, or when store-bought dough is used. |
Use the temperature and time for a similar menu option in the Recipes section as a reference, and cook the food using Manual Cooking and check on it as it cooks |
| During Auto Cooking, food is undercooked or overcooked |
Perform zero-point adjustment of the Triple Weight Sensor. |
Reheating Rice
| Rice is not heated The doneness is uneven. |
●Are you placing the rice in a plastic container and then heating it? Heat the rice using a ceramic/porcelain container (a bowl or the like).
●Heat with the rice placed in a container (a bowl or the like) of a size and weight that match the amount (weight) of the rice.
●When you reheat two to four servings at once, place the rice in containers of the same weight and size, arrange the containers around the center of the ceramic tray, and then heat.
|
| Rice is too hot. |
●Are you using a container that is too large relative to the amount (weight) of rice?
●Reheat using 1 Reheat and the doneness adjustment M-LO.
●You can cook food the way you like it by reheating using My Menu .
|
| Rice is not heated efficiently using 3 Steam Reheat . |
●Fill the water tank with water up to the Full line, and then heat.
● Place the rice in a container (a bowl or the like) and heat without covering it with plastic wrap or the like.
|
| Rice is dry. |
●Use 3 Steam Reheat , or when you heat using 1 Reheat at the doneness adjustment M-LO, spray water on the rice before heating to make it moist. |
| Frozen rice is not heated The doneness is uneven. |
●Heat with the frozen rice placed on a container (a flat dish). When frozen rice is heated when it is just wrapped in plastic wrap without being placed on a container (flat dish), it will not heat well.
●Are you placing the rice in a plastic container and then heating it? This will result in insufficient and uneven heating.
●The size and weight of the container (flat dish) you use should match the amount (weight) of the frozen rice.
●When you freeze rice, divide it into single servings (about 150 g), and form square blocks that are two to three centimeters thick.
●When you reheat two or more blocks of frozen rice, heat blocks that are the same weight and size. Doing otherwise will result in uneven heating.
●When you reheat two or more blocks of frozen rice, arrange them with a space between them, and do not stack the blocks on top of each other.
|
| Frozen rice is too hot. |
●Are you using a container that is too large relative to the amount (weight) of rice?
●Has the rice started to melt? Heat the rice immediately after taking it out of the freezer.
●You can cook food as you like it by reheating using My Menu .
|
Reheating Milk
| The milk is too hot. |
●Is the amount (weight) of milk too small? When the amount of milk is less than half that of the container, reheat using Microwave 600W .
●Are you reheating lukewarm milk?
●Did you press the wrong button? The milk will be hot if you heat it using 1 Reheat .
|
| The milk is too hot. |
●5 Milk registers the scale of doneness adjustment. Check the setting of the scale.
● You can heat milk as you like it by reheating using My Menu .
|
| The milk is lukewarm. |
● Are you using a lightweight container relative to the amount (volume) of milk?
● Are you heating the milk as-is, in the store-bought carton? Heat the milk in a mug or the like.
● Check the scale set for the doneness adjustment.
● Heat with the milk placed in the center of the ceramic tray. When you heat two to four servings at once, make the amounts (volumes) about the same, arrange them around the center of the ceramic tray, and then heat them.
● You can heat milk as you like it by reheating using My Menu .
|
Reheating Side Dishes
| Food is not hot even if reheated. |
● Are you simply reheating the food only, without using a container and 1 Reheat ? Place the food in a container of a size and weight that matches the amount (weight) of food, and reheat.
● Food will not heat if it is in a metal container or covered with aluminum foil.
● Are you heating the food with it placed in a plastic container? Plastic containers are too light, and will result in a short heating time being set.
● Place the food in the middle of the ceramic tray and heat it.
● Use the doneness adjustment that matches the food type and storage conditions (room temperature, chilled).
|
| The food becomes too hot when reheated. |
● Are you using a container that is too large (heavy) relative to the amount (weight) of food? Use a container with a weight that matches the amount (weight) of food.
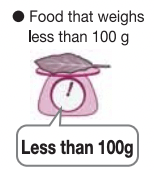
● Is the amount of food to be reheated too small? Make sure the weight is 100 g or more.
● Are you using Auto Cooking for additional heating of food that was heated to be lukewarm using Auto Cooking? For additional heating, use Microwave 600W or Microwave 500W and check on the food as it heats.
● Heat using Microwave 600W or Microwave 500W , and keep an eye on the food as it cooks.
|
| Curry and stew are not heated. |
● For foods with a certain thickness, cover the container with plastic wrap and heat by setting the doneness adjustment to M-HI or HI.
● Mix after heating.
|
| Frozen foods are not heated. |
● Heat using 2 Defrost & Reheat.
● Are you simply heating the food only, without using a container? Place the food inside a container of a size and weight that match the amount (weight) of food, and then heat.
● Are you placing the food in a plastic container and then heating? Plastic containers are too light, and will result in a short heating time being set.
● Place the food in the middle of the ceramic tray and heat.
|
Defrost
| Defrosting is insufficient, and food is hard. |
●Defrost the food so that it ends up being semi-defrosted (70% –80% defrosted). After heating, let the food stand for three to five minutes to let it naturally defrost nicely.
●You need to set the doneness adjustment according to the food (meat, sashimi, and so on) and the intended use (whether you will cook the food immediately after defrosting, or eat the food raw). For sashimi, set the doneness adjustment to LO .
●Place the food in the middle of the ceramic tray and heat it.
|
| The food boiled |
●Are you heating after filling the water tank with water? If food is heated with no steam being emitted, the food may be overcooked.
●Are you heating with the food placed on top of a plate? Heat with the food placed on top of a polystyrene foam tray.
●When the thickness and shape of the food are uneven, thin parts will easily become cooked. For fish and the like, wrap the tail with aluminum foil.
●When freezing, be sure to arrange the thickness of the food to be three centimeters or less.
●When heating, remove packaging such as plastic wrap.
● When defrosting two or more pieces of food at the same time, make sure that they are the same type and size of food.
●When defrosting sashimi, use 6 Defrost and set the doneness adjustment to LO .
|
Vegetables
| Vegetables are not boiled well. |
● Heat vegetables with them bundled in plastic wrap and placed directly in the center of the ceramic tray.
● If you heat a bundle of vegetables with a side with many layers of plastic wrap on top, the vegetables will not boil well.
● You can heat 100-500 g of leafy vegetables such as spinach, and 100-1,000 g of root vegetables such as potatoes. If there are too few or too many, the vegetables will not boil well.
|
| Leafy vegetables such as spinach are dry, or they are heated unevenly. |
●Bundle leafy vegetables such as spinach in plastic wrap after you wash them, without draining the water from the vegetables.
● When you bundle vegetables in plastic wrap, alternate stalks and leafy parts, and wrap them tightly. If the wrapping is loose, or if the vegetables are spread out, they will not be heated well.
|
| When you wrap fruit vegetables such as broccoli |
● Divide fruit vegetables such as broccoli into small clusters, arrange them in a single layer without any spaces between them, and wrap them tightly. |
| When root vegetables such as potatoes and carrots are being overheated. |
● Place the vegetables in the center of the ceramic tray with the side where the ends of the plastic wrap overlap on the bottom.
● Auto Cooking cannot be used for food weighing less than 100 g. Use Microwave 500W and check on the food as it heats.
|
| Potatoes were not heated sufficiently. |
Do not remove the plastic wrap immediately after heating. Flip the potatoes over and let them stand for a while, to let them steam. |
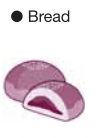
Bread
| Butter rolls |
The rolls do not rise well. |
● Did the dough leaven sufficiently? If the surface of the dough is dry during leavening, add some moisture by misting the dough.
● Are you handling the dough roughly when you form the shape? Handle the dough gently.
|
| Rolls are not browning evenly. |
If the sizes of the dough rolls differ, there will be unevenness when the rolls are baked. |
• Toasting requires time
Sweets
Cake
|
The cake does not rise well. |
● Did you beat the eggs well?
● Beat the eggs thoroughly so that you can make a stiff peak with the foam that drops from the end of the hand mixer or egg beater.
● Did you mix the mixture too much after adding flour or butter?
|
| No matter how much the eggs are beaten, they do not foam well. |
Eggs do not foam well when there is water or oil on the bowl used for beating them, or on the egg beater. Use fresh eggs. |
| The mixture is lumpy, and clumps of flour remain. |
● Did you sift the flour well while mixing it in?
● After adding the flour, mix steadily until the powder is blended in smoothly.
|
| The cake does not bake well. |
● For information on the temperature and baking time when you bake using Manual Cooking, refer to Heating Times for Manual Cooking.
● Bake the cake in a mold that is appropriate for its weight.
|
| Cream puffs |
The cream puffs do not rise well. |
●Did you measure the weight correctly?
●Refer to the information on how to make cream puffs . When you heat the butter and water in Step 2 , be sure to boil the mixture thoroughly.
|
| The sizes are uneven. |
●Did you squeeze out the dough in the same size portions? If the amounts of dough differ, there will be unevenness when the cream puffs are baked. |
| Cookies |
The color is uneven after baking. |
● Make sure that you divide the batter into portions of about the same size and thickness. |
• Grilled whole fish with intact internal organs cannot be grilled efficiently.
Troubleshooting
Does not function
|
The power does not turn on.
The oven does not respond, even when Reheat is pressed.
The oven does not respond, even when any button is pressed.
The oven does not heat.
|
●Has the plug come out of the electrical outlet?
●Is there a blown fuse in the fuse box, or is the breaker thrown?
●Is 0 shown in the display area? If nothing is displayed, open and close the door. 0 is displayed. (The Standby Power Zero Watt function is operating.)
●Is the door closed firmly?
●Does the oven function normally after reopening and reclosing the door?
●Does the oven function normally if you switch the breaker off and on, and open and close the door?
|
| The food is not heated at all. |
After pressing the Cancel key, are only M and 0 shown in the display area? The store use mode has been set.
Press three times and once. After repeating this operation three times, the M in the display area disappears and food can be heated.
|
| There is no steam. |
● Is there water in the water tank?
● Is the room temperature low? The water path may be frozen.
●If you continuously use water with a high concentration of calcium, a chalky substance builds up in the steam boiler, and steam may not be emitted. Ask the Service Center to repair the oven.
|
Noise · Sparks · Smoke · Foreign matter
| There is a clicking sound during heating. |
This is the sound that is produced when the microcomputer switches between the microwave and heater, and so on. |
| There is a static-like sound during heating |
This is the sound of the inverter functioning. |
| There is a sharp popping sound during microwave heating. |
This is the sound of bursting drops of water, which had adhered to the contact surface of the door and oven cavity. |
| There is a hollow popping sound during oven and grill heating |
Due to the high temperatures involved, there may be some cases where you hear the sound of the oven cavity expanding, but this is not a malfunction. |
| There are noises when using steam |
This is the sound of the air when water is absorbed from the water tank |
| Some time after cooking is complete, there is a clicking sound. |
This is the sound of the standby power turning off, which occurs when 10 minutes have passed after closing the door after cooking is complete. |
| There was smoke from the oven cavity during oven heating. |
Are the walls in the oven cavity dirty? Are there food crumbs or the like on the walls? Wipe them off with a well-wrung wet dishcloth. |
| The completion sound changes, or the sound turns off. |
Open and close the door to show 0 in the display area, then press Healthy , and press Cup/Plate Sensing for three seconds to switch between the melody sound and buzzer sound. In the same way, after pressing Healthy , press My Menu for three seconds to switch between the melody sound and no sound. |
| When the power plug is plugged in, there is a clicking sound or sparks. |
This is for charging the power circuit, and is not a malfunction. |
| There are sparks when using the microwave. |
● Are you using the metal tray by mistake?
● Are you using aluminum foil and heating food?
● Did you place aluminum foil on the super grill tray unit?
● Are the walls of the oven cavity, door glass, or the like in contact with aluminum foil or metal cooking goods?
● Are there food crumbs, or the like on the walls of the oven cavity or ceramic tray?
|
| There was smoke when using the oven for the first time. |
The oven cavity is coated with oil to prevent rusting. When you use the oven for the first time, run the oven empty to burn off the oil. |
| If smoke occurs during cooking. |
Leaving scraps of food, splattered oil, and the like in the oven cavity may cause it to smoke during cooking. Always clean the over after cooking. |
| A residue of white matter is encrusted on the steam outlet |
The components of the white matter are what remain when the minerals contained in tap water (calcium and magnesium) evaporate. The minerals are not harmful. Wipe them off using a well-wrung wet dishcloth. |
| The fan can be heard even after cooking is complete. |
After cooking is complete or when is pushed, there are cases where the fan may run for about 10 minutes in order to cool down electrical components, but this is not a malfunction. When cooling completes, the fan stops automatically. |
| There are times when there is odor on the super grill tray unit. |
The heating element that is welded onto the surface of the super grill tray unit may sometimes give off an odor, but this does not affect cooking. The odor subsides with use. |
Drops of water · Oven lamp · Heater
| During heating, the display area and door become cloudy, and drops of water fall. |
Depending on the menu option, the moisture from the food becomes water vapor, and the display area and the inside of the door may become cloudy. When dew forms on the inside of the door and drops of water fall to the floor, wipe them up with a dishcloth. |
| There are drops of water on the inside of the oven cavity. |
Due to steam cooking and depending on the menu option, the water vapor that is emitted from the food adheres to the inside of the oven cavity as drops of water. Wipe the drops of water off frequently. |
| The oven lamp turns off during oven preheating. |
During preheating, the oven lamp is turned off in order to save energy. Press during Oven preheating in order to light the oven lamp for five seconds. |
| There are times when the brightness of the oven lamp changes. |
During intermittent operation, the brightness of the oven lamp may change. This is not a malfunction. |
| There are times when the convection heater glows, and times when it does not glow. |
To make the temperature in the oven cavity constant, the power distribution of the convection heater is intermittent. |
Settings
| Sometimes it is not possible to set the temperature to 300°C. |
When the oven cavity is hot or preheat No, the maximum temperature that can be set is 250°C. |
| There are times when the set temperature changes. |
During Oven heating (preheat Yes ), the operation time at 300°C is about five minutes. Afterwards, the temperature automatically switches to 250°C. |
| Display of the oven cavity temperature during preheating increases or decreases by 10°C—20°C. In addition, there is also an intermittent sound. |
The temperature display changes until the oven cavity temperature stabilizes. This is not a malfunction. Because the convection heater runs intermittently during preheating, you may hear intermittent sounds, but this is not a malfunction. |
| Preheating ended before the specified preheat temperature was displayed. |
Preheating may end before the set temperature is displayed, due to the impact of the room temperature, power supply voltage, and so on. In addition, when 45 minutes pass after preheating has started, preheating stops. When preheating stops and the oven is left as-is, preheating continues for 10 more minutes and then the oven heats for the specified amount of time. |
| The time remaining changed during heating. |
During Auto Cooking, the remaining heating time may change during heating in order to make the food cook efficiently |
| Heating is cancelled when the door is opened. |
When the door is opened when a remaining heating time is not displayed in Auto Heating, heating is cancelled. |
Display
| The Refill Water display on the control panel lights up, and food is not cooked well using the steam menu. |
This is because there is no water in the water tank. Refill the tank with water. After about one to two minutes, the Refill Water display is cleared. Even if you refill the water tank with water, there may be some cases where the Refill Water display is not cleared in Auto Cooking. |
Other
| Whether or not superheated steam is being emitted is not clear. |
As the food is heating based on the combined use of the oven and grill, the temperature inside the oven is hot, and the superheated steam particles are extremely fine. |
| There is some steam leaking from the door. |
A small amount of steam may be emitted, but this is not abnormal. |
| The amount of water in the water tank does not decrease. |
The decrease in the amount of water in the water tank differs depending on the menu option. |
When Notices Are Displayed
| Display Examples |
Cause · Content of Notice |
How to Resolve |
|

C 00
|
●The method for zeropoint adjustment of the Triple Weight Sensor is wrong. |
Place only the ceramic tray in the oven, close the door, and press . After a few seconds, 0 is displayed and zero-point adjustment is complete. |
|

C 01
|
●The door was opened during adjustment of the Triple Weight Sensor. |
Close the door and press . After a few seconds, 0 is displayed and zeropoint adjustment is complete. |
|

C 02
|
● The ceramic tray is not inserted. |
Place only the ceramic tray in the oven, close the door, and press . After a few seconds, 0 is displayed and zero-point adjustment is complete. |
|

C 03
|
● There is too much food for 6 Defrost . |
Make sure the amount of food to be defrosted is from 100–1,000 g. |
|

C 11
|
●The door was opened during container sensing for My Menu. |
Close the door and press  . Container sensing is completed in about six seconds. . Container sensing is completed in about six seconds. |
 |
● There is no water in the water tank. |
Fill the water tank with water. |
 |
●Operation is stopped when an abnormality in the machinery is detected or when there is temporary malfunction arising from the effect of external electrical noise and the like.
● Parts malfunction display.
|
Press . (The H display is cleared.) Alternately, pull out the power plug, plug it in again, open and close the door, and turn the power on once more. display is cleared.) Alternately, pull out the power plug, plug it in again, open and close the door, and turn the power on once more. |
In cases where conditions are not restored to normal or the same display is shown, pull out the power plug, and ask the Service Center to repair the oven.