Loading ...
Loading ...
Loading ...
English 17
1
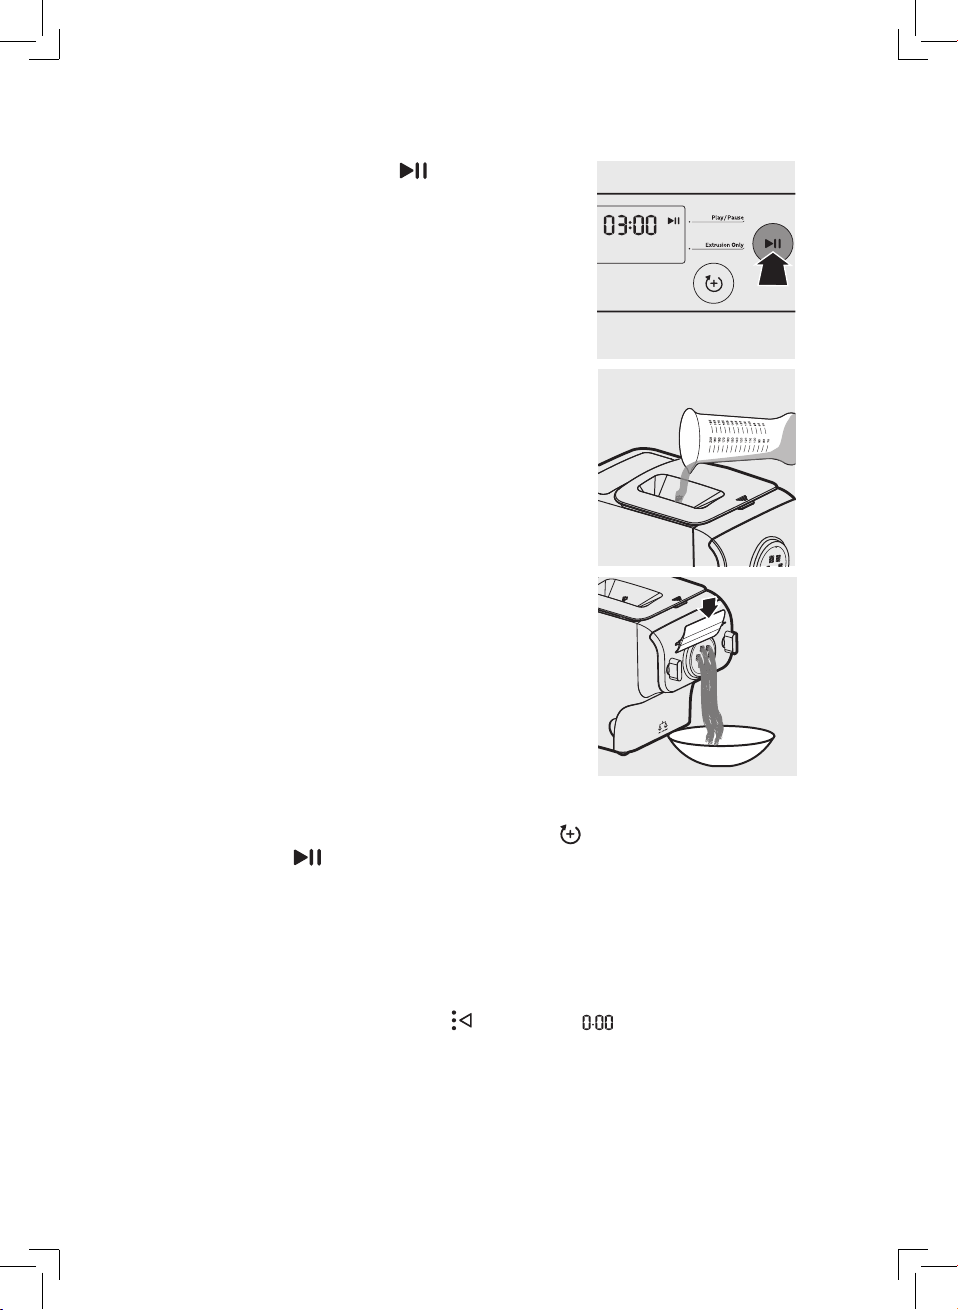
Press the start/pause button to start
processing, and the processing time starts to
count down.
2
After the kneading starts, slowly pour in the
water or egg mixture along the entire length of
the slot in the lid.
Note:
• During dough mixing, do not add other ingredients
after you have poured in the water. Otherwise, it will
affect the results of the pasta texture.
3
After the pasta maker nishes kneading, it will
beep a few times and start extruding pasta after
a few seconds. Place a container right under the
outlet. Cut the pasta into the length you need
with the at cleaning tool.
Note:
• If the ratio of liquid and our is not correct, the
extrusion will not succeed. In this case, prepare the
ingredients again.
• Move the cleaning tool downwards to cut the pasta.
4
After the pasta making is complete, if you notice some leftover dough inside the
chamber, you can press the extra extrusion button
rst, and then press the start/
pause button
for extra extrusion.
Note:
• The countdown timer of the extra extrusion program is 3 minutes.
• You may nd some ne pasta threads on the pasta surface. This is normal.
• The cooking time of the pasta varies depending on personal preferences, pasta
shapes, and number of servings.
5
If you want to make another batch of pasta right after the rst batch is nished,
press the program selection button
and wait until displays on the screen.
Then start from step 3 (remove the chamber lid) at Page 13, and all the rest
steps are the same as the rst batch.
Note:
• Make sure that all the parts (including the chamber lid) are well assembled before
plugging in.
Loading ...
Loading ...
Loading ...