Loading ...
Loading ...
Loading ...
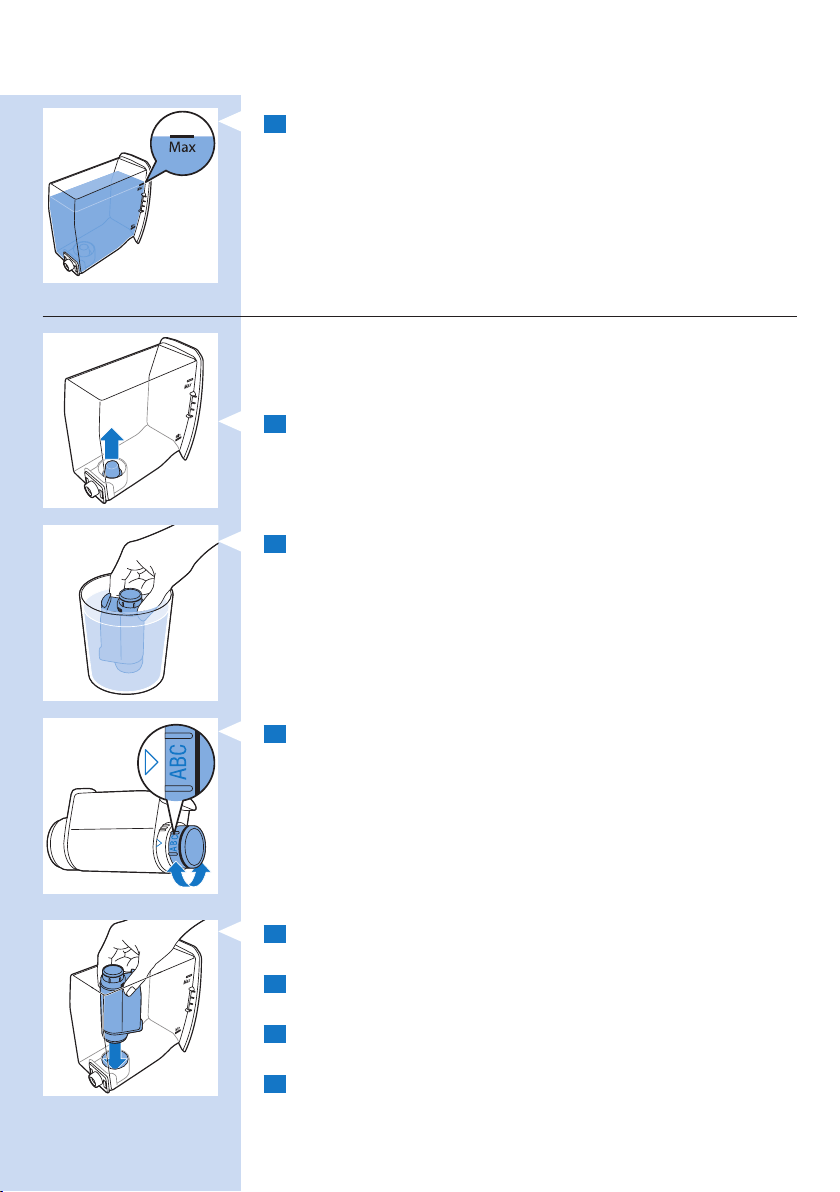
9 Fill the water tank with fresh water up to the MAX indication.
, The machine is ready for use.
Note: The rst cups of coffee may be a bit watery, this is normal. The machine
needs to complete a few brewing cycles to optimize its settings.
Installing the Intenza+ water lter
We advise you to install the Intenza+ water lter as this prevents scale
build-up in your machine. You can buy the Intenza+ water lter separately.
For more details, see chapter ‘Warranty and support’, section ‘Ordering
maintenance products’.
1 Remove the small white lter from the water tank and store it in a
dry place.
Note: Please keep the small white lter for future use. You will need it for the
descaling process.
2 Remove the lter from its packaging and immerse it in cold water
with the opening pointing upwards. Press the sides of the lter gently
to let out the air bubbles.
3 Turn the knob of the lter to the setting that corresponds to the
water hardness of the area you live in.
A Soft water
B Hard water (default)
C Very hard water
Note: You can test the water hardness with a water hardness test strip.
4 Place the lter in the empty water tank. Press it down until it cannot
move any further.
5 Fill the water tank with fresh water up to the MAX indication and
slide it into the machine.
6 Let the machine brew hot water until the water tank is empty
(see chapter ‘Using the machine’, section ‘Hot water’).
7 Rell the water tank with fresh water up to the MAX indication and
slide it back into the machine.
, The on/off button illuminates continuously.
The machine is ready for use.
ENGLISH14
Loading ...
Loading ...
Loading ...