Loading ...
Loading ...
Loading ...
2-14
4
.
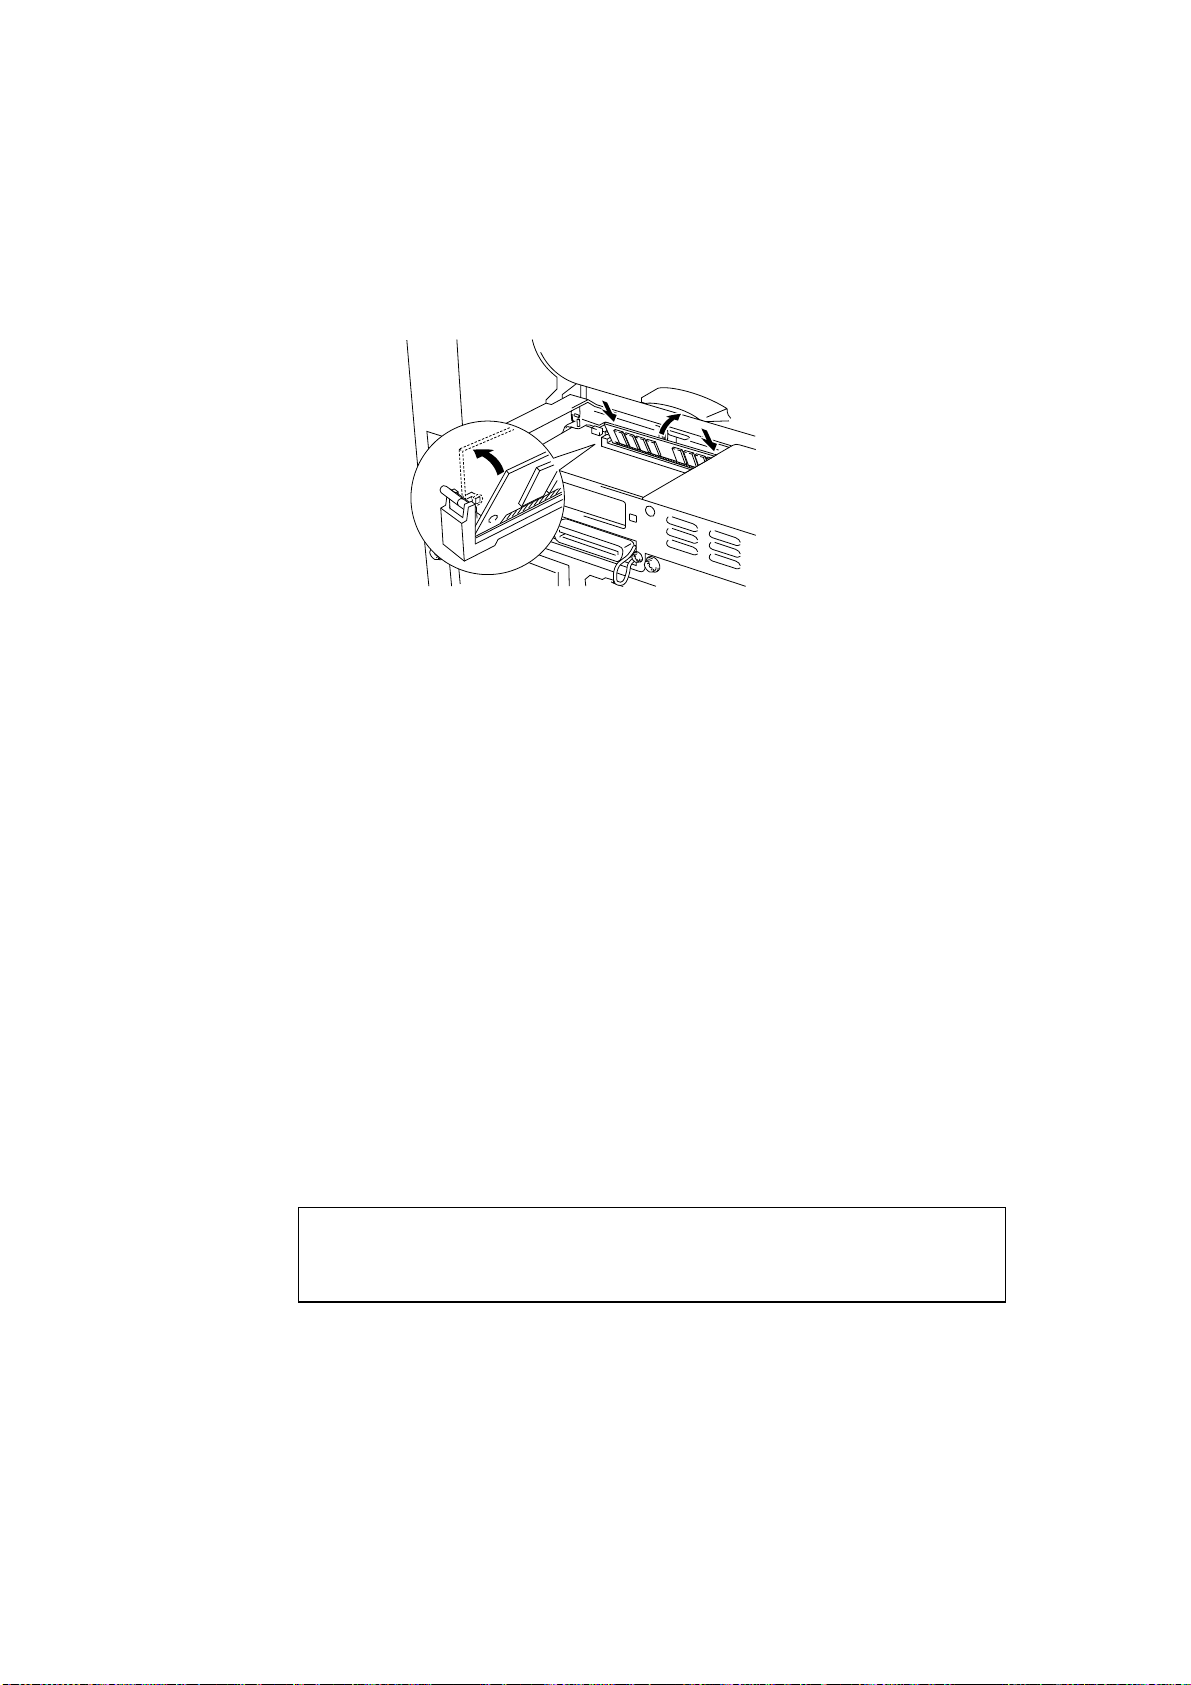
Install the SIMM into the slot at an angle and then push it gently towards the vertical
until it clicks into place.
Fig. 2-7 Install the SIMM
5
.
Install the access cover.
6
.
Secure the access cover with the two screws. Close the rear cover.
7
.
Reconnect the interface cable (printer cable) from your computer. Plug the power
cord into the AC outlet and turn on the power switch.
8
.
To check that the SIMM is installed correctly, you should perform a Test Print
“Print Configuration” which will print the current total memory size.
✒ Note
If you have already installed the serial interface (RS-100M), remove it first, and
then install the SIMM.
Loading ...
Loading ...
Loading ...