Loading ...
Loading ...
Loading ...
Operating position Posicidn de fundenamiente
m
m
10.
Before moving range across floor, check that range is
still on cardboard shipping base to protect floor
covering,
Antes de mover la estufa sobre el piso, asegurese de
que la estufa esta todavu'a sobre la base de carton de
embarque para proteger el revesfimiento del piso,
Make sure the anti4ip bracket is installed:
, Look for the antFtip bracket A securely
attached to floor,
, Slide range back so rear range foot B is
under antFtip bracket,
Asegurese de que el soporte antivuelco este [nstalado:
, Busque el soporte antivuelco @ que esta bien
asegurado al piso,
Deslice la estufa hacia atras de manera que la pata
trasera de la estufa ® quede debajo del soporte
antivuelco,
If installing the range in a mobile home, you must
secure the range to the floor. Any method of securing
the range is adequate as long as it conforms to the
standards in the "Mobile home installation"
instructions,
Cuando se instala la estufa en una casa m6vil, debe
ser asegurada al piso. Cualquier metodo de asegurar
esta estufa es adecuado s[empre que cumpla con los
estandares indicados en las instrucciones para
'qnstalaci6n en una casa m6vil".
Place rack @ in oven. Place level @ on rack, first side
to side then front to back.
if range is not level, puii range forward until rear
leveling leg is removed from the anti-tip bracket, Use
3/8" drive ratchet and channel lock pliers to adjust
leveling legs up or down until range is level. Slide
range back so rear range foot is under antFtip bracket.
NOTE: Oven must be level for satisfactory baking
conditions.
Replace the storage drawer or lower panel.
Coloque la rejilla @ en el horno. Coloque el nivel @ en la
rejilla, primero de lado a lado, luego de la parte
delantera a la trasera.
Si la estufa no esta nivelada, jale la estufa hacia adelante
hasta que la pata niveladora trasera se separe del
soporte antivuelco, Use una llave de trinquete de 3/8" y
una llave corrediza para ajustar las patas niveladoras
hacia arriba o hacia abajo hasta que la estufa este
nivelada. Deslice la estufa hacia atrOs de manera que la
pata trasera de la estufa quede debajo del soporte
antivuelco.
NOTA: el horno debe estar nivelado para que las
condiciones sean adecuadas para hornear.
Vuelva a colocar el caj6n de almacenamiento o el
panel inferior.
Check operation Verifique el funcionamiento
1 1. Reconnect power. Conecte el suministro de energu'a.
ooo Check the operation of the cooktop elements: Push in
12. oo
and turn each surface unit control knob to "Hi"
position. Check the operation of the cooktop elements
and indicator lights.
Verifique el funcionamiento de los elementos de la
superficie de estufa: empuje y gire cada una de las
perillas de control de la unidad de superficie hasta la
posicion "Hi". Verifique el funcionamiento de los
elementos de la superficie de estufa y las luces
indicadoras.
16
13.
LU6_T
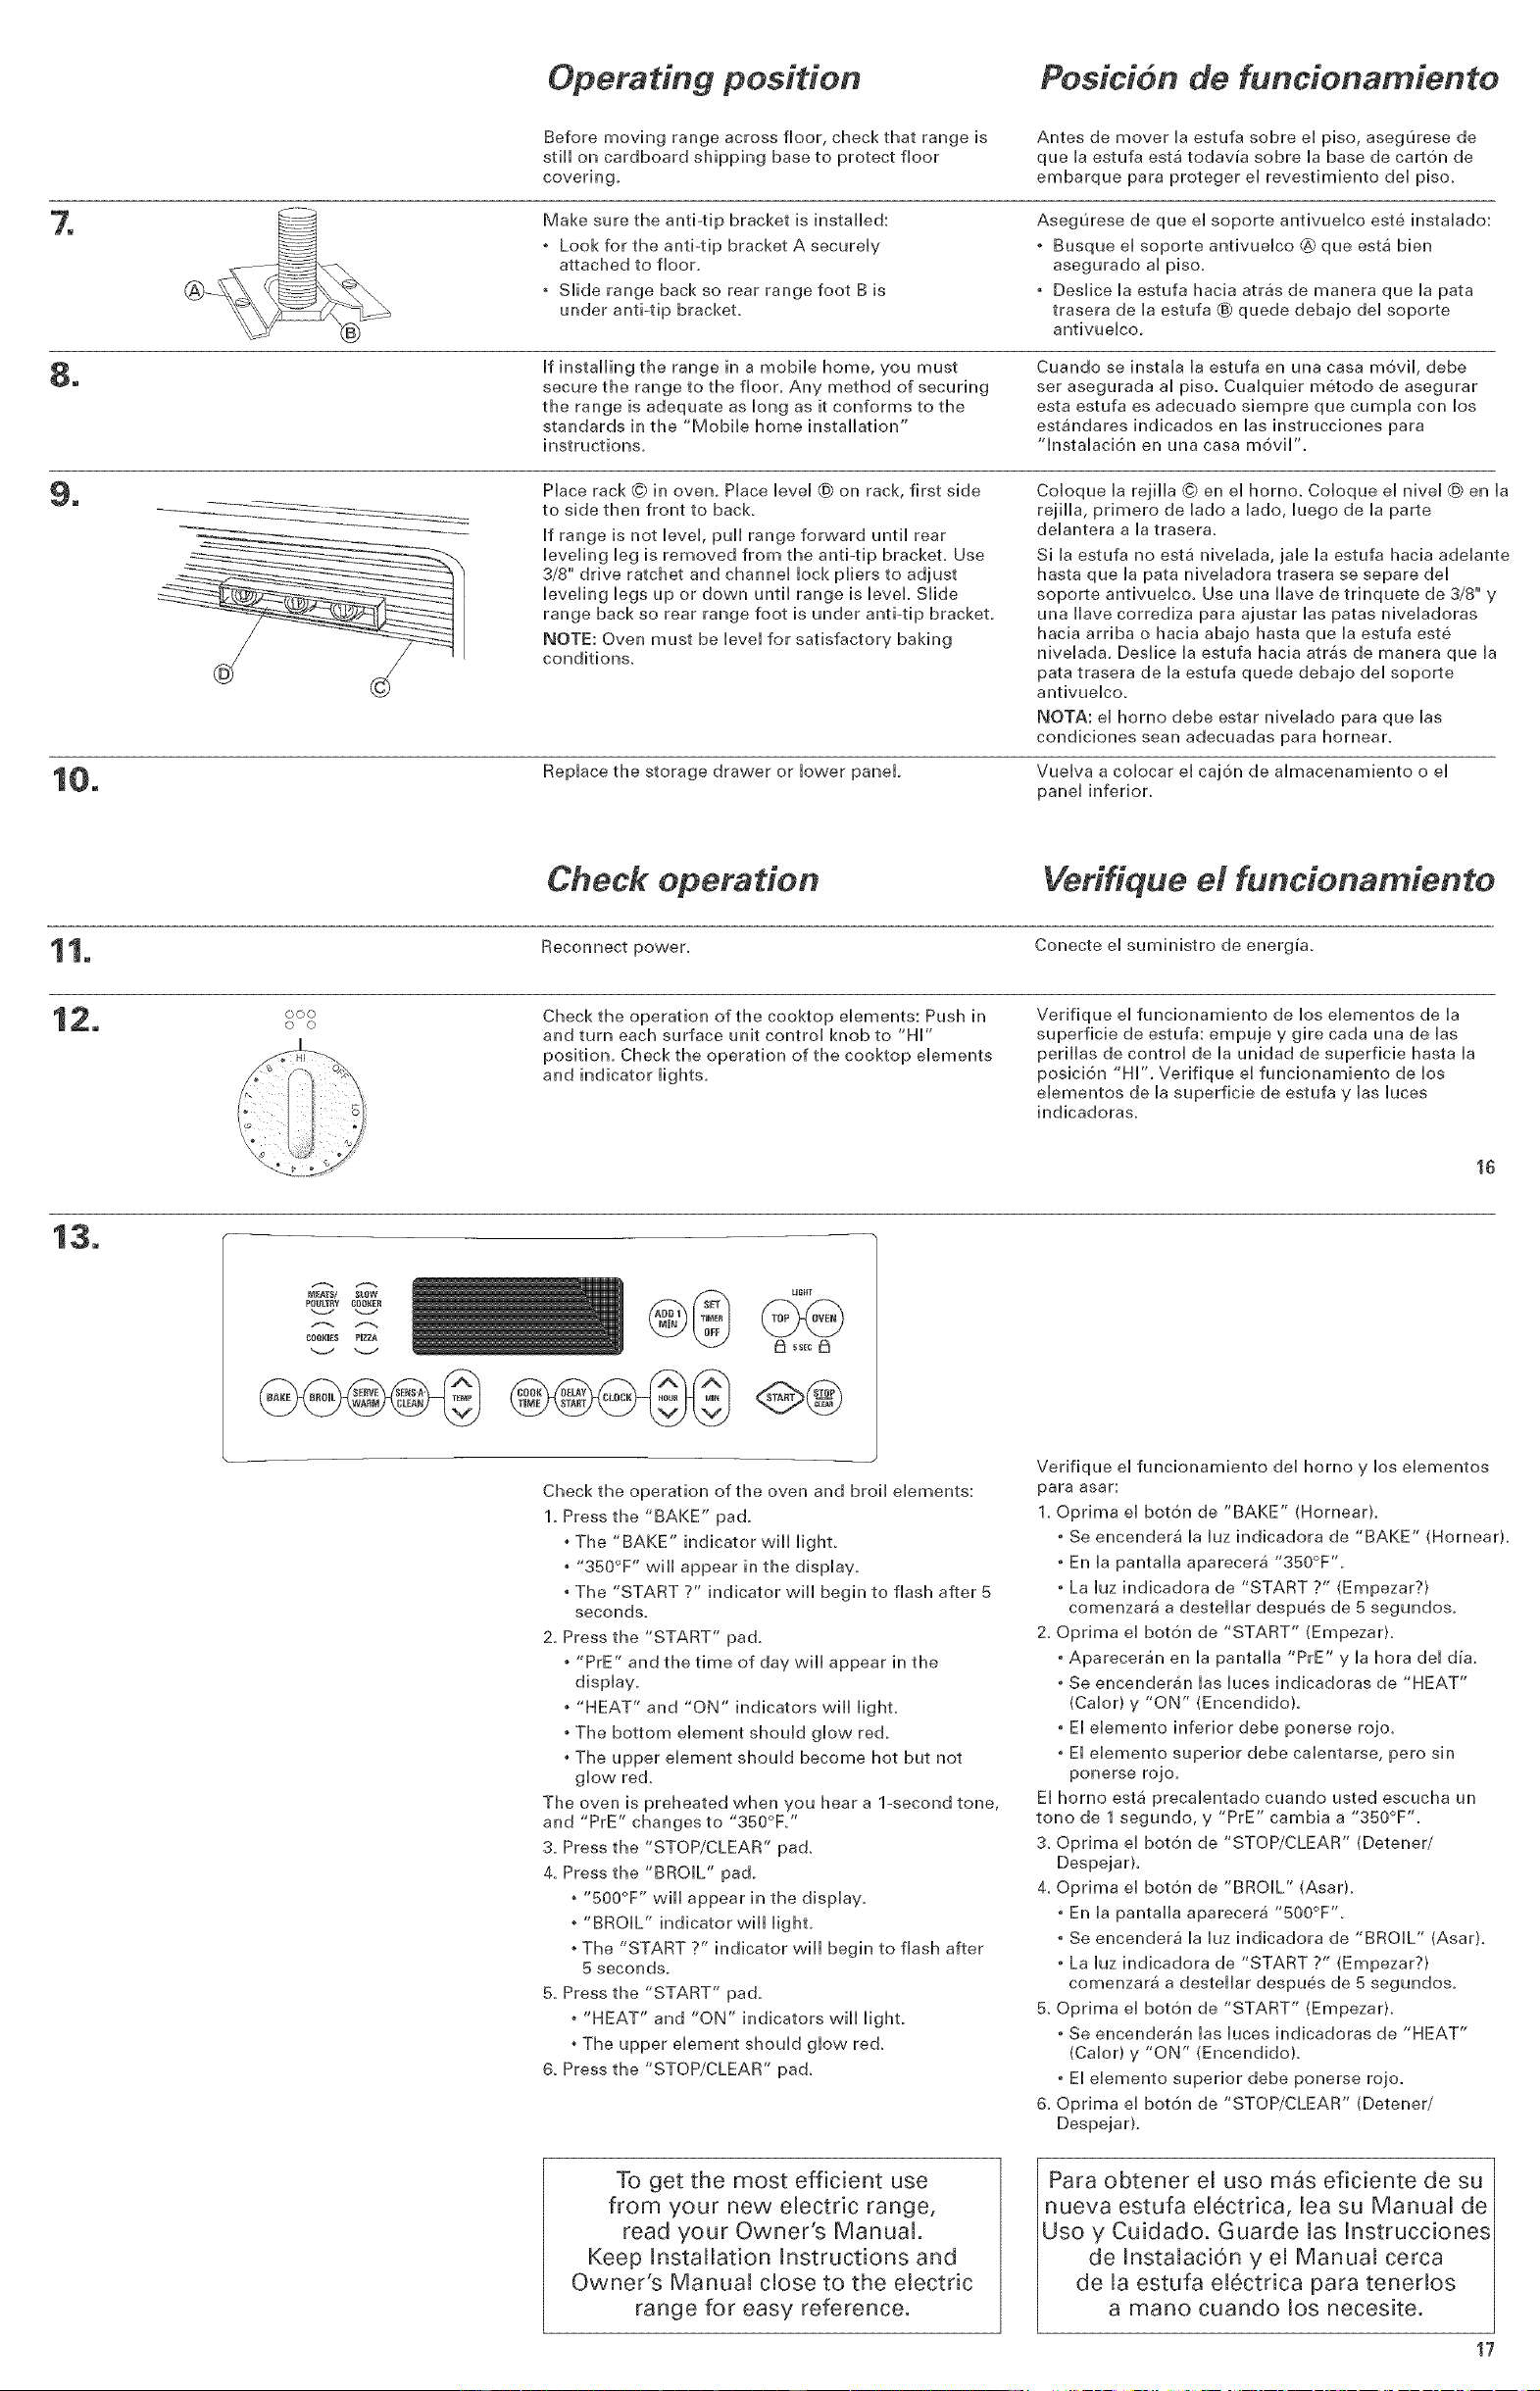
Check the operation of the oven and broil elements:
1. Press the "BAKE" pad.
• The "BAKE" indicator wiii light.
"350°F '' will appear in the display,
• The "START ?" indicator will begin to flash after 5
seconds.
2. Press the "START" pa&
• "PrE" and the time of day wiil appear in the
display.
• "HEAT" and "ON" indicators wiii lighL
• The bottom element should glow red.
• The upper element should become hot but not
glow red.
The oven is preheated when you hear a 1-second tone,
and "PrE" changes to "350°R"
3. Press the "STOP/CLEAR" pa&
4. Press the "BROIL" pad.
, "500°F " will appear in the display.
, "BROIL" indicator will light.
, The "START ?" indicator will begin to flash after
5 seconds.
5. Press the "START" pa&
, "HEAT" and "ON" indicators will light.
, The upper element should glow re&
& Press the "STOP/CLEAR" pa&
Verifique el funcionamiento del homo y los elementos
para asar:
1, Oprima el bot6n de "BAKE" (Hornear),
Se encendera la luz indicadora de "BAKE" (Hornear).
En la pantalla aparecera "350°F ".
La luz indicadora de "START ?" (Empezar?)
comenzara a destellar despues de 5 segundos.
2. Oprima el boton de "START" (Empezar),
• Apareceran en la pantalla "PrE" y la hora del dia,
• Se encenderan las luces indicadoras de "HEAT"
(Calor) y "ON" (Encendido),
• El elemento inferior debe ponerse rojo,
• El elemento superior debe calentarse, pero sin
ponerse rojo,
El homo esta precalentado cuando usted escucha un
tono de 1 segundo, y "PrE" cambia a "350°F ".
3, Oprima el boton de "STOP/CLEAR" (Detener/
Despejar),
4, Oprima el boton de "BROIL" (Asar),
• En la pantalla aparecera "500°F ''.
• Se encendera la luz indicadora de "BROIL" (Asar),
• La luz indicadora de "START ?" (Empezar?)
comenzara a destellar despues de 5 segundos,
5, Oprima el boton de "START" (Empezar),
• Se encenderan las luces indicadoras de "HEAT"
(Calor) y "ON" (Encendido).
• El elemento superior debe ponerse rojo.
6, Oprima el boton de "STOP/CLEAR" (Detener/
Despejar),
To get the most efficient use
from your new electric range,
read your Owner's Manual.
Keep Installation Instructions and
Owner's Manual close to the electric
range for easy reference.
Para obtener el uso mas eficiente de su
nueva estufa el6ctrica, lea su Manual de
Uso y Cuidado. Guarde las Instrucciones
de Instalaci6n y el Manual cerca
de la estufa el6ctrica para tenedos
a mano cuando los necesite.
17
Loading ...
Loading ...