Loading ...
Before you start... Antes de empezar...
Your safety and the safety of others are
very important.
We have provided many important safety messages in
this manual and on your appliance. Always read and
obey all safety messages.
This is the safety alert symbol.
This symbol alerts you to potential hazards
that can kill or hurt you and others.
All safety messages wil! follow the safety alert symbol
and either the word "DANGER" or 'WARNING." These
words mean:
You can be killed or seriously injured if you don't
immediately_ follow instructions.
You can be killed or seriously injured if you don't
follow instructions,
All safety messages wil! tell you what the potential
hazard is, tell you how to reduce the chance of injury,
and tell you what can happen if the instructions are not
followed.
iMPORTANT: Observe aH governing codes
and ordinances.
Proper installation is your responsibility. A qualified
technician must install this range. Make sure you have
everything necessary for correct installation. It is the
instdler's responsibility to comply with installation
clearances specified on the model/serial rating plate.
The model/serial rating plate is located on the oven
frame behind the storage drawer panel.
Check location where range will be installed. The
range should be located for convenient use in kitchem
Grounded electrical outlet is required. See "Electrical
requirements," Page 6.
Su seguridad y la seguridad de los dem&s es
muy importante.
Hemos incluido muchos mensajes importantes de
seguddad en este manual y en su electrodomestico. Lea
y obedezca siempre todos los mensajes de seguridad.
Este es el simbolo de advertencia de
seguridad.
Este simbolo le llama la atencion sobre
peligros potenciales que pueden ocasionar la
muerte o una lesi6n a usted y a los demas.
Todos los mensajes de seguridad iran a continuaci6n
del simbolo de advertencia de seguridad y de la palabra
' PEUGRO" o "ADVERTENCIA." Estas palabras
significan:
Si no sigue [as instrucciones de inmediato, usted
)uede morir o sufrir una lesi6n grave.
Si no sigue Jas instrucciones, usted puede morir o
sufrir una [esi6n grave.
Todos los mensajes de seguridad le dir&n el peligro
)otencia[, le diran como reducir las posibilidades de
sufrir una lesi6n y Io que puede suceder si no se siguen
las instrucciones.
IMPORTANTF: Observe todos los c6digos y reglamentos
locales.
La debida instabci6n es su responsabilidad. Esta estufa
debe ser instaiada por un tecnico calificado. Asegurese
de tener todo Io necesario para instahda correctamente.
Es responsabilidad del instdador cumplir con los
espacios especificados en la placa de modelo y serie. La
placa de modelo y serie esta ubicada en el marco del
homo detras del panel del caj6n de almacenamiento.
Revise el lugar donde se ha de instaiar la estufa. La
estufa debe ser instdada en un lugar de la cocina donde
resulte comodo usada.
Se requiere de un tomacorriente de conexion a tierra.
Ver los "Requisitos el6ctricos" en la pagina 6.
OI
o[
Mobile home installation
The installation of this range must conform with the
Manufactured Home Construction and Safety
Standard, Title 24 CFR, Part 3280 [formerly the Federal
Standard for Mobile Home Construction and Safety,
Title 24, HUD (Part 280)] or, when such standard is not
applicable, the Standard for Manufactured Home
Installations, ANSI A225.1/NFPA 501A% or with local
codes.
When this range is installed in a mobile home, it must
be secured to the floor during transit. Any method of
securing the range is adequate as long as it conforms
to the standards listed above.
Four-wire power supply cord or cable must be used in
a mobile home installation, The appliance wiring will
need to be revised. See "Four-wire electrical
connection," Pages 13 and 15.
Copies of the standards listed may be obtained from:
*National Fire Protection Association
One Batterymarch Park
Quincy, Massachusetts 02269
Tools needed
Assemble the required tools and parts before starting
installation. Read and follow the instructions provided
with any tools listed here,
• level
• 3/8" drive ratchet
• flat-blade screwdriver
• 3/8" and 5/16" nut driver
• channel lock pliers
• wood floors: 1/8"drill bit
• concrete/ceramic floors: 3/16" carbide-tipped masonry
drill bit (Hammer may be needed for anchors.)
• tape measure or ruler
• hand or electric drill
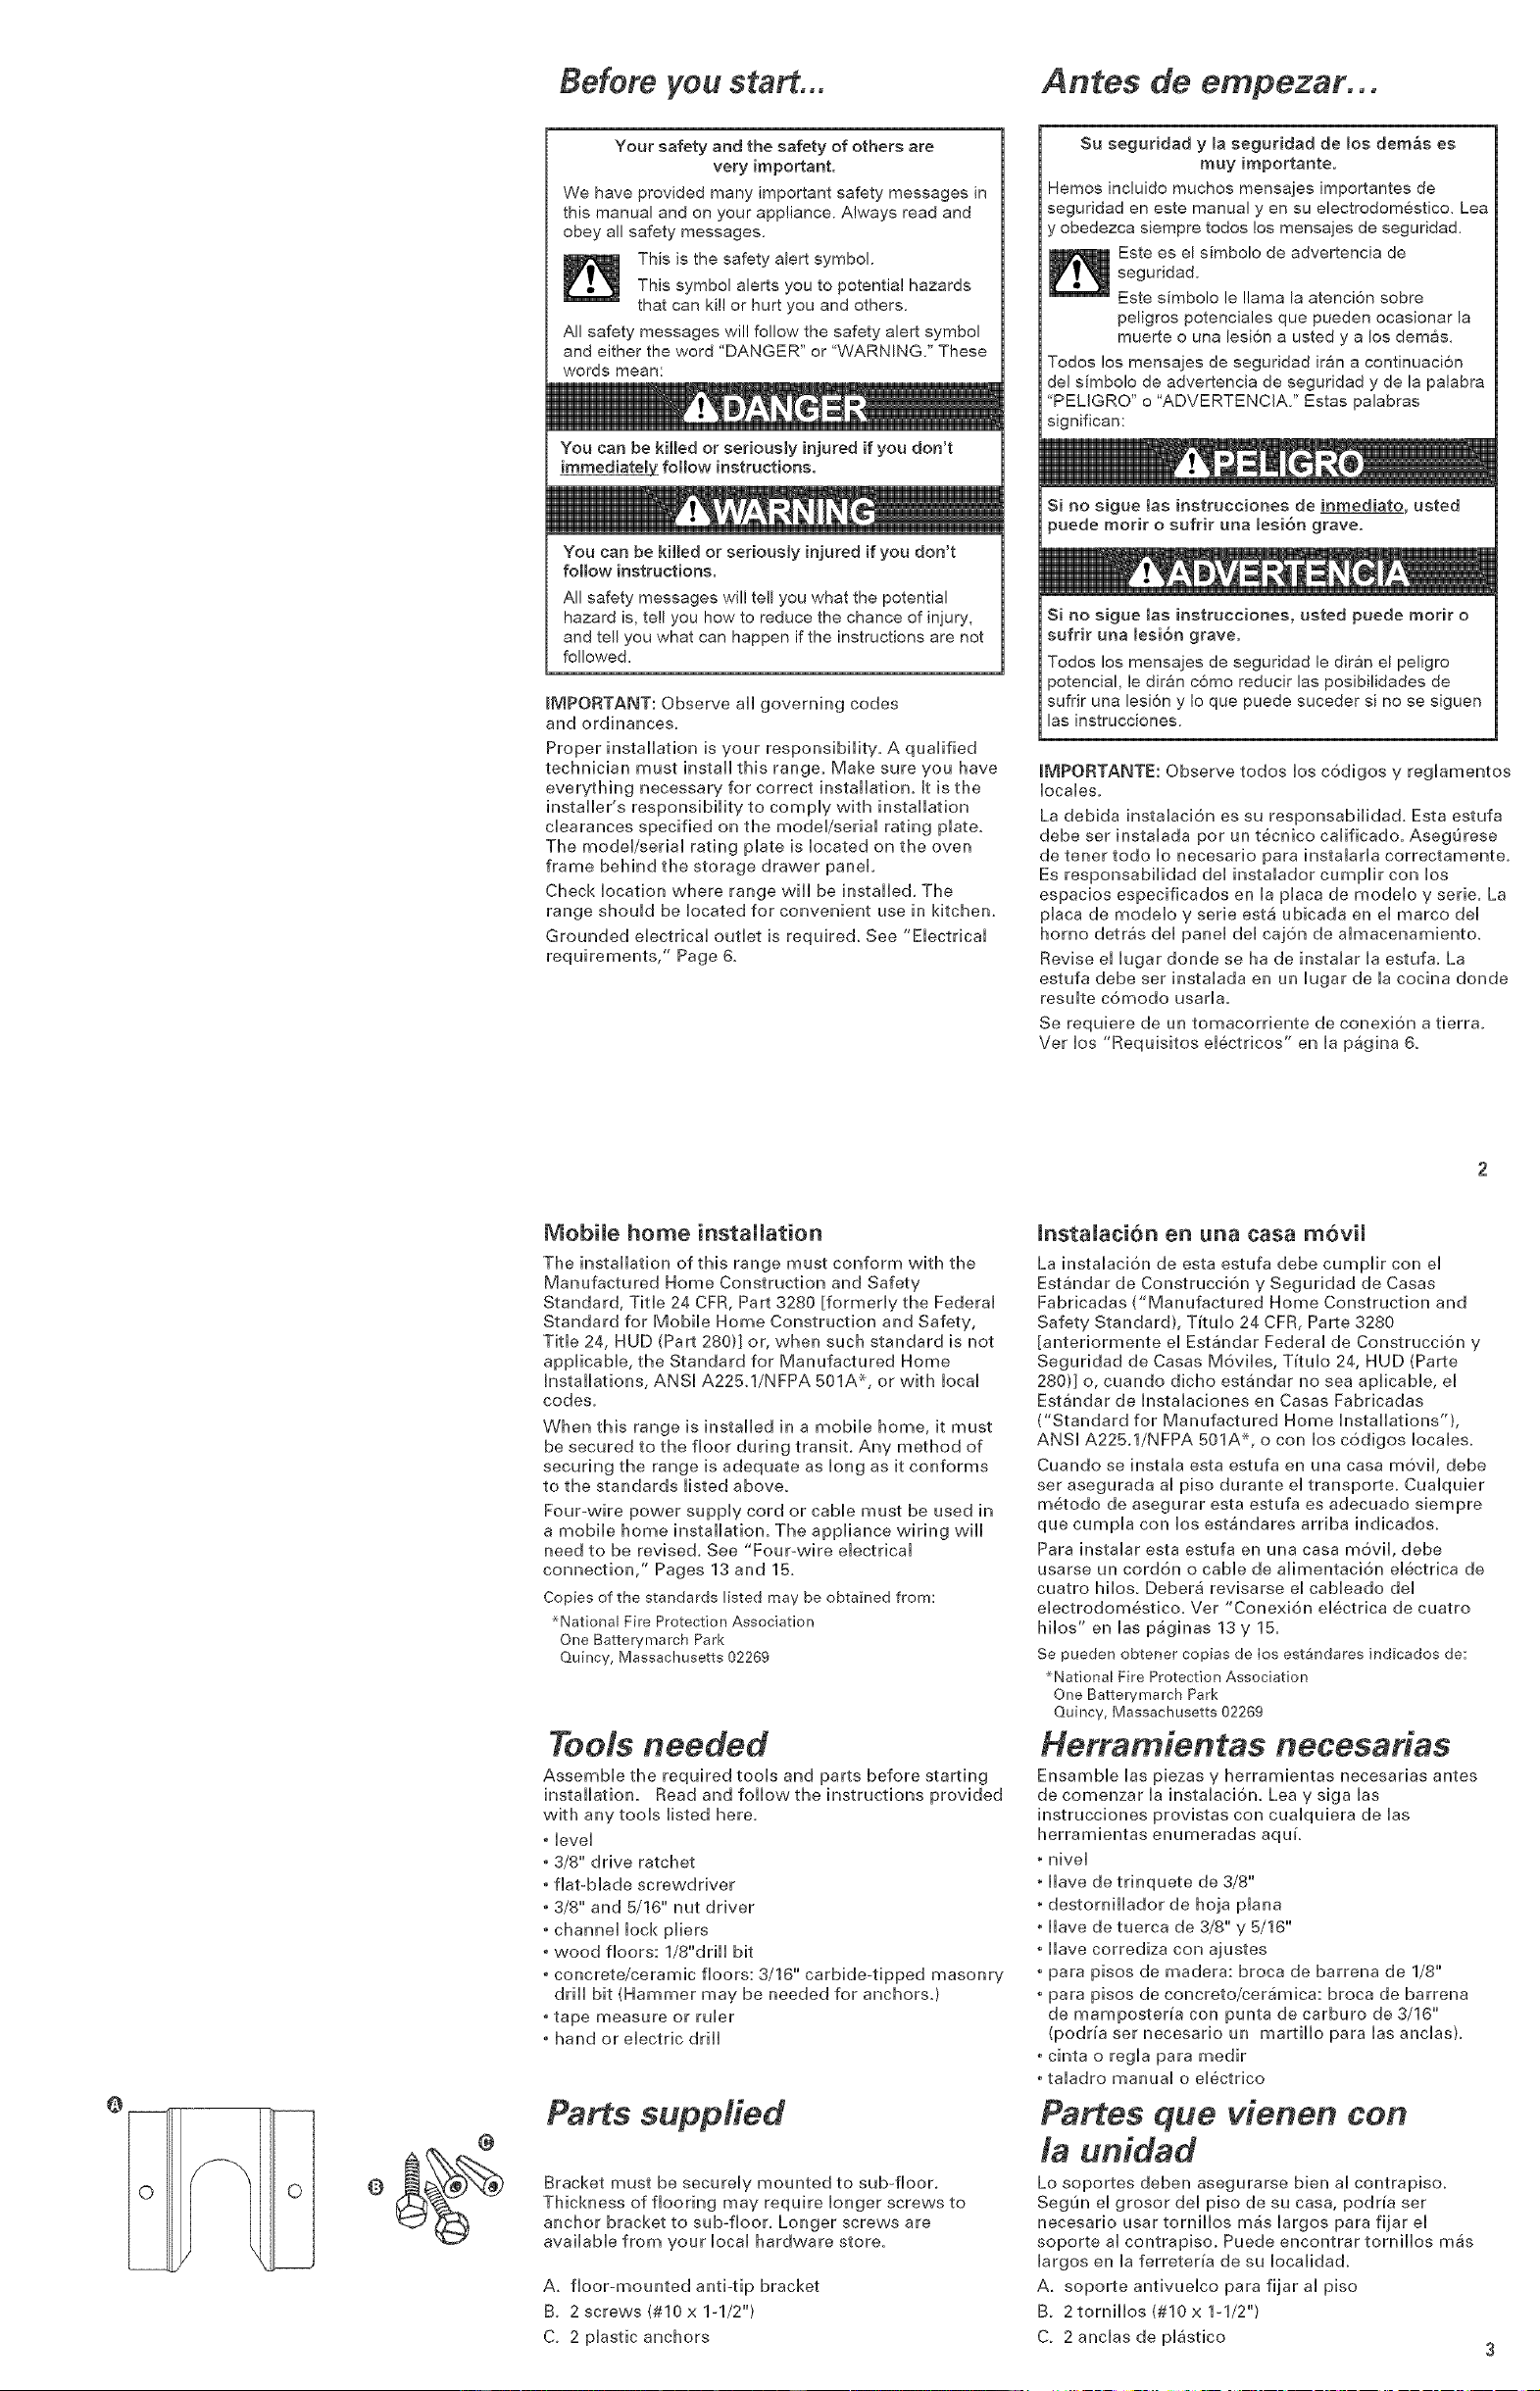
Parts supplied
Bracket must be securely mounted to sub-floor.
Thickness of flooring may require longer screws to
anchor bracket to sub-floor, Longer screws are
available from your local hardware store.
A, floor-mounted anti-tip bracket
B. 2 screws (#10 x 1-1/2")
C. 2 plastic anchors
hstalaei6n en una easa m6vil
La instalaci6n de esta estufa debe cumplir con el
Estandar de Construccion y Seguridad de Casas
Fabricadas ("Manufactured Home Construction and
Safety Standard), Tu'tuio 24 CFR, Parte 3280
[anteriormente el Estandar Federal de Construccion y
Seguridad de Casas Moviies, Tu'tuio 24, HUD (Parte
280)] o, cuando dicho estandar no sea aplicable, el
Estandar de [nstalaciones en Casas Fabricadas
("Standard for Manufactured Home Installations'),
ANSI A225.1/NFPA 501A% o con los codigos locales.
Cuando se instala esta estufa en una casa m6vil, debe
ser asegurada al piso durante el transporte. Cualquier
metodo de asegurar esta estufa es adecuado siempre
que cumpla con los estandares arriba indicados.
Para instalar esta estufa en una casa m6vil, debe
usarse un cord6n o cane de alimentacidn electrica de
cuatro hilos. Debera revisarse el cableado del
electrodomestico. Ver "Conexion electrica de cuatro
hiios" en ias paginas 13 y 15.
Se pueden obtener copias de Ios est_ndares indicados de:
*National Fire Protection Association
Qrle Batterymarch Park
Quincy, Massachusetts 02269
Herramientas necesarias
EnsamNe las piezas y herramientas necesarias antes
de comenzar la instalaci6n, Lea y siga las
instrucciones provistas con cudquiera de las
herramientas enumeradas aquL
nivei
llave de trinquete de 3/8"
destornillador de hoja plana
liave de tuerca de 3/8" y 5/16"
liave corrediza con ajustes
para pisos de madera: broca de barrena de 1/8"
para pisos de concreto/ceramica: broca de barrena
de mamposten'a con punta de carburo de 3/16"
(podr_asernecesarioun martiiioparaiasancias).
. cinta o regla para medir
. taladro manual o electrico
Partes que vienen con
la unidad
Lo soportes deben asegurarse bien al contrapiso.
SeguJn el grosor del piso de su casa, podr_a ser
necesario usar tornillos mas largos para fijar el
soporte ai contrapiso. Puede encontrar torniiios m_s
largos en la ferretena de su Iocalidad.
A. soporte antivuelco para fijar al piso
B. 2 tornillos (#10 x 1-1/2")
C. 2 anclas de plastico
Loading ...
Loading ...
Loading ...