Loading ...
Loading ...
Loading ...
133
Clip Operations
Using the Clip Menu
1 Select a clip and then press SET.
• The clip menu appears. Available functions depend on the index screen and which functions are enabled.
2 Select the desired function and then press SET.
• The function is enabled. For some functions, further action may be required. Follow the onscreen directions.
• Press the CANCEL button instead to return to the clip index screen.
IMPORTANT
• Observe the following precautions while the CF2 or CF3 access indicator is illuminated in red. Failure to do
so may result in permanent data loss.
- Do not disconnect the power source or turn off the camcorder.
- Do not open the cover of the either CF card slot.
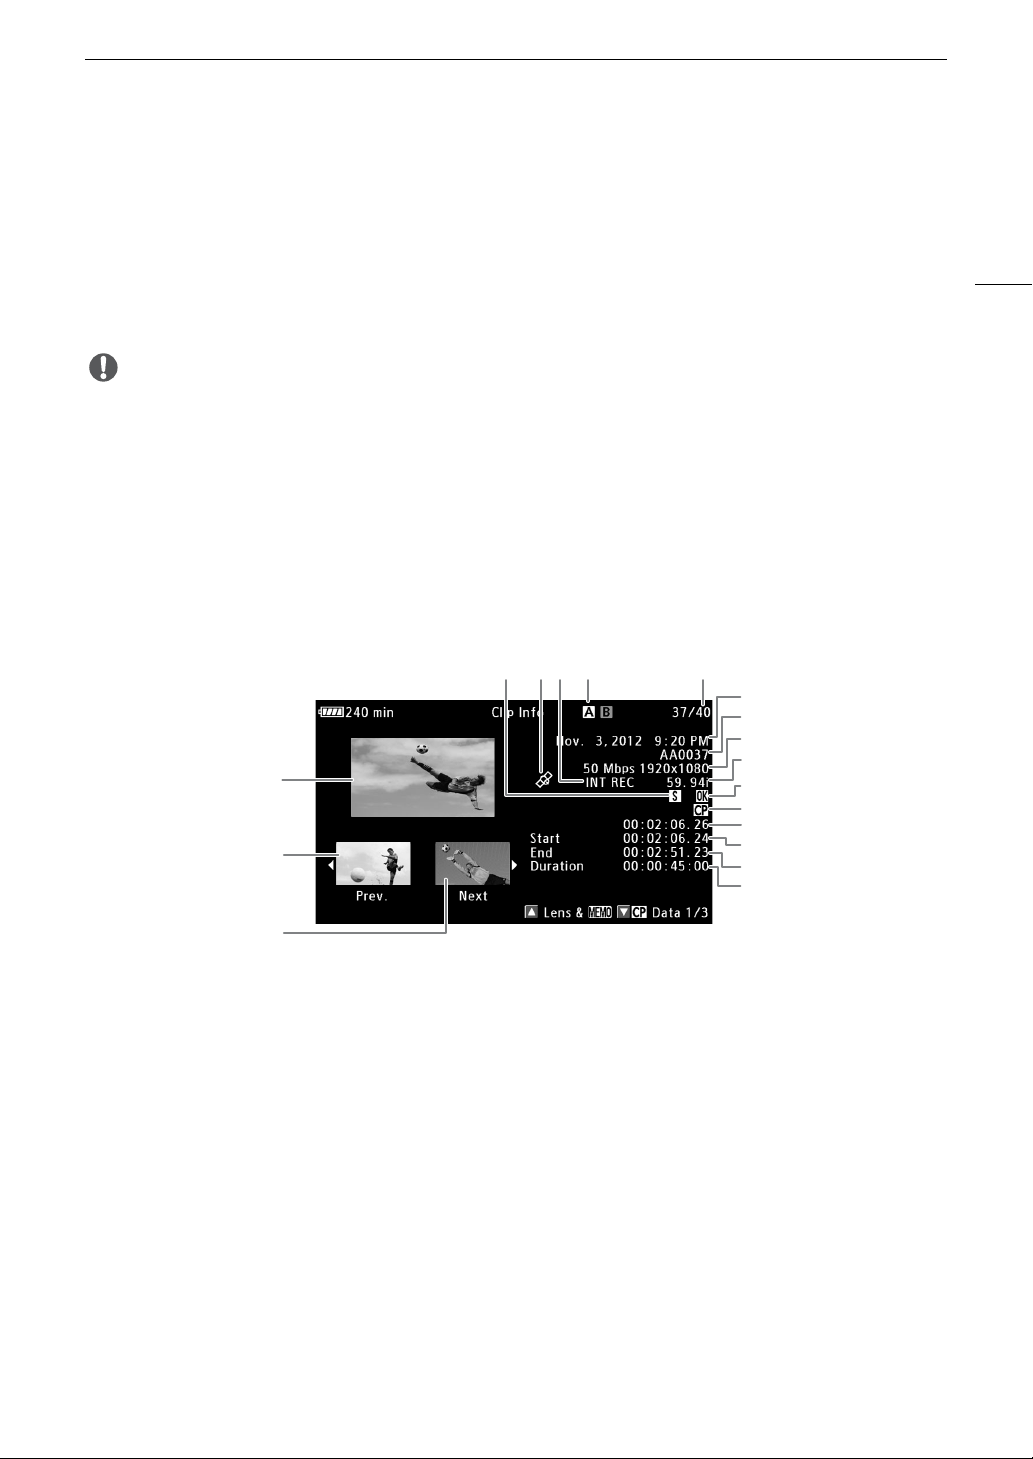
Displaying Clip Information
Select [Display Clip Info] in the clip menu to display the selected clip’s information screen ([Clip Info] screen).
Push the joystick left/right to switch to the previous/next clip. When you are finished, press the CANCEL button
to return to the clip index screen.
* For clips recorded using slow & fast motion mode, the shooting frame rate and playback frame rate will both be displayed.
10
467
1
2
3
9
11
14
15
16
17
18
12
13
5 8
1 Thumbnail of the selected clip
2 Thumbnail of the previous clip
3 Thumbnail of the next clip
4 Shot mark (A 103, 139)
5 Clip geotagged with GPS information (A 98,
105)
6 Special recording mode (A 108)
7 Currently selected CF card slot (A 46)
8 Clip number / Total number of clips
9 Recording date and time
10 Clip name (A 53)
11 Bit rate and resolution (A 59)
12 Frame rate* (A 59)
13 $ mark / % mark (A 104, 134)
14 Embedded custom picture file (A 116)
15 Time code of the clip thumbnail
16 Time code of the first frame in clip
17 Time code of the last frame in clip
18 Clip duration
Loading ...
Loading ...
Loading ...