Loading ...
Loading ...
Loading ...
9
FASTENING THE INSTALLA-
TION BRACKETS
(Refer to Figures 5):
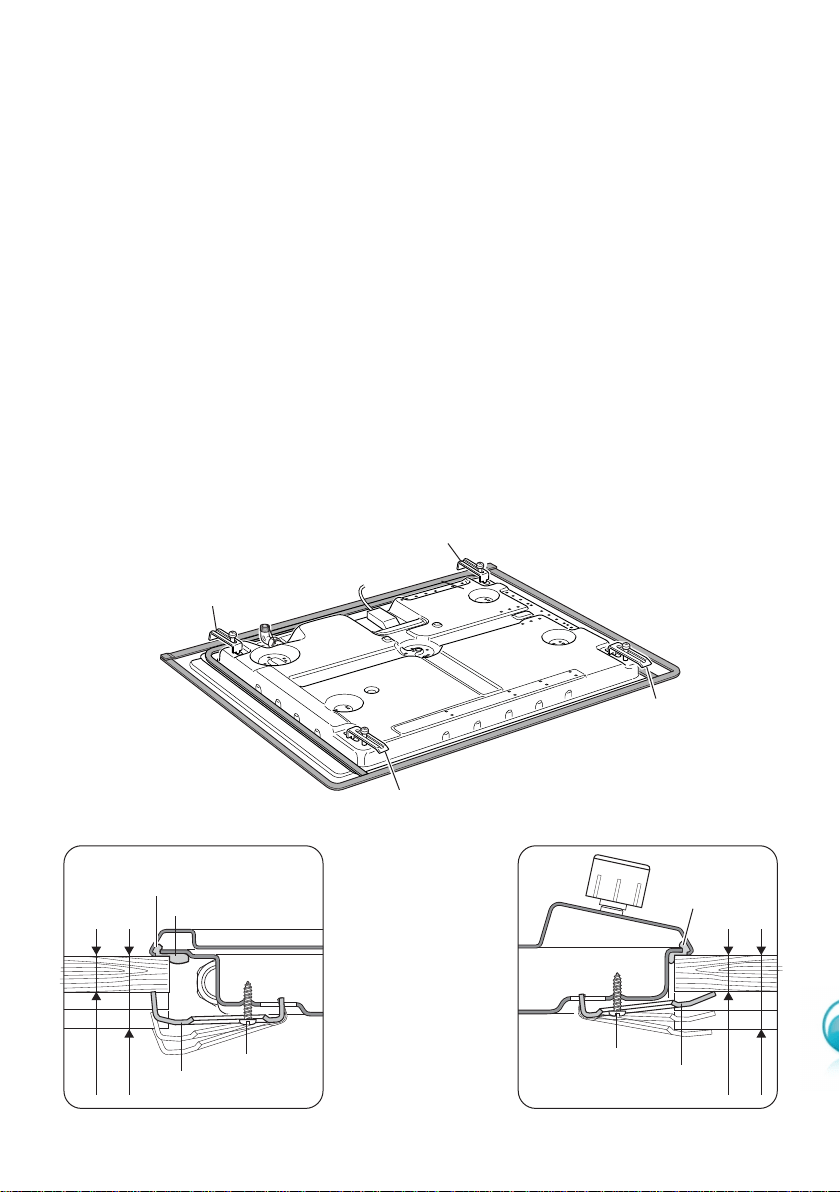
Each cooker top is provided with an
installation kit including brackets and
screws for fastening the top to fixture
panels from 2 to 4 cm thick.
■ Turn the cooker top upside down
and fasten the brackets “F and R”
to the appropriate socket holes,
without tightening the screws “B”
for the moment.
■ Make sure that the brackets are
fastened as shown in figure 5a,
5b and 5c.
FASTENING THE COOKER
TOP (Refer to Figures 5):
■ Insert the cooker top into the
hole and position it correctly.
■ Adjust the position of the
brackets “F and R” and tighten
screws “B” to block the cooker
top firmly in position.
■ With a sharp cutter or trimmer
knife trim the excess sealing
material around the edge of the
cooker top.
Figure 5a
Figure 5b
Rear side
Figure 5c
Front side
20 mm min.
40 mm max.
B
seal A
F
F
F
R
R
20 mm min.
40 mm max.
B
seal C
seal A
R
FRONT
Take care not to
damage the countertop.
Loading ...
Loading ...
Loading ...