Loading ...
Loading ...
Loading ...
8
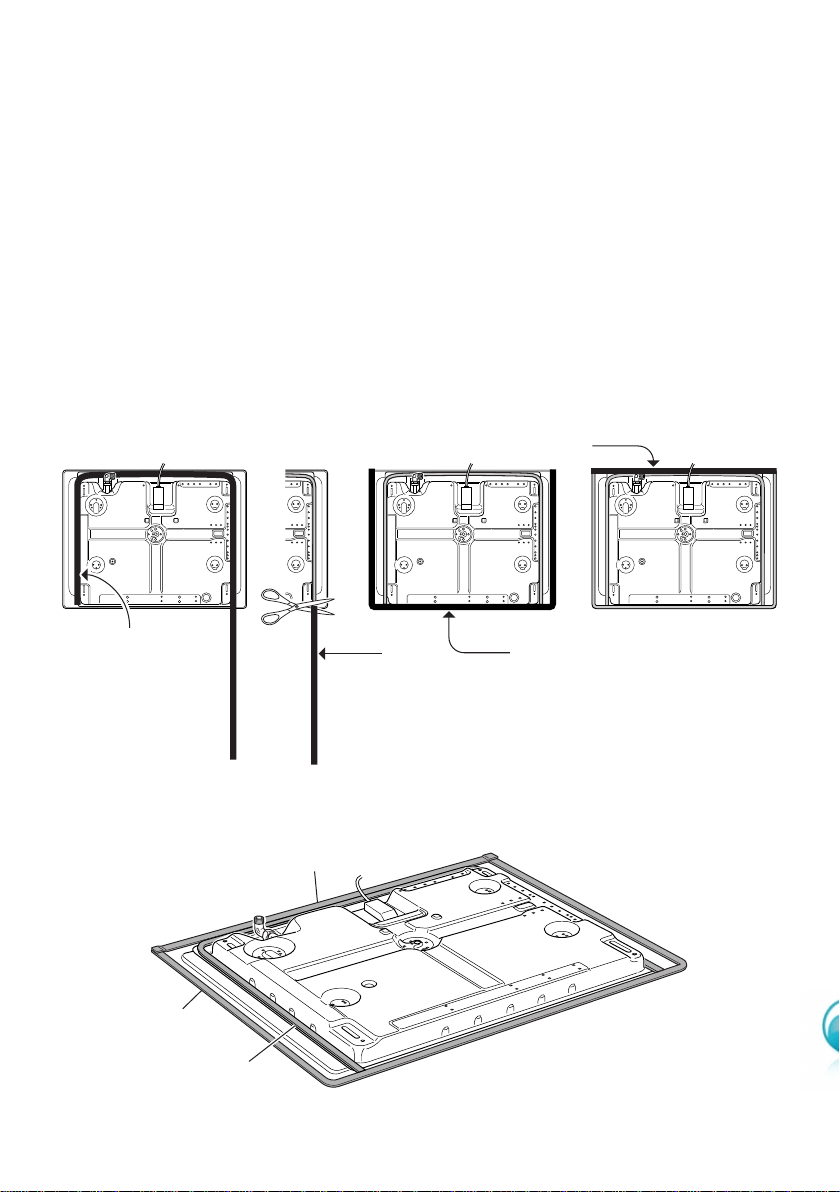
Figure 4a Fig. 4b Figure 4c Fig. 4d
Figure 4e
APPLYING THE SEALS
(Refer to Figures 4):
■ Turn the cooker top upside down.
■ Spread the longer seal “A” around the left, rear and right sides as shown in
figure 4a.
■ With a cutter or a scissors cut the excess seal “C” and retain it for next use
(figure 4b)
■ Spread the seal “B” around the left, front and right edges of the cooker top
as shown in figure 4c.
■ Spread the seal “C” along the rear edge of the cooker top as shown in
figure 4d. Making sure that the beginning and the end overlap at the seal
“B” (see figure 4e).
FRONT
seal A
seal C
seal A
seal C seal B
seal C
seal B
Loading ...
Loading ...
Loading ...