Owner Manual Coffee Maker
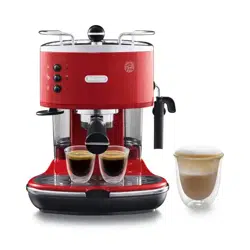
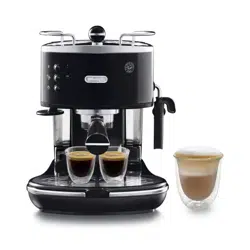
DESCRIPTION
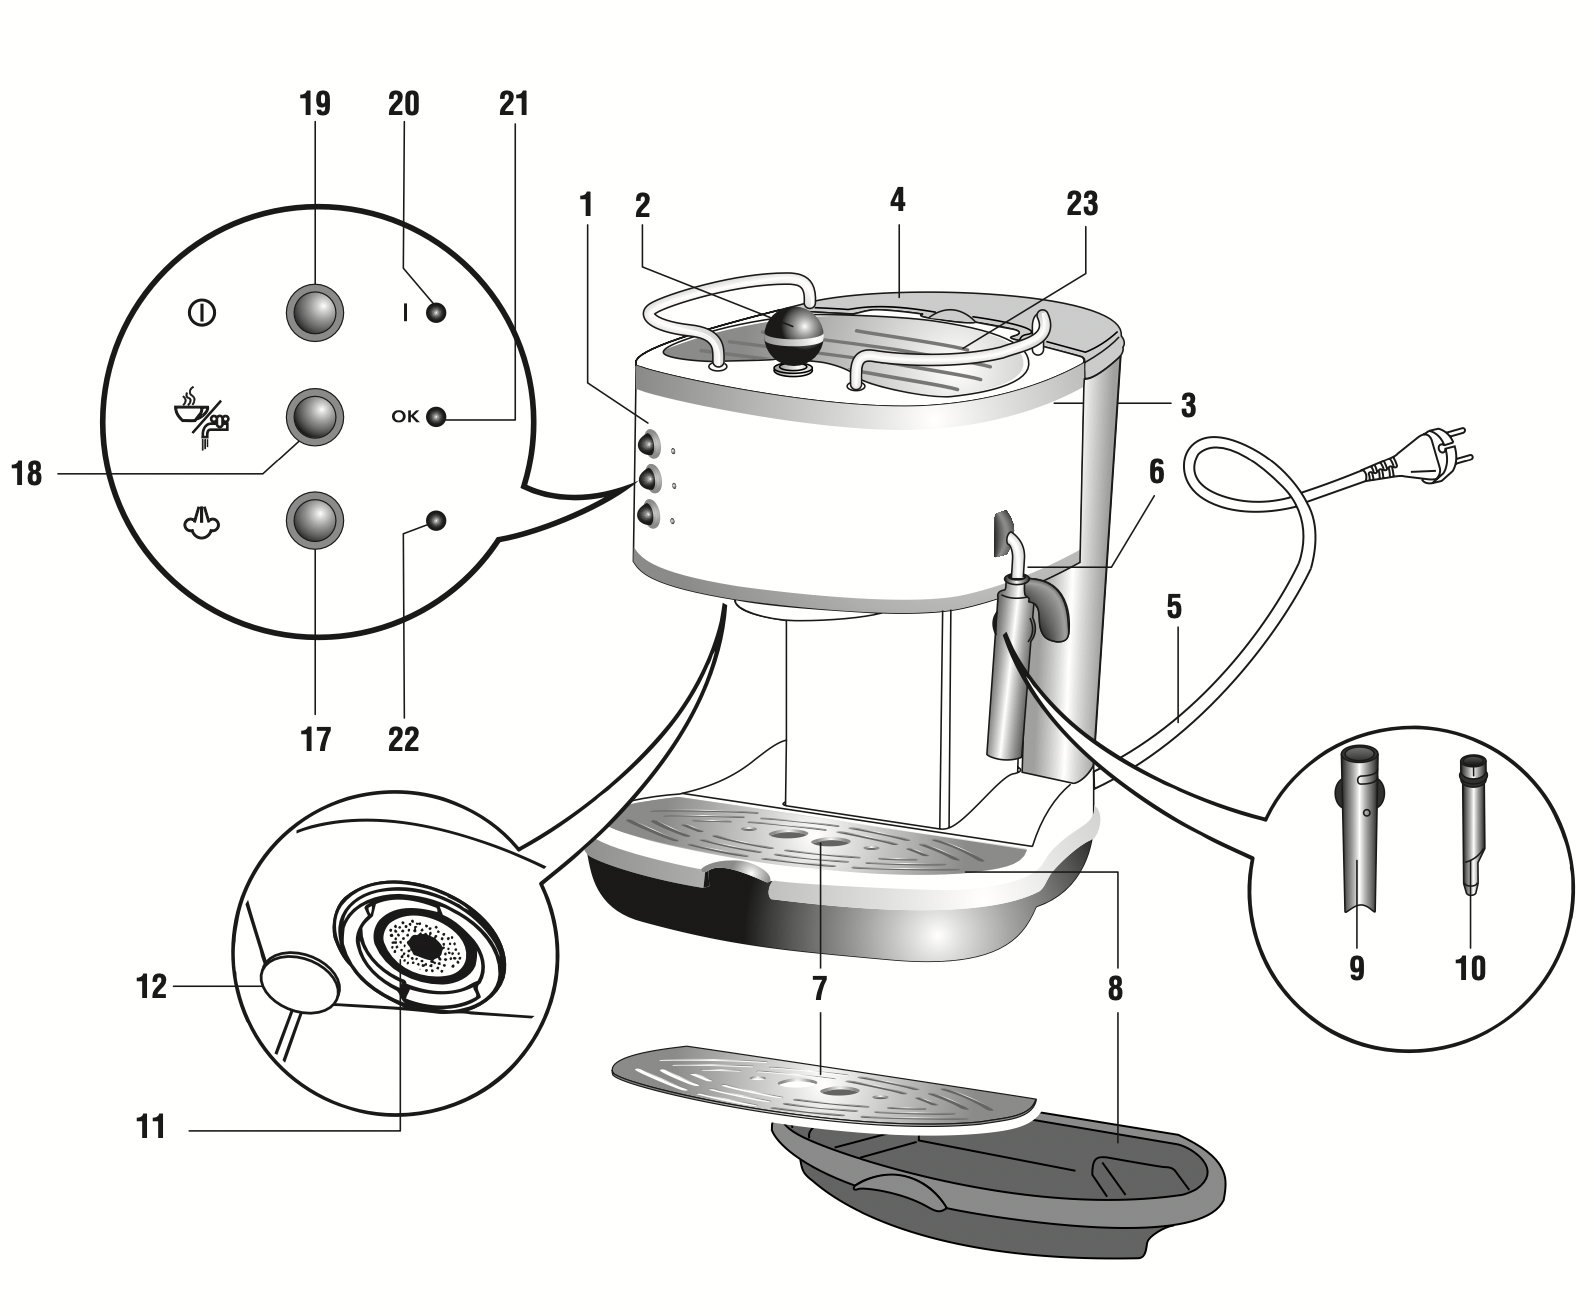
- Control panel
- Steam knob
- Water tank
- Water tank lid
- Power supply cable
- Frother tube
- Cup tray
- Drip tray
- Frothing cover
- Frothing nozzle
- Boiler outlet
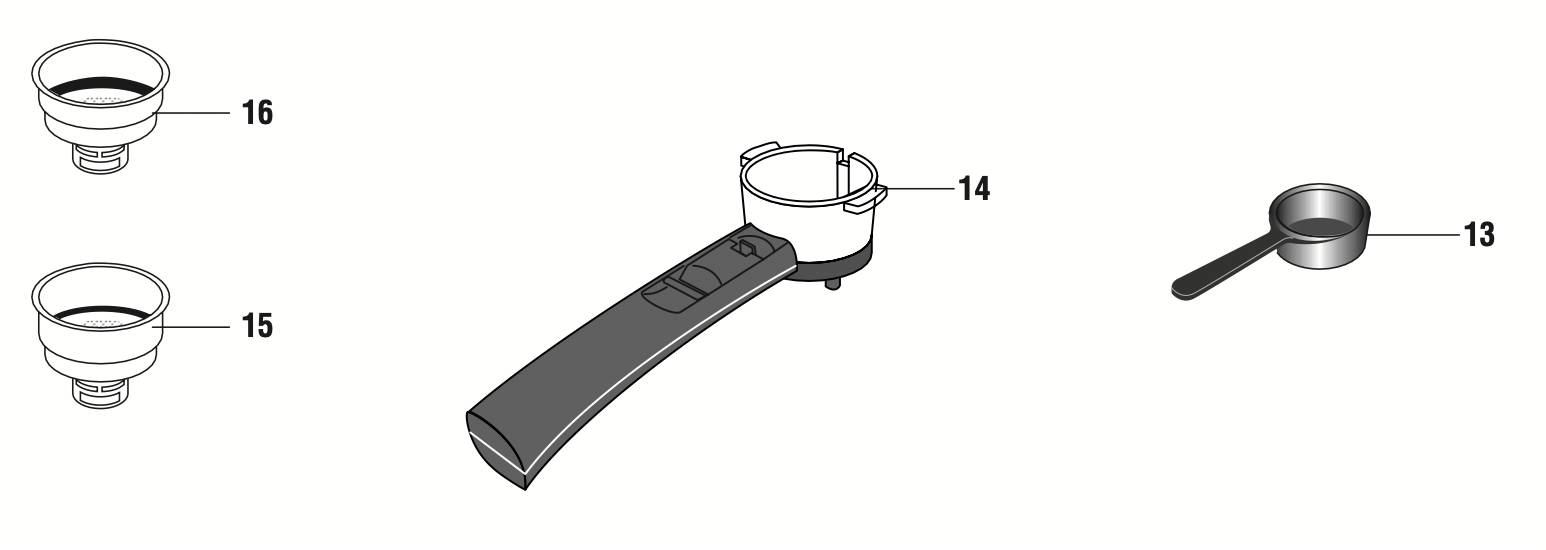
- Coffee tamper
- Measure for ground coffee
- Filter-holder
- Large filter 2 doses
- Small 1 dose filter or for pods
- Steam function selection button
- Coffee or hot water button
- On/off button
- On indicator light
- OK indicator light
- Steam function selected indicator light
- Cup warmer plate
PRELIMINARY OPERATIONS
Check after transport After the packaging has been removed, check the integrity of the appliance and the presence of all accessories.
Do not use the appliance in the presence of obvious damage. contact the De’longhi customer service center..
Installing the appliance
The following safety measures must be complied with when installing the appliance:
- The appliance could be damaged by the penetration of water.
Do not position the appliance near sinks or faucets.
- The appliance could be damaged if the water it contains freezes. Do not install the appliance in a room where the temperature can fall below freezing point.
- Position the power supply cable in a way that it cannot be damaged by sharp edges or by contact with hot surfaces (e.g. electric plates).
Connecting the appliance
Attention! Make sure that the electric voltage corresponds with that indicated on the data plate on the base of the appliance.
- Only connect the appliance to correctly installed socket with minimum rating of 12A and efficient earthing.
- In the case of incompatibility between the socket and the plug on the appliance, have the plug replaced by a qualified technician.
- The power supply cable on this appliance must never be replaced by the user as special tools are needed for this operation. contact a De’longhi authorized customer service center if the cable is damaged or must be replaced, in order to avoid all risks.
Filling the water tank
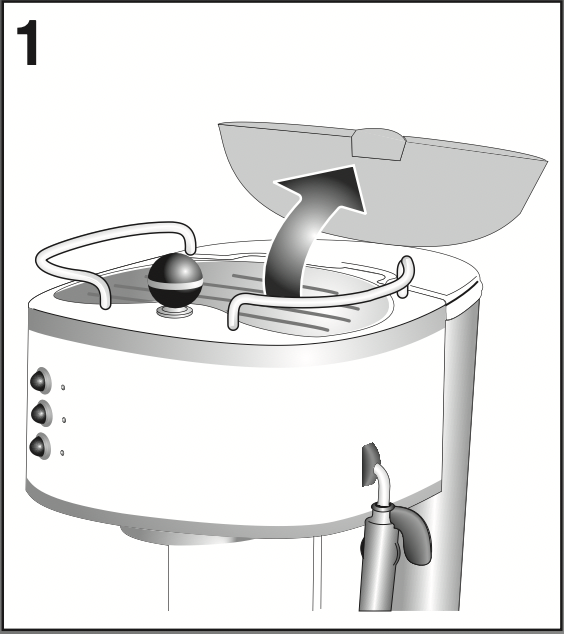
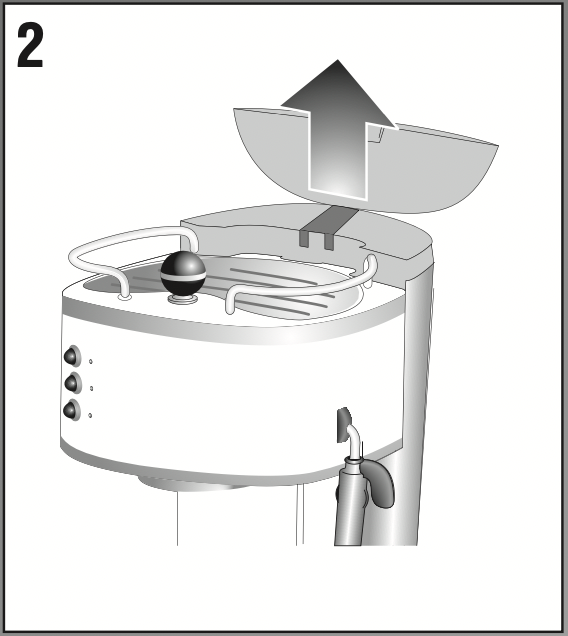
- Open the water tank lid (fig. 1) and then lift the tank to remove it (fig. 2).
- Fill the tank with fresh water but do not pass MAX. (fig. 3). Re-position the tank by pressing it lightly in place to open the valve situated on the base of the tank itself.
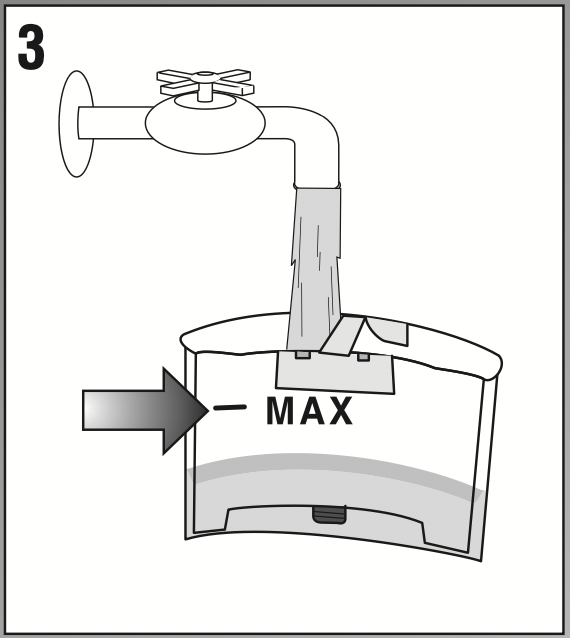
- Alternately, do not remove the tank, fill by pouring in water from a jug.
Attention: do not operate the appliance without water in the tank and always fill it when the water is a few centimeters from the bottom.
Information: it is normal to find water in the compartment under the tank; dry using a clean sponge.
HOW TO PREPARE ESPRESSO COFFEE
Pre-heating the coffee machine it is advised to pre-heat the coffee machine as follows in order to obtain an espresso coffee at the right temperature:
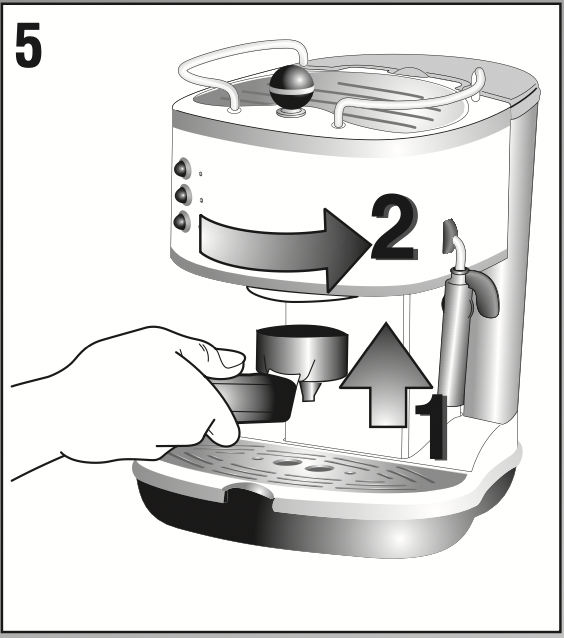
- Press the oN/off button (the relative indicator light switches on) (fig. 4) and attach the empty filterholder to the machine (fig. 5) by fitting filter holder into place and turning from left to right.

- Place a cup under the filter-holder. Use the same cup in which the coffee is to be served so that it can be pre-heated.
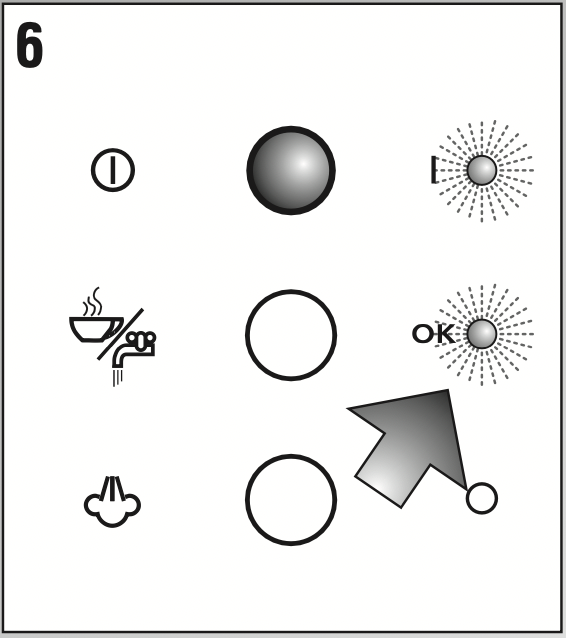
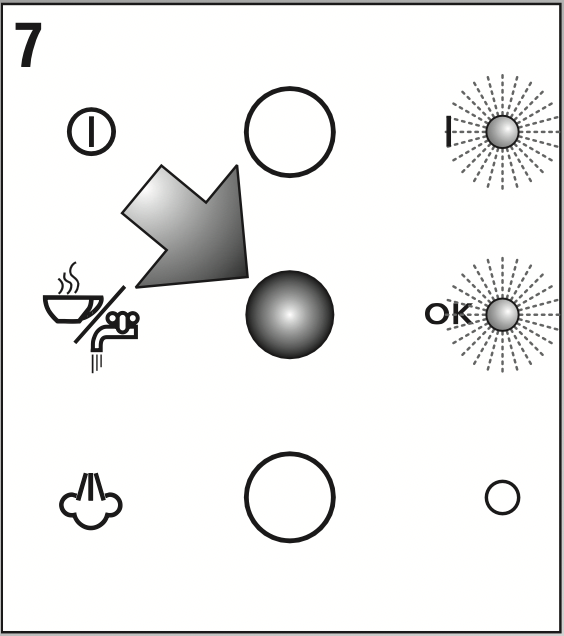
- Wait until the oK light comes on (fig. 6) and then press the coffee button (fig. 7). Allow the water to run until the oK light switches off and then stop the water by pressing the coffee button again (fig. 7).
- Empty the cup, wait for the “oK” light to switch on again and repeat the same operation again.
(it is normal for a small, harmless puff of steam to be released when the filter-holder is removed).
HOW TO PREPARE THE ESPRESSO USING GROUND COFFEE
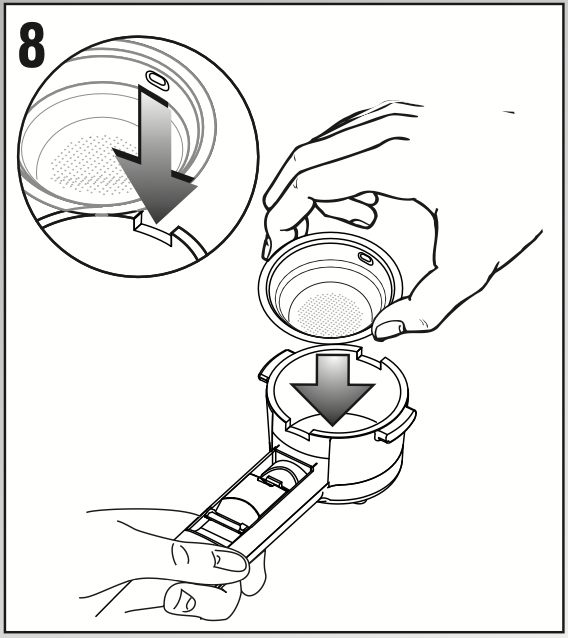
- After having pre-heated the machine as described in the previous paragraph, insert the ground coffee filter into the filter-holder, making sure that the projection is correctly inserted into the relative seat as indicated in fig. 8. Use the smallest filter for one coffee or the larger one to make two cups of coffee.
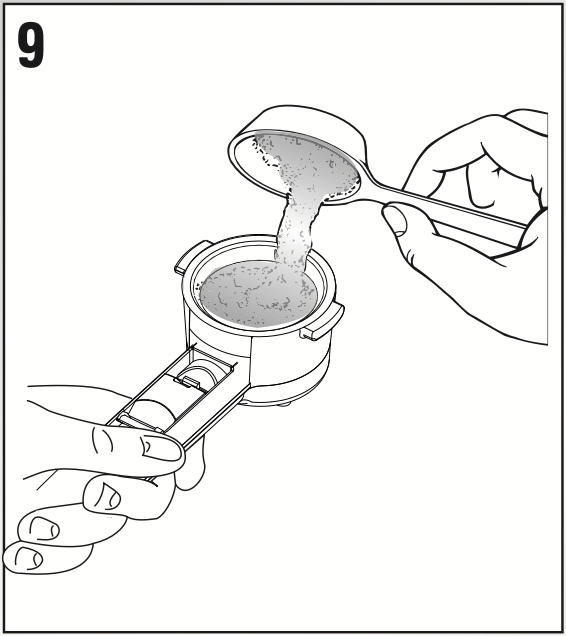
- To prepare one coffee, fill the filter with a level measuring scoop of ground coffee, about 2 tsp (7g) (fig. 9). if you wish to prepare two cups of coffee, fill the filter with two less-than-level measuring scoops of ground coffee (1 tbsp or 12g). fill the filter with small amounts at a time to prevent the coffee spilling out.
Attention: for correct use, before filling the filter with ground coffee always make sure there is no residual coffee in the filter from the previous infusion.
- Distribute the ground coffee evenly and press it lightly using the coffee tamper (fig. 10). Pressing the ground coffee is very important to obtain a good espresso. if you press too hard, the coffee will run out slowly and the crema will be dark. if you press too lightly, the coffee will run out too fast and the crema will be very light.
- Remove any excess coffee from the rim of the filterholder and attach it to the machine: turn the grip to the right (fig. 5) to prevent water from escaping.
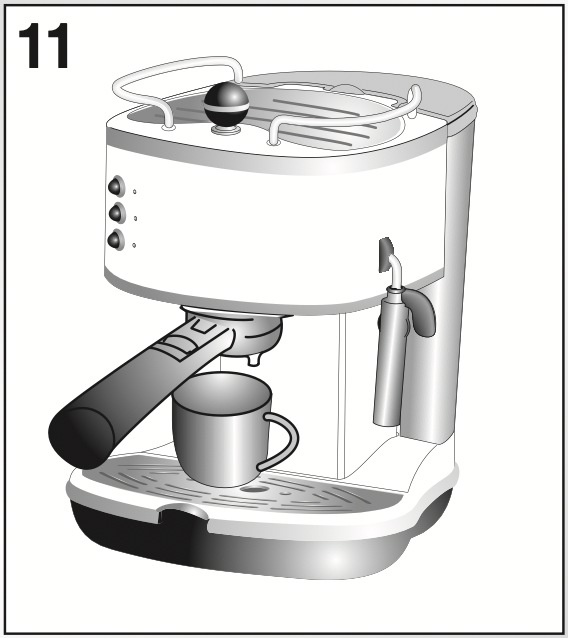
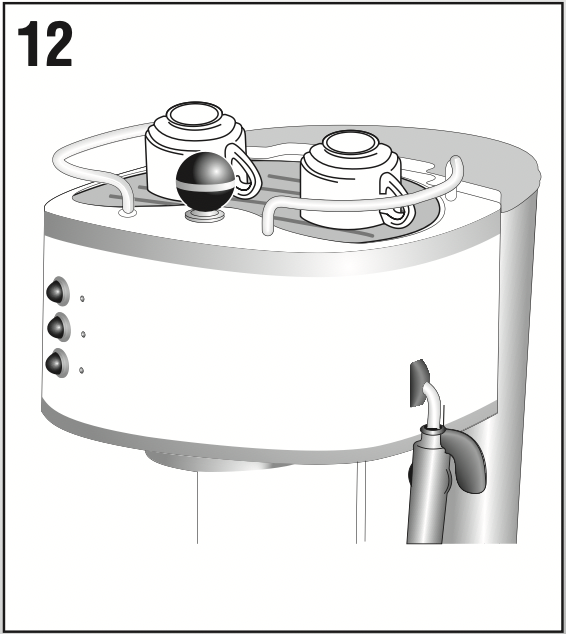
- Position the cup or cups under the filter-holder spouts (fig. 11). it is recommended to warm the cups before making the coffee by running them under hot water or leaving them to pre-heat on the cup warmer for at least 15-20 minutes (fig. 12).
- Make sure that the oK light (fig. 6) is on (if it is off, wait for it to switch on) and press the coffee button (fig. 7). once the desired amount of coffee has been obtained, press the same button again (fig. 7). (it is recommended not to run the coffee for more than 45 seconds).
- Turn the grip from right to left to release the filterholder.
Scalding hazard! To prevent sprays, do not release the filter-holder while the machine is dispensing coffee.
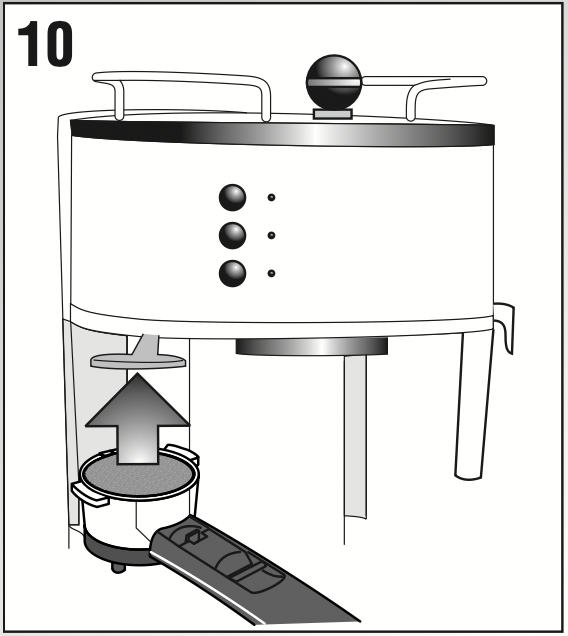
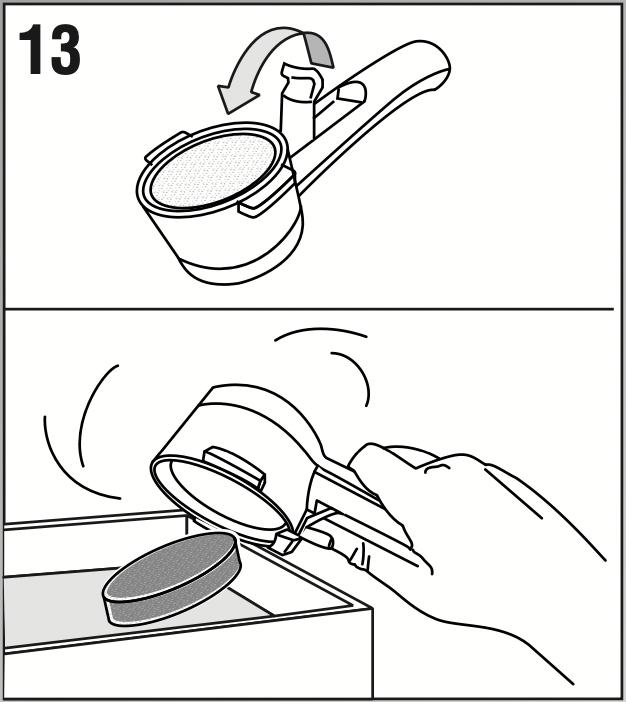
- To remove the used coffee, lock the filter using the lever in the grip and let the coffee fall out by knocking the over-turned filter-holder (fig. 13).
- Turn the machine off by pressing the on/off button (fig. 4).
Attention: Before using the machine for the first time all accessories and internal circuits must be washed by making at least five cups of coffee without using ground coffee.
HOW TO PREPARE THE ESPRESSO USING PODS
- Pre-heat the machine as described in the “PREHEATING The coffee MACHINE” chapter, making sure that the filter-holder is attached to the machine. hotter coffee is obtained in this way.
Information: use pods that comply with the ese standard: this will be indicated on the packaging by the icon to the right.
The ese standard is a system accepted by the leading coffee pod manufacturers and allows espresso coffee to be made simply and without making a mess.
- Place the small filter in the filter-holder, making sure that the projection is correctly inserted into the relative seat as indicated in fig. 8.
- Insert the pod, centering it as far as possible on the filter (fig. 14). Always follow the instructions of the pod pack for correct positioning of the pod on the filter.
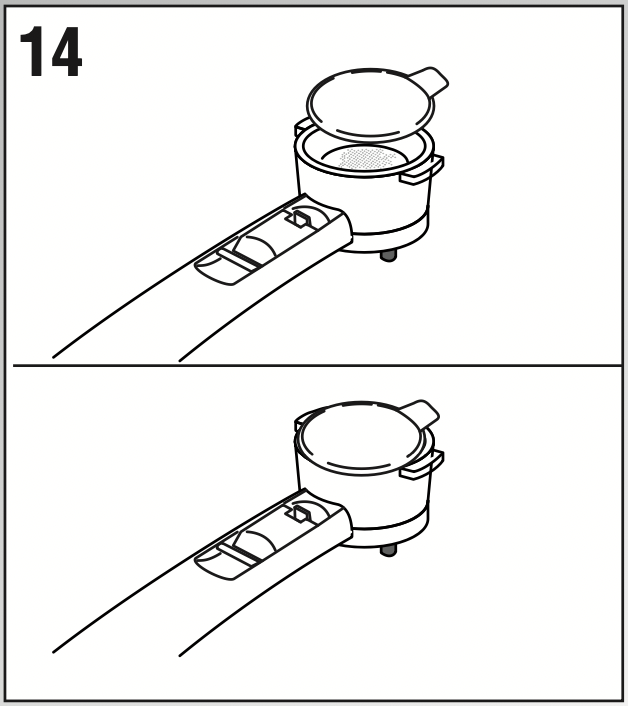
- Attach the filter-holder to the machine, by inserting the filter handle on the left side of the machine and then turn to the right (fig 5) to prevent water from escaping. ensure that handle is tightly attached to the machine (fig. 5).
- Proceed as in points 5, 6 and 7 in the previous section.
HOW TO MAKE CAPPUCCINO
- Prepare the espresso coffee as described in the previous paragraphs, using cups that are large enough to hold both the espresso and frothed milk..
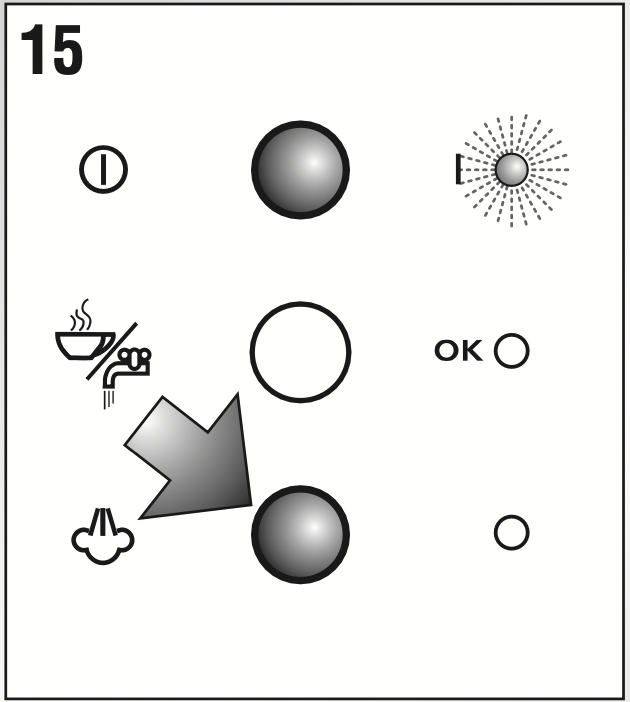
- Press the steam button (fig. 15).
- In the meantime, fill a container with about 1/2 cup of milk for every cappuccino to be prepared. The milk must be cold and at refrigerator temperature (not hot!). When choosing the frothing container consider that the volume of the milk will increase by 2 or 3 times.
Information: it is recommended to use semi-skimmed milk at refrigerator temperature (41°f/ 5°c).
- Position the container with the milk under the frother.
- Wait for the indicator light next to the steam button to switch on (fig. 16). This indicates that the boiler has reached the ideal temperature for the production of steam.
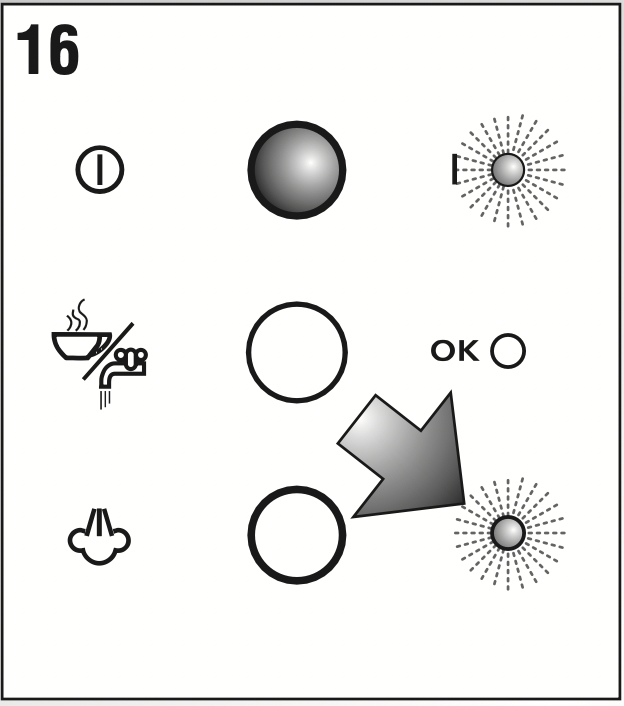
- Open the steam tap (2) for a few seconds to remove any water present in the circuit. close the tap.
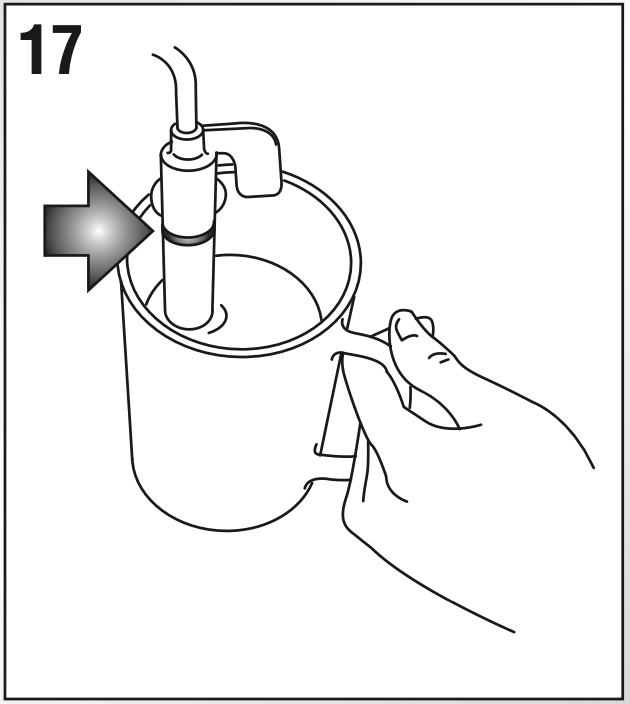
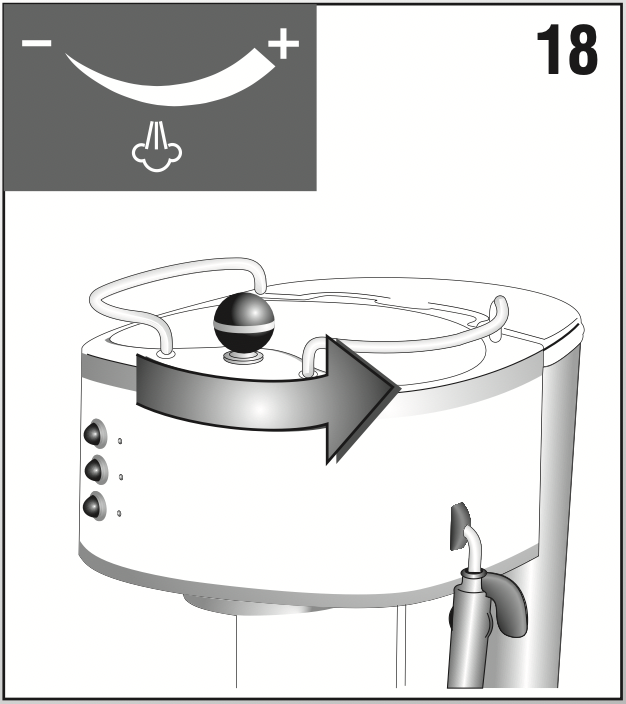
- Dip the frother into the milk a few millimeters (fig. 17) making sure not to immerse the raised line on the cappuccino maker (indicated by the arrow in fig. 17). Turn the knob counterclockwise (fig. 18) for at least half a rotation. steam escapes from the frother giving the milk a creamy appearance and increasing its volume. To obtain a creamier froth, dip the frother into the milk and turn the container with slow movements from the bottom upwards.
- When the volume of the milk has doubled, dip the frother far down into the frothing container and continue to heat the milk. When the desired temperature (ideal value is 140°f / 60°c) and the desired milk froth have been reached, interrupt the steam by turning the steam knob clockwise and release the steam button. Use the on/off button to switch the machine off (fig. 4) (The on/off indicator light switches off).
- Pour the frothed milk into the cups containing the previously-prepared espresso coffee. The cappuccino is ready: add sugar at will and if desired, sprinkle a little powdered chocolate on top of the froth.
Information
- If more than one cappuccino is to be prepared, first make all of the coffees and then prepare the milk for all of the cappuccinos;
- If more coffee must be prepared after the milk has been frothed, allow the boiler to cool first otherwise the coffee will be burned. To cool it, position a container under the filterholder spouts (fig. 11), press the steam button and allow water to run out until the steam function light switches off: then prepare the coffee. Do not deliver steam for more than 60 seconds at a time or froth more than 3 times consecutively.
Attention: the frother must always be washed after use to ensure proper functioning and sterility. Proceed as follows:
- Discharge a small amount of steam for a few seconds (see points 2,5 and 6 of the previous paragraph) by turning the steam knob (fig. 18). By doing this, the frother empties any milk left inside. switch the machine off by pressing the ON/OFF button.
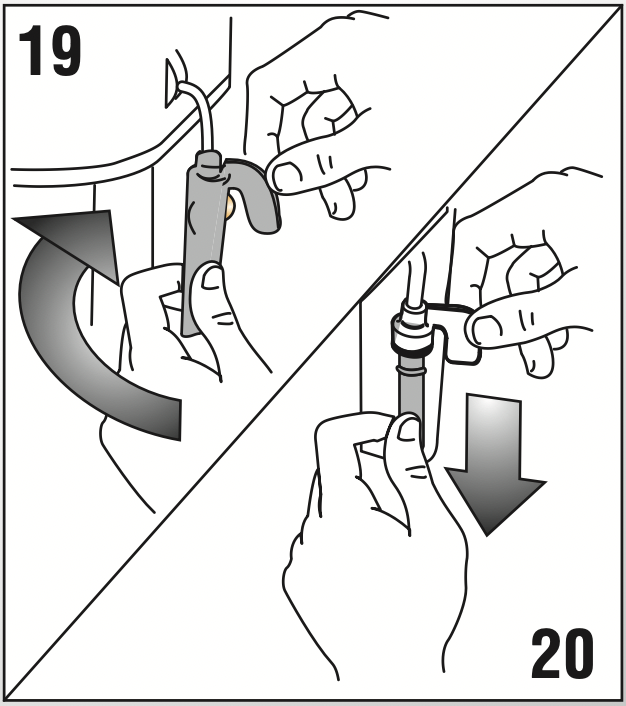
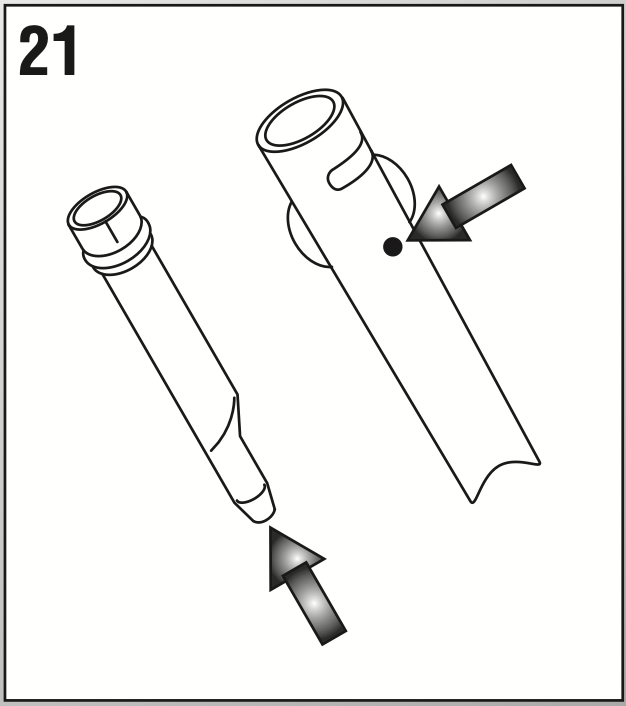
- Use one hand to hold the cappuccino tube and the other to release the frothing cover by turning it clockwise and pulling it downwards (fig. 19).
Danger! Do not touch stainless steel tube that attaches frother to machine. This will be very hot after frothing.
- Remove the frothing nozzle from the tube by pulling it downwards (fig. 20).
- Wash the frother and nozzle thoroughly in warm water.
- Make sure that the two holes indicated by the arrows in fig. 21 are not blocked. clean using a pin if necessary.
- Re-mount the frothing nozzle by inserting it firmly upwards into the steam tube.
- Re-mount the frothing cover by inserting it upwards and turning it counterclockwise .
PRODUCTION OF HOT WATER
- Switch the machine on by pressing the on/off button (fig. 4). Wait for the oK light to switch on (fig. 6).
- Position a container under the cappuccino maker.
- Press the coffee button (fig. 7) and turn the steam knob counterclockwise at the same time (fig. 18): the hot water will escape from the frother.
- To interrupt the hot water, turn the steam knob clockwise and press the coffee button again (fig. 7).
Maximum delivery of 60 seconds is recommended.
CLEANING
Danger! Before performing any cleaning operations of the external parts of the appliance, switch the machine off, remove the plug from the outlet and let the machine cool down.
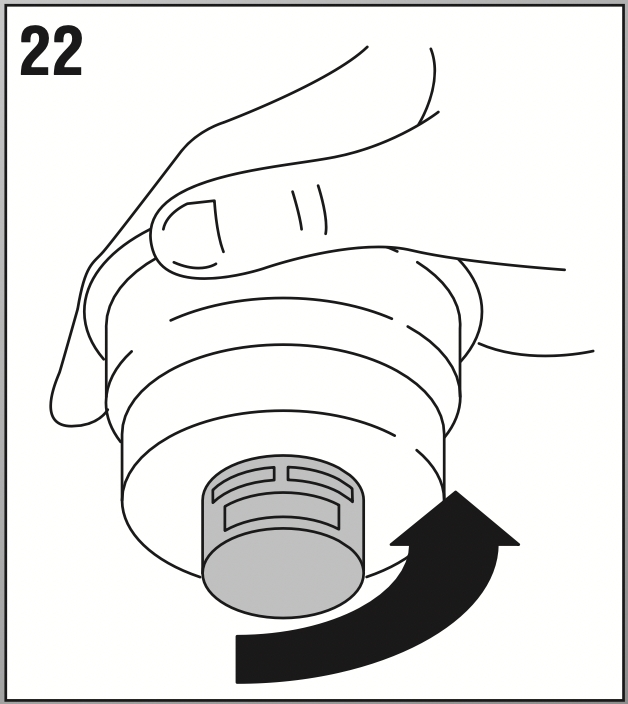
Cleaning and maintenance of the filter clean the filter-holder and ground coffee filters about every 300 coffees and when the coffee drips through the filter-holder and does not flow completely:
- Remove the filter from the filter-holder.
- Unscrew the filter cap (fig. 22) in the direction indicated by the arrow on the cap itself.
- Remove all parts of filter by pushing the black rubber holder and metal disc out of filter. Remove the metal disc from its backing. (There should be 5 separate pieces to the filter)
- Rinse all components and clean the metal filter disc thoroughly using hot water and a brush (fig. 23).
Check that the holes in the metal filter disc are not blocked. If this is not the case, clean them using a pin (see fig. 24).

- Re-mount the filter by placing the metal disc and backing inside the black rubber holder as indicated in figure 25. Make sure that the plastic disc pin is inserted inside the hole in the black plastic holder as indicated by the arrow in fig. 25.
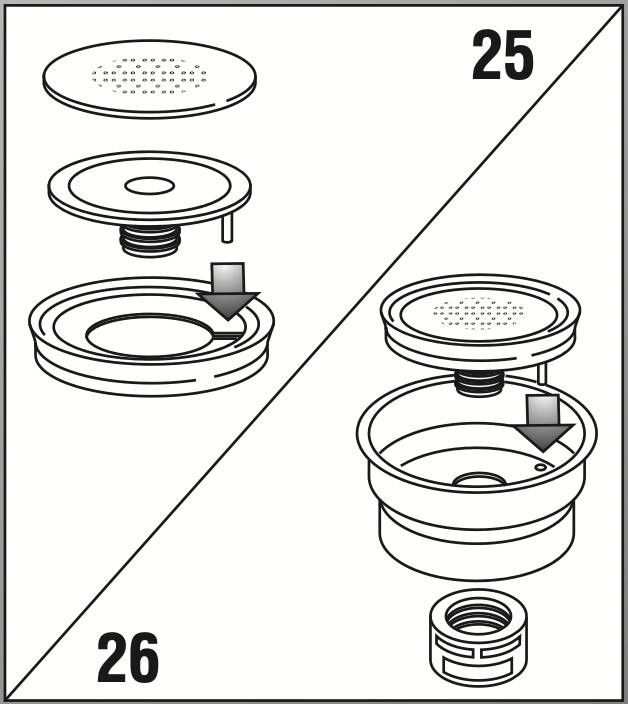
- Re-insert the black rubber holder that contains metal disc and backing into the metal holder (fig. 26), making sure that the pin is inserted into the hole of the support itself (see arrow fig. 26).
- Finally, tighten the filter cap .
The warranty is not valid if the cleaning operations described above are not performed on a regular basis.
Cleaning the boiler outlet
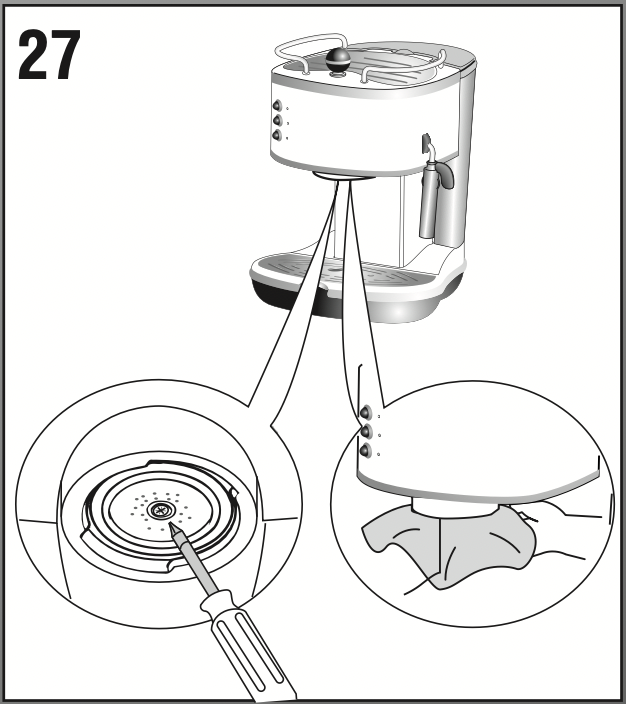
About every 300 coffees the espresso boiler outlet must be cleaned as follows:
- Make sure that the coffee machine is not hot and the plug is disconnected from the socket;
- Use a screwdriver to remove the screw that fixes the espresso boiler outlet (fig. 27);
- Remove the boiler outlet;
- Clean the boiler using a damp cloth (fig. 27);
- Clean the boiler outlet disc thoroughly using hot water and a brush. check that the holes are not blocked. if this is not the case, clean them using a pin (fig. 24).
- Rinse the boiler outlet disc under the tap, rubbing continuously.
- Re-mount the boiler outlet, paying attention to position it correctly on the gasket.
The warranty is not valid if the cleaning operations described above are not performed on a regular basis.
Other cleaning operations
- Do not use solvents or abrasive detergents to clean the machine. Use a soft, damp cloth.
- Clean the filter-holder cup, the filters, drip tray and water tank regularly. To empty the drip tray, remove the cup warmer grid, remove the water and clean the tray using a cloth: then re-assemble the drip tray. clean the water tank using a soft bottle-brush in order to reach the bottom.
Danger! During cleaning, never immerse the machine in water: it is an electric appliance.
DESCALING
It is recommended to descale the machine about every 200 coffees.
We recommend using De’longhi approved descaler which is available through customer service.
Follow this procedure:
- Fill the tank with the descaling solution and dilute the solution with water, following directions on the descaling solution package.
- Press the on/off button and wait for the oK light to switch on.
- Make sure that the filter holder is not attached and position a container under the boiler outlet.
- Press the coffee button and allow about 1/4 of the solution contained in the tank to flow out: every now and again turn the steam knob and allow a small amount of solution to escape; then interrupt by pressing the button again and leave the solution to act for about 5 minutes.
- Repeat point 4 another 3 times, until the tank is completely empty.
- To eliminate residues of the solution and lime scale, rinse the tank well and fill it with clean water (without descaler).
- Press the coffee button (fig. 6) and operate the appliance until the tank is completely empty;
- Repeat operations 6 and 7 again.
TROUBLESHOOTING
|
PROBLEM
|
POSSIBLE CAUSES
|
SOLUTION
|
|
Espresso coffee does not flow out
|
|
|
- The holes in the filter-holder are blocked
|
- Clean the holes in the filter-holder spouts
|
- The espresso boiler outlet is blocked
|
- Clean the boiler outlet as indicated in the “Cleaning the boiler outlet” paragraph
|
|
Espresso coffee drips from the edges of the filter-holder instead of through the holes
|
- The filter-holder is inserted incorrectly
|
- Attach the filter-holder correctly by placing filter holder on the left side of the machine and turning towards the right. Filter holder should be tightly locked in place.
|
- The espresso boiler gasket has lost elasticity
|
- Replace the espresso boiler gasket by calling customer service.
|
- The holes in the filter-holder spout are blocked
|
- Clean the holes in the spouts.
|
|
The espresso coffee is cold
|
- The espresso OK light is not on when the coffee button is pressed
|
- Wait for the OK light to switch on
|
- Pre-heating has not been carried out
|
- Pre-heat as indicated in the “Preheating the coffee machine” paragraph
|
- The cups have not been pre-heated
|
- Pre-heat the cups using hot water or leave them for at least 20 minutes on the cup warmer plate.
|
|
Loud pump noise
|
|
|
- The tank is inserted incorrectly and the valve on the bottom is not open
|
- Press the tank lightly to open the valve on the bottom
|
|
The coffee crema is clear (it flows quickly from the spout)
|
- The ground coffee has not been sufficiently pressed
|
- Tamper the ground coffee more (fig. 10)
|
|
|
- Increase the amount of ground coffee
|
- The coffee is not ground finely enough
|
- Only use coffee ground specifically for espresso coffee machines
|
- Incorrect type of ground coffee
|
- Change the type of the ground coffee. it is recommended to use a dark espresso roast.
|
|
The coffee crema is dark (it flows slowly from the spout)
|
- The ground coffee is too tightly pressed
|
- Tamper the coffee less (fig. 6)
|
|
|
- Decrease the amount of ground coffee
|
- The espresso boiler outlet is blocked
|
- Clean as indicated in the “Cleaning the espresso boiler outlet” paragraph.
|
|
|
- Clean as indicated in the “Cleaning the filter” paragraph.
|
- The coffee is too finely ground
|
- Only use coffee ground specifically for espresso coffee machines
|
- The ground coffee is too fine or is damp
|
- Only use coffee ground specifically for espresso coffee machines and it must not be too damp
|
- Incorrect type of ground coffee
|
- Change the type of the ground coffee. it is recommended to use a dark espresso roast.
|
|
The milk does not froth when making a cappuccino
|
- The milk is not cold enough
|
- Always use milk at refrigerator temperature (41°f/5°c).
|
|
|
- Carefully clean the holes in the frother in particular, those indicated in figure 21
|