Loading ...
Loading ...
Loading ...
E-20
Pre-filter
(Guide for cleaning: Once a month)
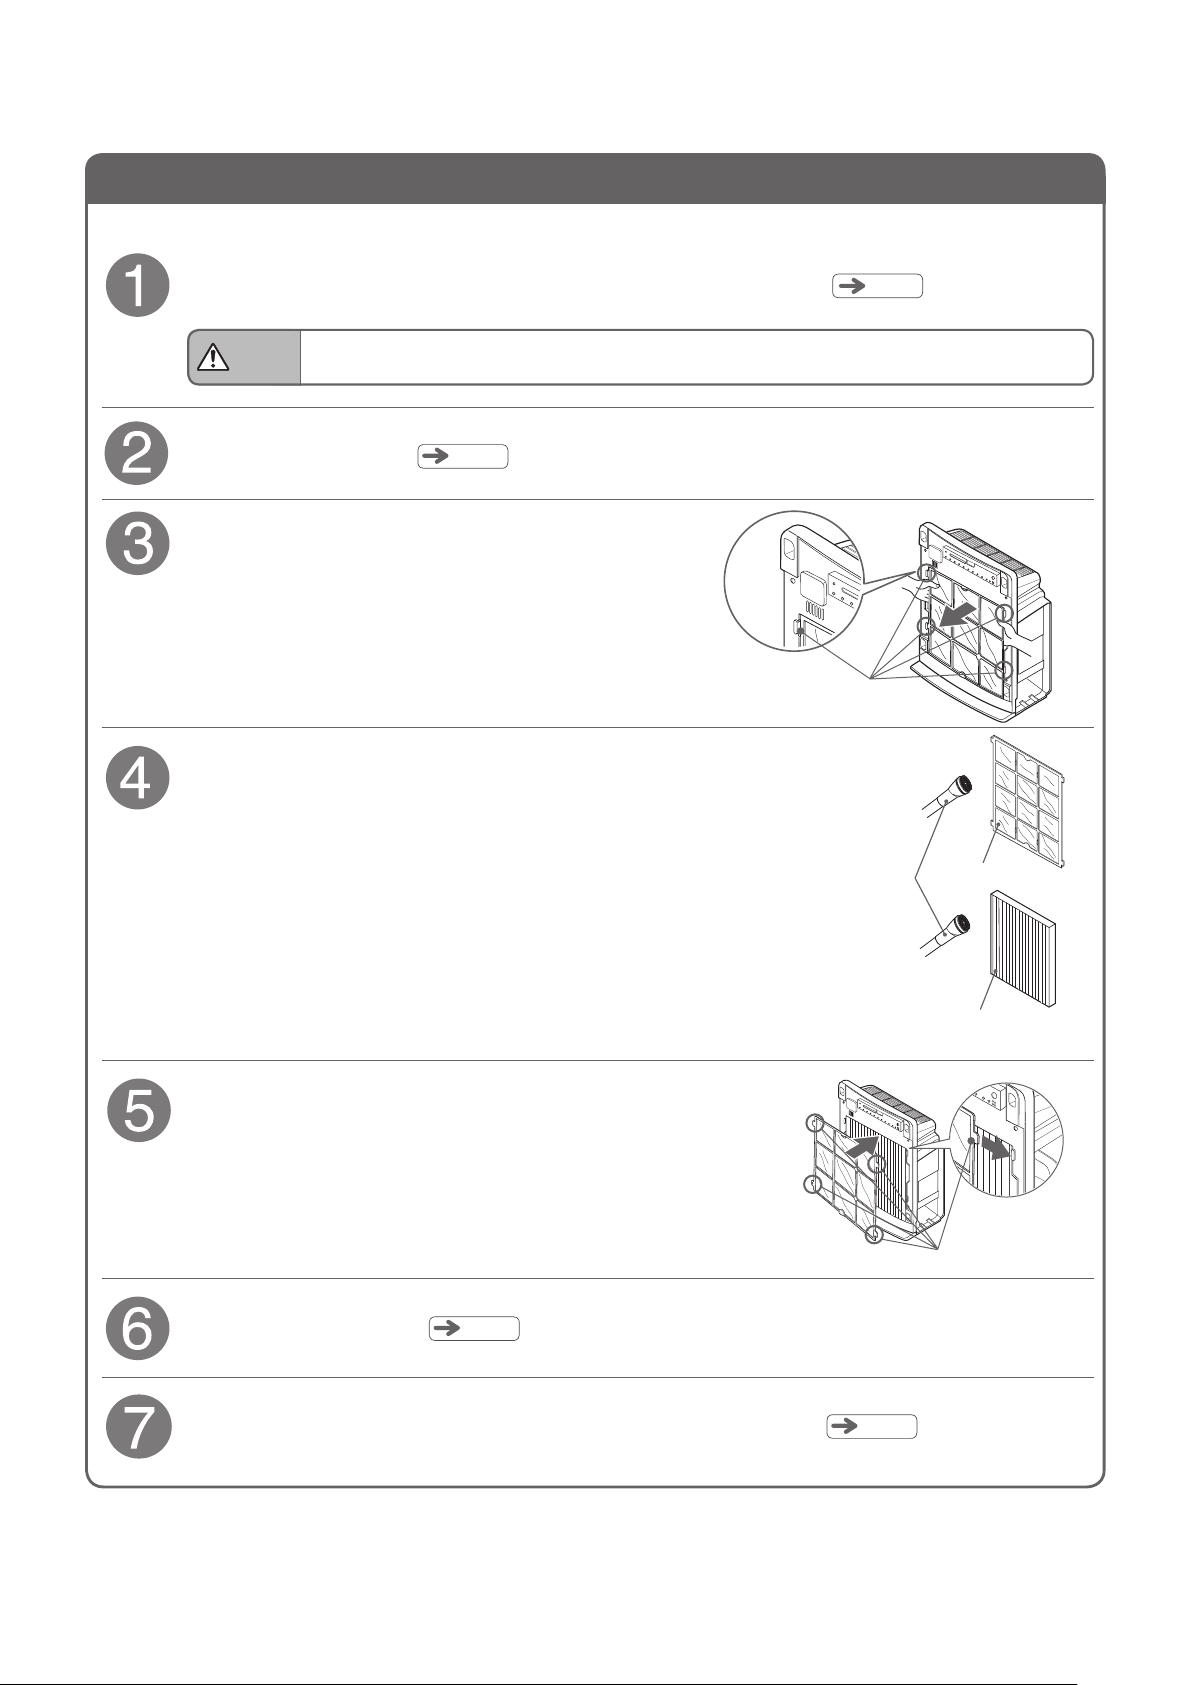
Remove the pre-filter.
Clean the pre-filter.
Remove the panel.
Reattach the pre-filter.
Reattach the panel.
Cleaning (Continued)
Install the water tray, and then mount the water tank.
P.E-9
P.E-8
P.E-8
P.E-9
To clean the pre-fi lter, follow the steps below.
Remove the water tank, and then pull out the water tray.
When you remove the water tank, water may drip from the tank cap. Lay a dry
cloth before removing the water tank.
(This is to prevent water leakage.)
Disengage the four tabs of the pre-fi lter.
Use a vacuum cleaner or the like to remove dust. If the dust
cannot be removed, wash off with water. After washing, fully
drain the pre-fi lter and then dry it in a well-ventilated place
not exposed to sunlight.
When you wash the pre-fi lter, use a soft toothbrush or the
like.
If you want to remove dust on the filter, use a vacuum
cleaner. (The fi lter is not washable.)
The pre-fi lter is a consumable part.
When damaged pre-filter needs to be replaced, purchase the replacement part (Part No. EP-BX40-002).
Disengage the four tabs
of the pre-filter.
Vacuum cleaner
attachment for
cleaning shelves
Pre-filter
Filter
(not washable)
Pre-filter tabs
CAUTION
Insert the four tabs securely into the holes on the purifier
and fi x the pre-fi lter.
T_S-EP-A5000.indd 20T_S-EP-A5000.indd 20 11/14/2011 1:58:37 PM11/14/2011 1:58:37 PM
Loading ...
Loading ...
Loading ...