Loading ...
Loading ...
Loading ...
UTILITY STITCHES — — — — — — — — — — — — — — — — — — — — — — — — — — — — — — — — — — — — — — — — — — —
—
72
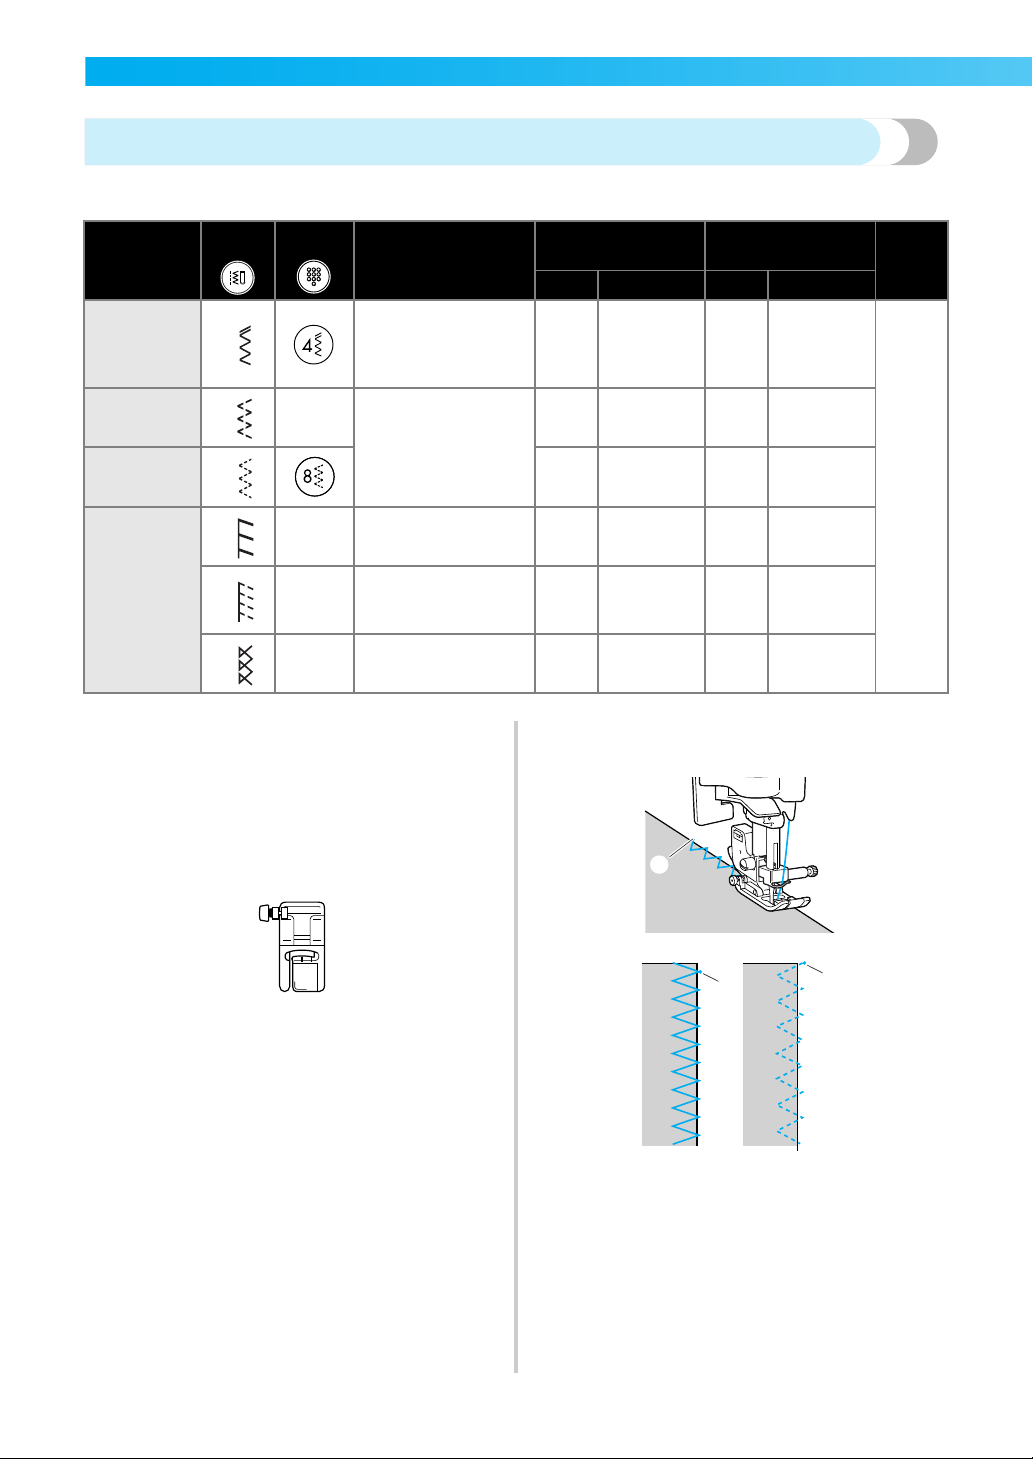
Sewing overcasting stitches using zigzag foot “J”
Six stitches can be used to sew overcasting stitches with zigzag foot “J”.
a
Turn on the sewing machine.
b
Select a stitch.
• For details, refer to “Selecting stitching” (page
67).
c
Attach zigzag foot “J”.
• For details, refer to “Replacing the presser
foot” (page 41).
d
Sew along the edge of the fabric with the
needle dropping off the edge at the right.
a Needle drop point
Stitch Name
Pattern
Numeric
Key
Application
Stitch Width
[mm (inch)]
Stitch Length
[mm (inch)]
Presser
Foot
Auto Manual Auto Manual
Zigzag stitch
(center
needle
position)
05
Preventing fraying
(center baseline/
reverse stitching)
3.5
(1/8)
0.0–7.0
(0–1/4)
1.4
(1/16)
0.0–4.0
(0–3/16)
J
2-point
zigzag stitch
06
–
Preventing fraying in
thick fabrics and
stretch fabrics
5.0
(3/16)
1.5–7.0
(1/16–1/4)
1.0
(1/16)
0.2–4.0
(1/64–3/16)
3-point
zigzag stitch
07
5.0
(3/16)
1.5–7.0
(1/16–1/4)
1.0
(1/16)
0.2–4.0
(1/64–3/16)
Overcasting
stitch
11
–
Preventing fraying in
stretch fabrics
5.0
(3/16)
0.0–7.0
(0–1/4)
2.5
(3/32)
0.5–4.0
(1/32–3/16)
12
–
Preventing fraying in
thick fabrics and
stretch fabrics
5.0
(3/16)
0.0–7.0
(0–1/4)
2.5
(3/32)
0.5–4.0
(1/32–3/16)
13
–
Preventing fraying in
stretch fabrics
4.0
(3/16)
0.0–7.0
(0–1/4)
4.0
(3/16)
1.0–4.0
(1/16–3/16)
J
a
a
a
Loading ...
Loading ...
Loading ...