Loading ...
Loading ...
Loading ...
Appliqué, Patchwork and Quilt Stitching 99
3
—
— — — — — — — — — — — — — — — — — — — —
—
— — — — — — — — — — — — — — — — — — — — — — — — — — — — — — —
• For details, refer to “Replacing the presser
foot” (page 41).
d
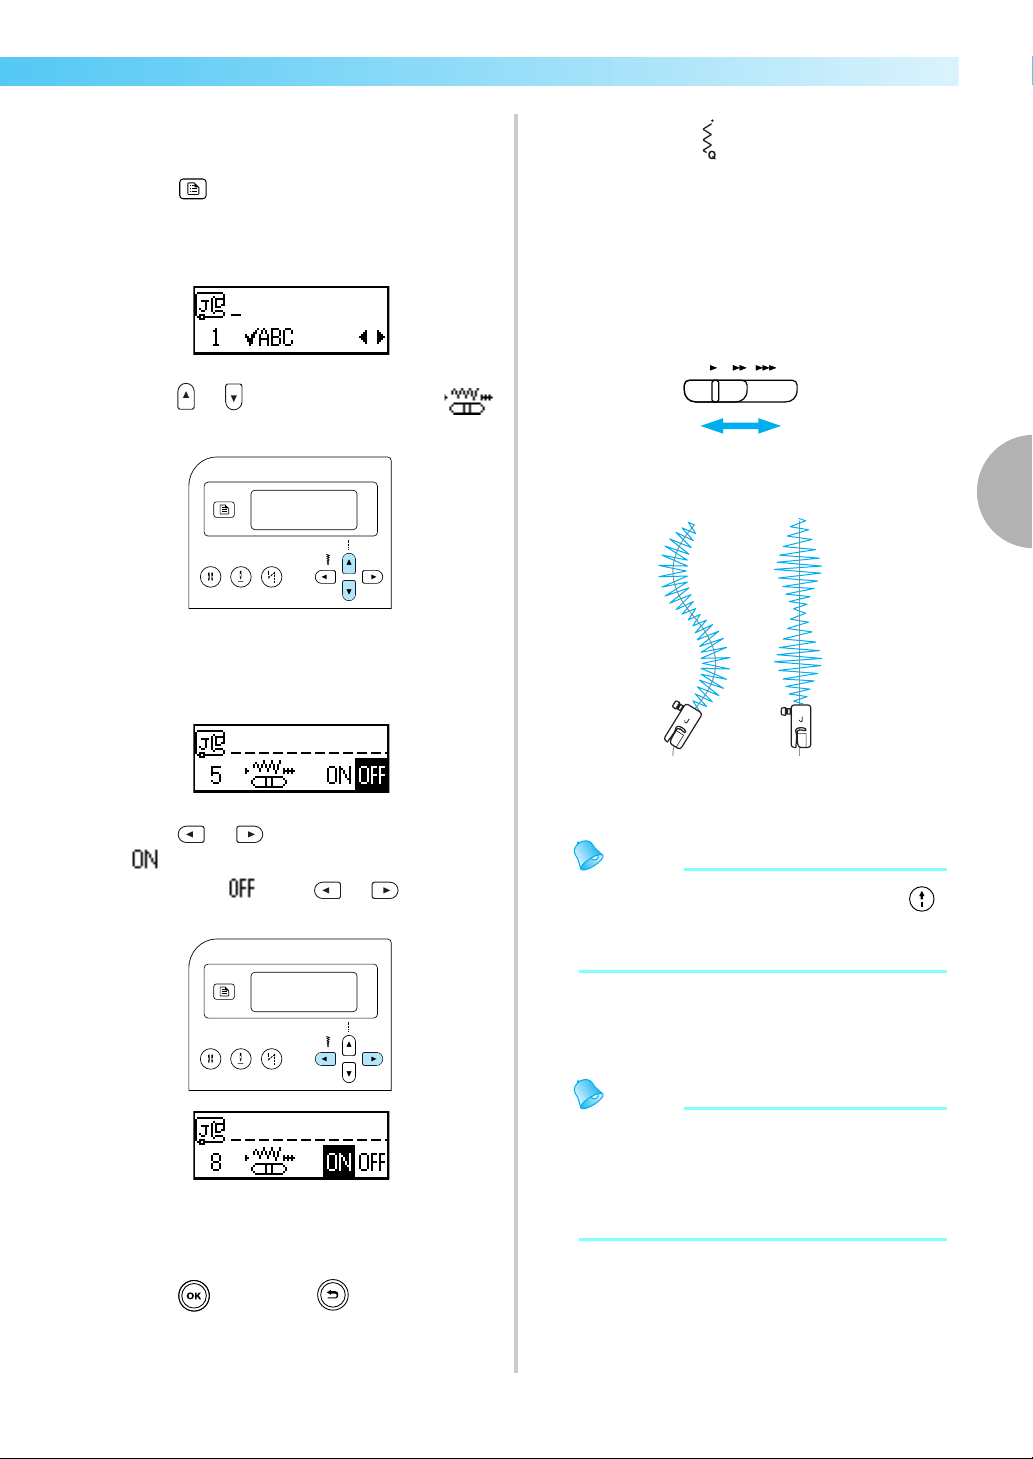
Press (Settings key) in the operation
panel.
X The settings screen appears.
e
Press or (Stitch length keys) until
is displayed.
X The screen for specifying that the stitch
width can be controlled with the sewing
speed controller appears.
f
Press or (Stitch width keys) to select
.
To return to , press or (Stitch
width keys).
X The machine is now set so that the stitch
width can be controlled with the sewing
speed controller.
g
Press (OK key) or (Cancel/clear
key).
X The initial stitch screen appears again.
h
Select stitch
21
.
• For details, refer to “Selecting stitching” (page
67).
i
While sewing, slide the sewing speed
controller to adjust the stitch width.
Slide the controller to the left to make the width
narrower. Slide the controller to the right to
make the width wider.
a Narrower
b Wider
• Adjust the sewing speed with the foot
controller.
Memo
z When the foot controller is plugged in,
(Start/stop button) cannot be used to start
sewing.
j
When you are finished sewing, set the stitch
width control setting back to OFF.
Memo
z
Although the stitching result differs depending
on the type of fabric being sewn and the
thickness of the thread being used, for best
results, adjust the stitch length to between 0.3
and 0.5 mm (1/64 and 1/32 inch).
12
Loading ...
Loading ...
Loading ...