Loading ...
Loading ...
Loading ...
Donotuseflametocheckforleaksfrom
gasconnections.Checkingfor leakswithaflamemay
resultinafireorexplosion.
Tightenallconnectionsif necessaryto preventgas
leakageinthecooktoporsupplyline.
Checkalignmentof controlknobvalvesafter
connectingthecooktoptothegassupplyto besurethe
cooktopmanifoldpipehasnotmoved.Amisalignment
couldcausethevalvestemstorubontilecontrolpanel,
resultinginagasleakattilevalve.
Disconnectthecooktopanditsindividualmanual
shutoffvalvefromthegassupplypipingsystemduring
anypressuretestingofthatsystematatestpressure
greaterthanY2psig(3.5Kpaor14"watercolum).
2.ConvertthePressureRegulatorfrom LPGasto
NATURALGas(seefigure7)
A.Removetile capfromthepressureregulator.
B.Removetheplunger.
C.Turntheplungerupsidedownwiththeenlargedend
UP.
D.Replacetheplungerinsidetheregulator.Theletters
NATor4" W.C.shouldbevisibleontheexposed
endoftheplunger.
E.Replacetilecapontile pressureregulator.
Plunger-Enlarged"_ Cap
endUPforNatural
O
Gas __._.
Isolate the cooktop from the gas supply piping
system by closing its individual manual shutoff valve
during any pressure testing of the gas supply piping
system at a test pressures equal to or less than _/2psig
(3.5 Kpa or 14" water colum).
Figure 7
Natural Gas
5. LPiPropane Gas Conversion
A. Pressure Regulator Conversion
Note: • Do not remove the Pressure Regulator.
If in doubt about the pressure at the manifold,
use a manometer. The inlet pressure on the
regulator must be at least I "' W.C. higher than
the outlet pressure. Inlet pressure on the
regulator must never exceed 14" W.C.
1. Convert the Pressure Regulator from Natural Gas
to LP Gas (see figure 6)
A. Remove the cap from the pressure regulator.
B. Remove the plunger.
C.Turn the plunger upside down with the enlarged end
DOWN.
D. Replace the plunger inside the regulator. The letters
LP or 10" W.C. should be visible on the exposed end
of the plunger.
E. Replace the
cap on the
pressure
regulator,
Cap
Plunger- Enlarged _'_
end DOWN for LP _1
Gas
Figure 6
LP Gas
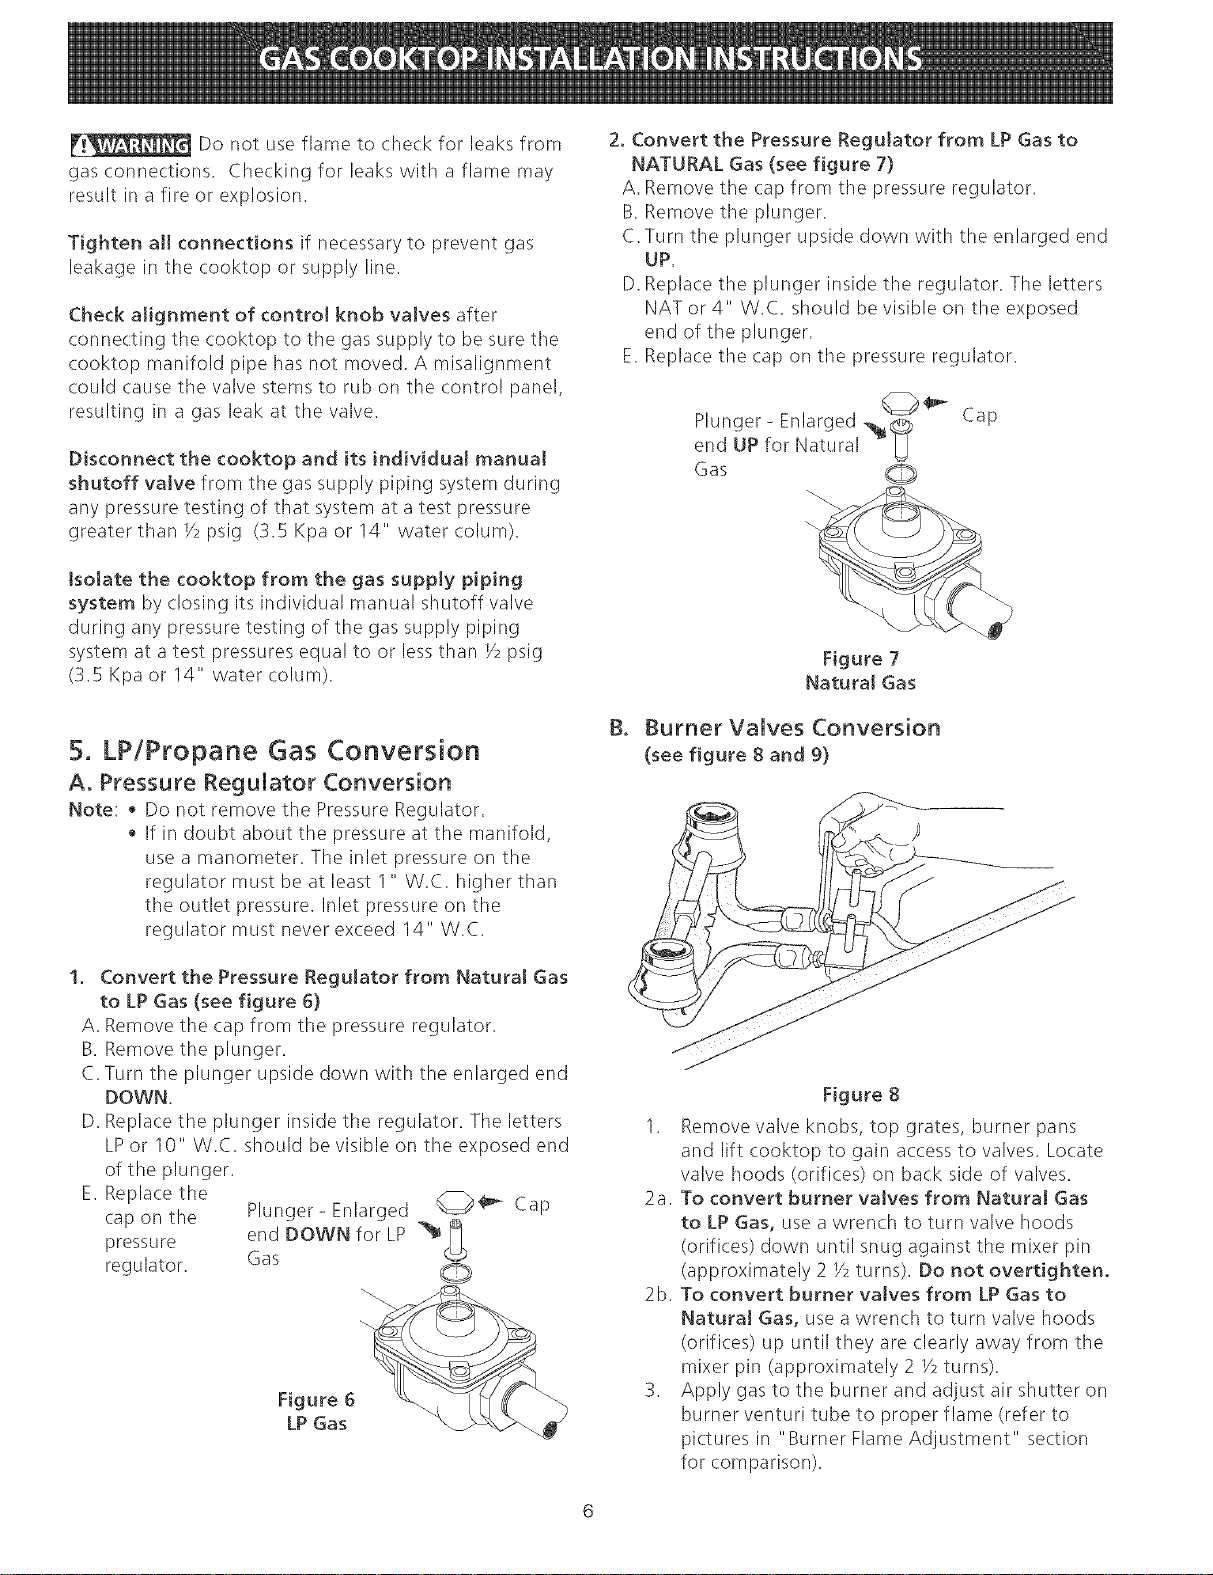
B. Burner Valves Conversion
(see figure 8 and 9)
Figure 8
1. Remove valve knobs, top grates, burner pans
and lift cooktop to gain access to valves. Lo(ate
valve hoods (orifices) on back side of valves.
2a. To convert burner valves from Natural Gas
to LP Gas, use a wrench to turn valve hoods
(orifices) down until snug against the mixer pin
(approximately 2 _/2turns). Do not overtighten.
2b. To convert burner valves from LP Gas to
Natural Gas, use a wrench to turn valve hoods
(orifices) up until they are clearly away from the
mixer pin (approximately 2 Y2turns).
3. Apply gas to the burner and adjust air shutter on
burner venturi tube to proper flame (refer to
pictures in "Burner Flame Adjustment" section
for comparison).
Loading ...
Loading ...
Loading ...