Loading ...
Loading ...
Loading ...
17
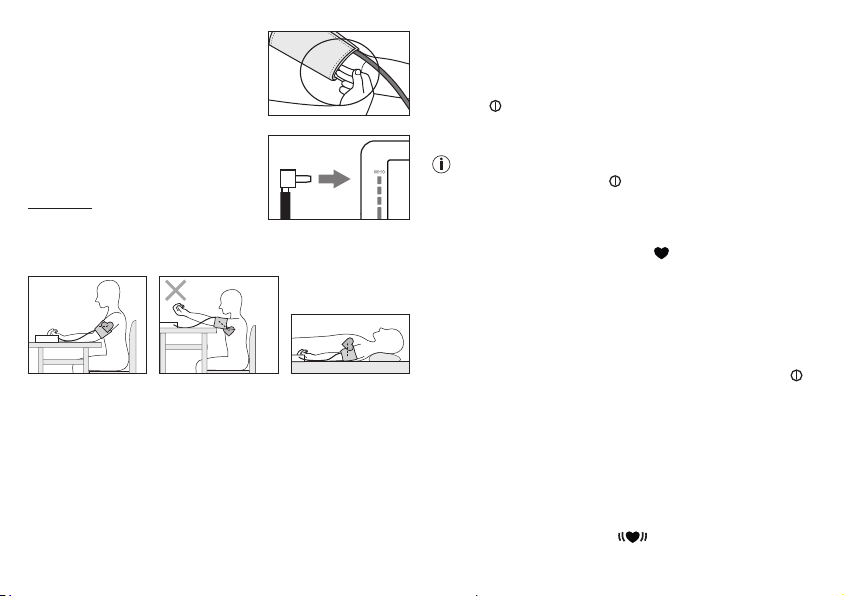
Now tighten the free end of the cuff,
but make sure that it is not too tight
around the arm and close the
hook-and-loop fastener.
The cuff should be fastened so that
two fingers fit under the cuff.
Now insert the cuff line into the con-
nection for the cuff connector.
Important: The unit may only be ope-
rated with the original cuff. The cuff is
suitable for an arm circumference of 22 to 32 cm.
Adopting the correct posture
•
Before every measurement, relax for about five minutes. Oth-
erwise deviations can occur.
•
You can take the measurement while sitting or lying. Make
sure that the cuff is at heart level.
•
To take your blood pressure, make sure you are sitting com-
fortably with your arms and back leaning on something. Do
not cross your legs. Place your feet flat on the ground.
•
To avoid falsifying the measurement, it is important to remain
still during the measurement and not to speak.
Performing the blood pressure measurement
•
As described above, attach the cuff and adopt the posture in
which you want to perform the measurement.
•
To start the blood pressure monitor, press the START/STOP
button . All displays will illuminate briefly. The blood pres-
sure monitor automatically begins to take the measurement;
the cuff automatically inflates.
You can cancel the measurement at any time by pressing
the START/STOP button .
•
The cuff’s air pressure is slowly released. If a tendency for
high blood pressure is already recognised, the cuff is rein-
flated and the cuff’s pressure is increased again. As soon as
a pulse is found, the pulse symbol is displayed.
•
The systolic pressure, diastolic pressure and pulse rate
measurements are displayed.
•
E_ appears if the measurement could not be performed prop-
erly. Observe the chapter on error messages/troubleshooting
in these instructions for use and repeat the measurement.
•
The measurement is automatically stored.
•
To switch the monitor off, press the START/STOP button .
If you forget to turn off the device, it will switch off automati-
cally after approx. 1 minute.
W
ait at least 5 minutes before taking another measurement!
Evaluating results
Cardiac arrhythmia:
This unit can identify potential disruptions of the heart rhythm
when measuring and if necessary, indicates this after the
measurement with the symbol
.
Loading ...
Loading ...
Loading ...