User manual Dishwasher
INSTALLATION INSTRUCTIONS
INSTALLATION
-537887.png)
This appliance is intended for household use only.
Remove interior and exterior packaging prior to installation. Place the appliance on a floor that is strong enough to support it when it is fully loaded.
The Quick Connect assembly, faucet adapter and hose storage bracket are in an accessory bag stored inside the appliance during transportation.
The Quick Connect assembly includes both the water inlet and drain hoses.
The hose storage bracket can be installed by sliding the tab into the slot on the back of the appliance.
Ensure the power cord is plugged into a properly grounded outlet.
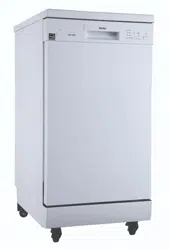
CASTERS
-837920.png)
This appliance has four casters. There are two locking casters on the front of the appliance and two non locking casters on the back of the appliance.
Press down on the peddle to engage the wheel lock. Locks should be engaged when the appliance is in use.
Push the peddle up to disengage the wheel lock.
CONNECTING THE DISHWASHER
To connect the dishwasher to the water source:
1. Two thick washers and one thin washer are provided with the faucet adapter to accommodate different types of faucets. Remove the aerator from the faucet and screw the faucet adapter onto the faucet. The faucet adapter is compatible with both male (outside threaded) or female (inside threaded) faucets. Install the faucet adapter with the washer that best suits the faucet.
2. Once the faucet adapter is attached to the faucet, turn on the water tap to test the connection. If there are leaks at the tap adapter connection, add the faucet washer and reattach. If there are still leaks when using the faucet washer, wrap Tefl on tape around the faucet or the tap adapter and reattach.
3. Pull down the locking collar on the Quick Connect and push the end of the Quick Connect onto the end of the faucet adapter. When the Quick Connect clicks over the faucet adapter, release the locking collar.
4. Do not turn on the water source until you are ready to run a wash program. Once the water source is turned on, the inlet hose is pressurized and filled with water. The water is released into the unit once the wash program begins.
DISCONNECTING THE DISHWASHER
When the wash program is complete, turn off the water source before attempting to disconnect the appliance.
1. Press the pressure relief valve (red button) on the Quick Connect to release any remaining water from the water inlet hose.
WARNING: Failure to relieve the water pressure before disconnecting the Quick Connect from the faucet will result in pressurized water spray at the connection point. This water can be very hot and could cause burns or scalding.
Note: For convenience, the drain hose and inlet hose can remain attached to the Quick Connect when not in use. Make sure that all water is drained from the hoses before storing.
2. Pull down the locking collar on the Quick Connect and pull downward to remove it from the faucet adapter.
3. The faucet adapter can be removed or it can remain on the faucet as it does contain an aerator. If the faucet adapter is removed, remember to replace the aerator on the faucet.
Note: Hard water conditions will adversely affect the performance of the dishwasher. Hard water will deposit lime or white scaling onto the stainless steel surface of the dishwasher tub, the faucet aerator and the internal filter assembly. It is recommended to periodically run a rinse cycle with 1 cup (250 ml) of white vinegar while the dishwasher is empty to remove any scaling.
OPERATING INSTRUCTIONS
CONTROL PANEL
-36090.png)
- Power button: Use to turn the appliance on or off.
- Rinse aid indicator: The light will illuminate to indicate that the rinse aid is low.
- Program end indicator: The light will illuminate to indicate that a program has ended.
- Handle
- Program indicator: The light will illuminate to indicate the chosen program.
- Heavy: For heaviest soiled dishes such as pots, pans, casserole dishes and dishes with dried on food.
- Normal: For heavily soiled dishes such as pots, plates, glasses and lightly soiled pans.
- Min: For lightly soiled plates and pans that need quick wash.
- Rapid: A short wash for lightly soiled loads that do not need drying.
- Program button: Press to select the desired program.
- Sanitize button: Press to select the sanitize function. This will maintain the water temperature at 70°C. The sanitize function can be used with all programs.
- Start/Cancel button:
- Press to start the desired program.
- Press to pause a program that is running. Press again to restart the program.
- Press and hold for 3 seconds to cancel a program which it is in operation.
LOADING THE DISHWASHER
- This appliance can hold a total of 8 full place settings.
- Scrape all dishes to remove any large food residue before placing in this appliance.
- Only place dishes in this appliance that are marked as dishwasher safe.
- Use a mild detergent.
Items that should not be placed in a dishwasher
- Cutlery with wooden, bone china or mother-of- pearl handles.
- Plastic items that are not heat resistant.
- Items that have been repaired with glue that is not heat resistant.
- Pewter, copper or steel items.
- Wooden platters.
- Items made from synthetic fibers.
- Items with glazed patterns may fade if machine washed frequently.
Tips for efficient loading
- Load hollow items such as cups, glasses or pans with the opening downward so that water cannot collect in the container.
- Items must not lie inside one another or cover one another.
- To avoid damage to glasses, they should not touch.
- Sharp items of cutlery such as carving knives should be loaded horizontally in the basket to avoid injury when unloading.
- Do not overload the appliance.
LOADING THE CUTLERY BASKET
Cutlery should be placed in the cutlery basket with the handles facing down. Ensure that cutlery items do not nest inside of one another as this can affect cleaning performance.
Sharp or pointed items should be placed in the cutlery basket with points facing down to avoid injury when unloading.
Do not place excessively small items into the dishwasher as they could fall through the basket and impact the operation of the appliance
LOADING THE UPPER BASKET
The upper basket is designed for cups, glasses, small plates, bowls and plastic items that are marked dishwasher safe.
Make sure the loaded dishes do not interfere with the rotation of the spray arm located on the bottom of the upper basket.
-272822.png)
LOADING THE LOWER BASKET
The lower basket is designed for dinner dishes, soup bowls, plates, pots, lids, casserole dishes and plates.
Load large items such as pans and pots should be loaded with their open sides facing downwards.
-995070.png)
DETERGENT DISPENSER
The detergent dispenser must be filled before the start of each wash cycle. Add the detergent just before starting the wash cycle. Adding the detergent to the appliance too soon can cause it to become damp and it may not dissolve properly.
- If the detergent dispenser is closed, press the latch to open it.
- Add the recommended amount of detergent to the main detergent component.
- Close the flap by pressing down.
-661893.png)
-523753.png)
RINSE AID DISPENSER
Rinse aid can be used to prevent water droplets or streaks from forming on dishes. The rinse aid will be released automatically during the final rinse. This appliance is designed to use liquid rinse aid only. Do not use a powdered rinse aid as it will clog the reservoir opening. Do not put any other substance in the rinse aid dispenser as this can damage the appliance.
- Remove the rinse aid dispenser cap by turning it counterclockwise.
- Add rinse aid to the dispenser. Be careful not to let it overflow.
- Turn the rinse aid indicator dial to the desired number. The higher the number, the more rinse aid will be used by the dishwasher. If the dishes do not dry properly or have spots, adjust the dial to a higher number. Turn to a lower number if dishes have sticky white stains or a bluish film.
- Close the rinse aid cap by turning it clockwise.
-411168.png)
STARTING A WASH CYCLE
- Load the dishwasher as per the loading instructions.
- Add detergent and rinse aid as required.
- Close the dishwasher door and press the power button to turn on the appliance.
- Press the Program button repeatedly to choose the desired wash program.
- Press the Sanitize button to select the sanitize function.
- Run the hot water faucet nearest the appliance until the water is hot and then turn it off.
- Press the Start/Pause/Cancel button to begin the cycle.
CHANGING THE PROGRAM MID CYCLE
A program can only be changed if it has been running for a short time otherwise the detergent may have already been released and the dishwasher may have already drained the wash water. If this is the case the dishwasher needs to be reset and the detergent dispenser must be refilled.
To change a program mid cycle:
- Press and hold the Start/Pause/Cancel button for 3 seconds to cancel the current program.
- Press the program button to select the desired program.
- Press the Start/Pause/Cancel button to start the new program.
CARE & MAINTENANCE
ADDING A FORGOTTEN DISH
A forgotten dish can be added to a running cycle any time before the detergent dispenser has opened. If the detergent has already been released into the appliance, it is recommended not to add more dishes as they will not receive adequate cleaning.
To add a dish:
- Open door slightly and wait a few seconds until the wash action stops before completely opening.
- Add the forgotten item.
- Close the door firmly to latch and press the Start/Pause/Cancel button to resume the program. The program will resume after a ten second pause.
Caution: Wait until wash action completely stops before opening the door. Hot water may splash out of the dishwasher and can cause injury.
CLEANING
- After every wash, leave the door slightly open so that moisture and odors are not trapped inside the appliance.
- Only use a soft cloth and mild detergent to clean the appliance. Never use solvents or abrasive cleaning agents as this can damage the appliance.
- To remove water spots from the interior of the appliance, use a soft cloth dampened with a small amount of vinegar.
- If the appliance will not be used for a long period of time, it is recommended to run a normal wash cycle with the dishwasher empty and then leave the door open until the interior of the appliance is completely dry. This will help the door seals last longer and will help prevent odors from forming inside the appliance.
- Clean the door seals with a damp sponge regularly to prevent odors from food particles that can become trapped in the door seal.
FILTER SYSTEM
The filter system removes food particles from the wash water and traps them. It is highly recommended to empty and clean the filters after every wash cycle.
To clean the filter system:
- Turn off the dishwasher. Turn the filter and lift upwards to remove the filter system from the appliance.
- Rotate the filter insert counterclockwise to unfasten and then detach the filter insert.
- Rinse and clean the filters with water and replace them inside the appliance.
-30543.png)
-403289.png)
SPRAY ARM
The spray arms should be periodically removed and cleaned to remove any hard water build up.
To remove the upper spray arm hold the nut in the center and rotate the spray arm counterclockwise.
-910729.png)
To remove the lower spray arm gently pull it upward.
-171333.png)
ERROR CODES
The rapid wash indicator is flashing
- Water intake is restricted or water pressure is too low.
The rapid wash and 90 Min indicator are flashing
- Malfunction of heating element
The normal wash indicator is flashing
If the appliance displays any error code, a power reset may resolve the issue. Unplug the appliance, wait approximately 5 minutes and then plug the unit back in.
TROUBLESHOOTING
| PROBLEM |
POSSIBLE CAUSE |
| No power |
• A fuse may be blown or the circuit breaker tripped
• Power surge
• Plug not fully inserted into the wall outlet
• Door not closed correctly
|
| Water not drained from dishwasher |
• Kink in drain hose
• Filter clogged
• Drain pump malfunction
|
| Detergent left in the dispenser |
• Dishes blocking dispenser from fully opening; unit may be over loaded |
| Suds left in the appliance |
• Too much detergent or wrong kind of detergent
• Too much rinse aid
|
| White film or cloudiness on dishes or interior tub |
• Hard water minerals
• Too much detergent
• Not enough rinse aid
|
| Noise inside the tub while running |
• The spray arm is hitting an item in the basket
• An item has fallen out of the basket and is on the bottom of the wash tub
|
| Dishes are not clean |
• Dishes were loaded incorrectly
• The wash program was not powerful enough
• Not enough detergent
• Items are blocking the spray arm; unit may be over loaded
• Filter clogged
|
| Dishes are not drying |
• Dishes were loaded incorrectly
• Too many dishes were loaded
• Not enough rinse aid
• Dishes removed too quickly
|