Loading ...
Loading ...
Loading ...
SUGGESTED HEAT
SETTINGS
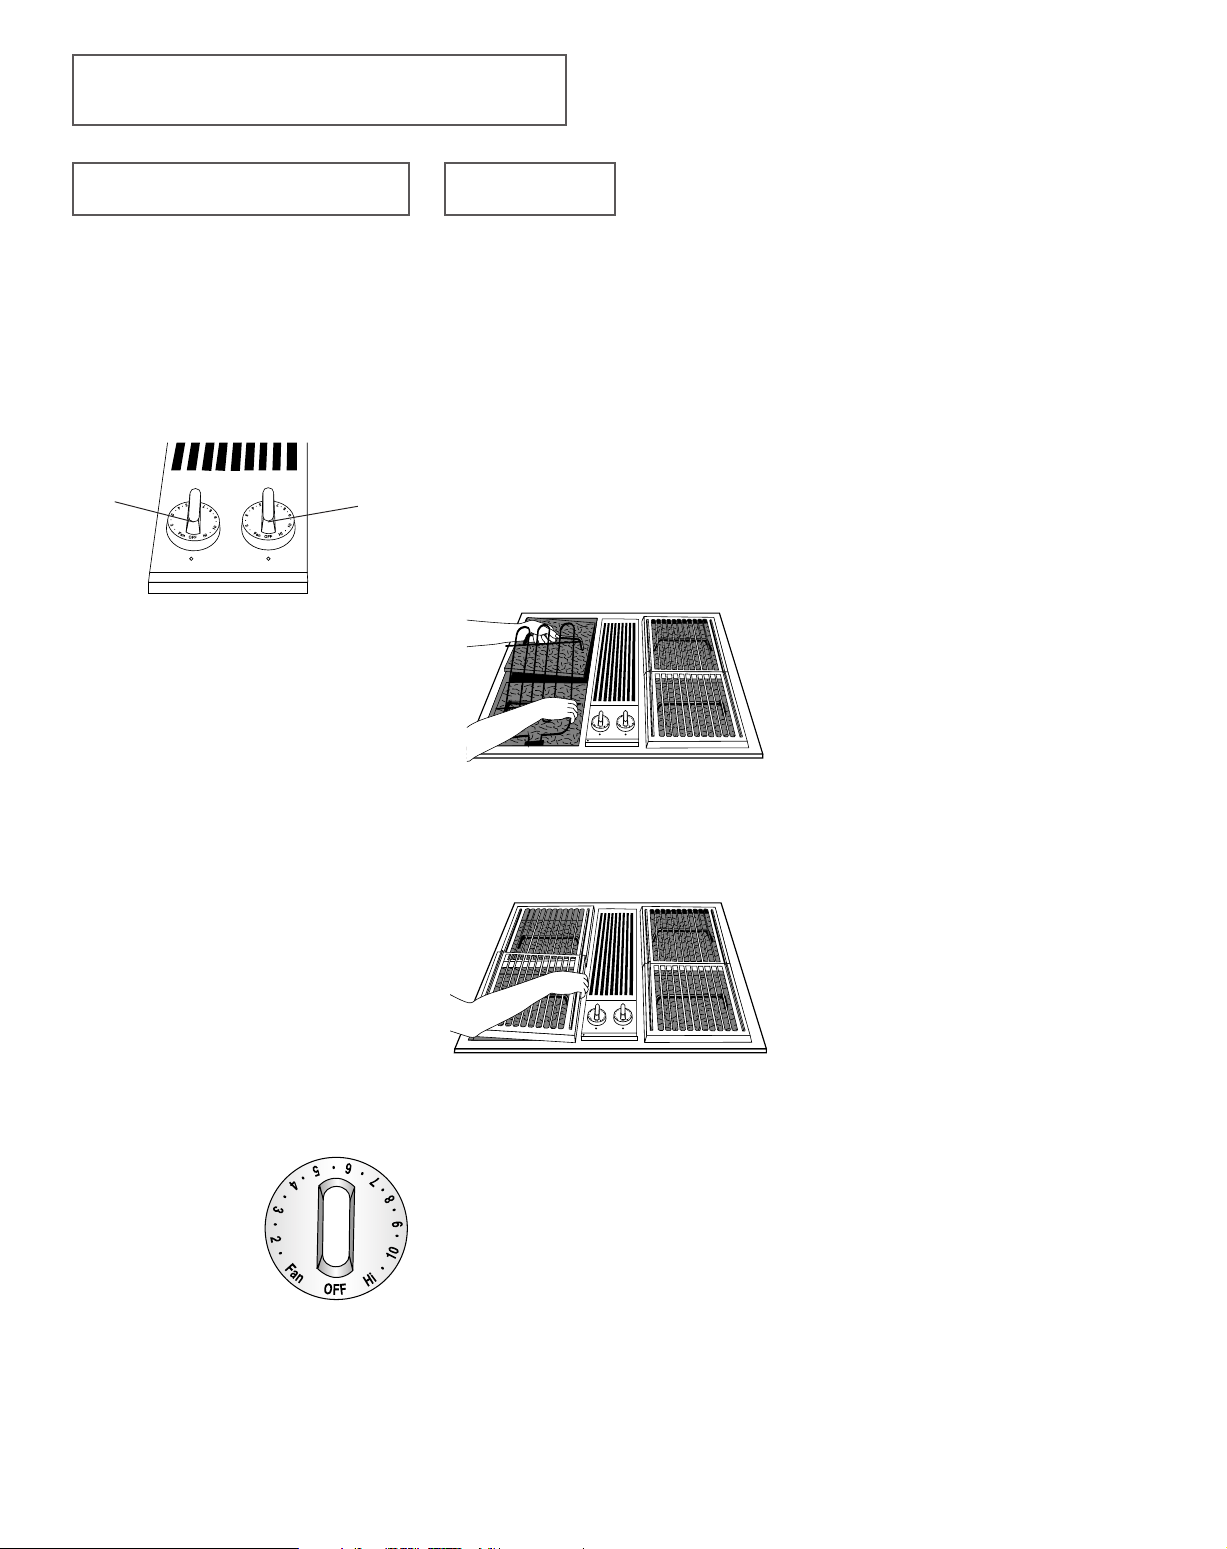
USING YOUR COOKTOP
SURFACE CONTROLS
3
Use to turn on the grill elements. An
infinite choice of heat settings is available
from lo to hi. The knobs can be set on or
between any of the settings.
CONTROL LOCATIONS
1. Left grill element
2. Right grill element
SETTING THE
CONTROLS
1. Push down and turn the knob in either
direction to the desired heat setting.
2. A red indicator light will glow when-
ever a control is turned to a position
other than OFF.
The amount and type of food being
cooked, weather conditions, and voltage
will influence the setting needed for best
cooking results. The setting indicated
should serve as a guide while you become
familiar with your cooktop.
Hi: Preheat for all
foods, cook
steaks and hot
dogs.
10: Cook pork chops, fish and chicken.
7-9: Preheat and cook hamburgers.
2: Maintain serving temperatures of
foods.
Fan: Manual control of fan
GRILL INSTALLATION
The grill consists of two black grill grates, a
grill element and two grill-rocks.
TO INSTALL GRILL COMPONENTS
1.Before installing grill components, be
certain surface controls are OFF.
2.Lift grill element. Place the two grill-rocks
into an empty basin pan with their handles
running parallel to the front of the
cooktop. These grill-rocks must be used
since they support the grill element.
3.Lower the grill element until it rests on the
handles of the grill-rocks.
4.Place the black grill grates on the top of
the cooktop.
TO REMOVE GRILL COMPONENTS
1.Remove grill components once they are
cool. Be sure controls are OFF.
2.Remove grill grates.
3.Lift grill element and remove grill-rocks.
GRILLING
1.
2.
USING THE GRILL
• Before the first use, wash your new
grill grates in hot soapy water, rinse
and dry. Then “season” the surface by
wiping on a thin coating of cooking oil.
Remove excess oil by wiping with
paper towel.
This procedure should be repeated
when either: a) cleaning in the
dishwasher since the detergent may
remove seasoning or b) anytime a
sugar-based marinade (for example,
barbecue sauce) is going to be used.
• Preheat the grill on Hi for 5-10
minutes. Preheating improves the
flavor and appearance of meats and
quickly sears the meat to help retain
the juices.
• Use nonmetallic spatulas or utensils to
prevent damaging the nonstick grill
grate finish.
• Excessive amounts of fat should be
trimmed from meats. Only a small
amount is necessary to produce the
smoke needed for that smoked,
“outdoor” flavor. Excessive fat can
create cleaning and flare-up problems.
• Allowing excessive amounts of grease
or drippings to constantly flare-up voids
the warranty on the grill grates.
• Excessive flare-ups indicate that either
the grill interior needs to be cleaned or
that excessive amounts of fat are in
the meat or the meat was not properly
trimmed.
• Grease drippings will occasionally
ignite to produce harmless puffs of
flame for a second or two. This is a
normal part of the cooking process.
• NEVER LEAVE GRILL UNATTENDED
DURING GRILL OPERATION.
• SHOULD EXCESS GREASE CAUSE
SUSTAINED FLARE-UPS:
1.Immediately turn grill control
switch to Fan position.
2. Remove meat from grill.
8111P489-60 5/22/06, 10:17 AM4
Loading ...
Loading ...
Loading ...