Loading ...
Loading ...
Loading ...
12 INITIAL START-UP
INITIAL START-UP – FREEZER
Your freezer was cleaned and polished before it left the
factory. Before use, dust and wipe over inside and out
using a clean dry cloth.
This product is designed to operate on a power supply
of 220/240 volts 50Hz. Connect to a separate power
point with a correctly earthed three pin socket. Do not
use double adaptors.
General Information
The freezer transfers heat from food placed inside to the
outside air. This process makes the rear and sides of the
outer cabinet feel warm to touch, particularly at initial
start up. This is normal.
Make sure you fully close the freezer door after loading
or removing food. If the door is left partly open, a heavy
frost will coat the inside of the freezer. Ensure that
baskets or bins are pushed all the way in to prevent the
door being held open.
If the unit is unplugged, power lost, or turned off you must
wait 5 minutes before restarting the unit. If you attempt to
restart before this time delay, the freezer will not start.
Features and general hints
• Try not to leave the door open for too long,
especially in warm and humid climates.
• It is recommended that you wrap all food in
freezer bags.
• Corned or pickled products (containing salts) must
NOT be stored in the freezer unless thoroughly
sealed. Salts cause metal oxidisation.
• In some circumstances (particularly after recent
opening and closing of the door) you may
experience a heavier than normal resistance when
opening the door. Should this occur wait a minute
or two between openings to stabilise the air
pressure within the cabinet.
• If going away for an extended period, turn your
freezer off, remove all foods and dry interior
thoroughly. Unplug the freezer from the electrical
outlet and leave the door open.
• If there is a power failure, do not open the door.
Frozen foods will stay frozen for up to 24 hours
depending on temperature and load conditions if
the door is kept closed.
• It is recommended that to ensure safe food storage,
the freezer operates for 3 hours with the door
closed before being stocked with food. It is also
recommended that you wait until the following day
before you purchase additional food, either frozen
or unfrozen, to stock your freezer.
WARNING
WARNING
Do not touch freezer shelf surfaces, particularly when
hands are damp or wet. Extremely low temperatures
may cause your hands to stick.
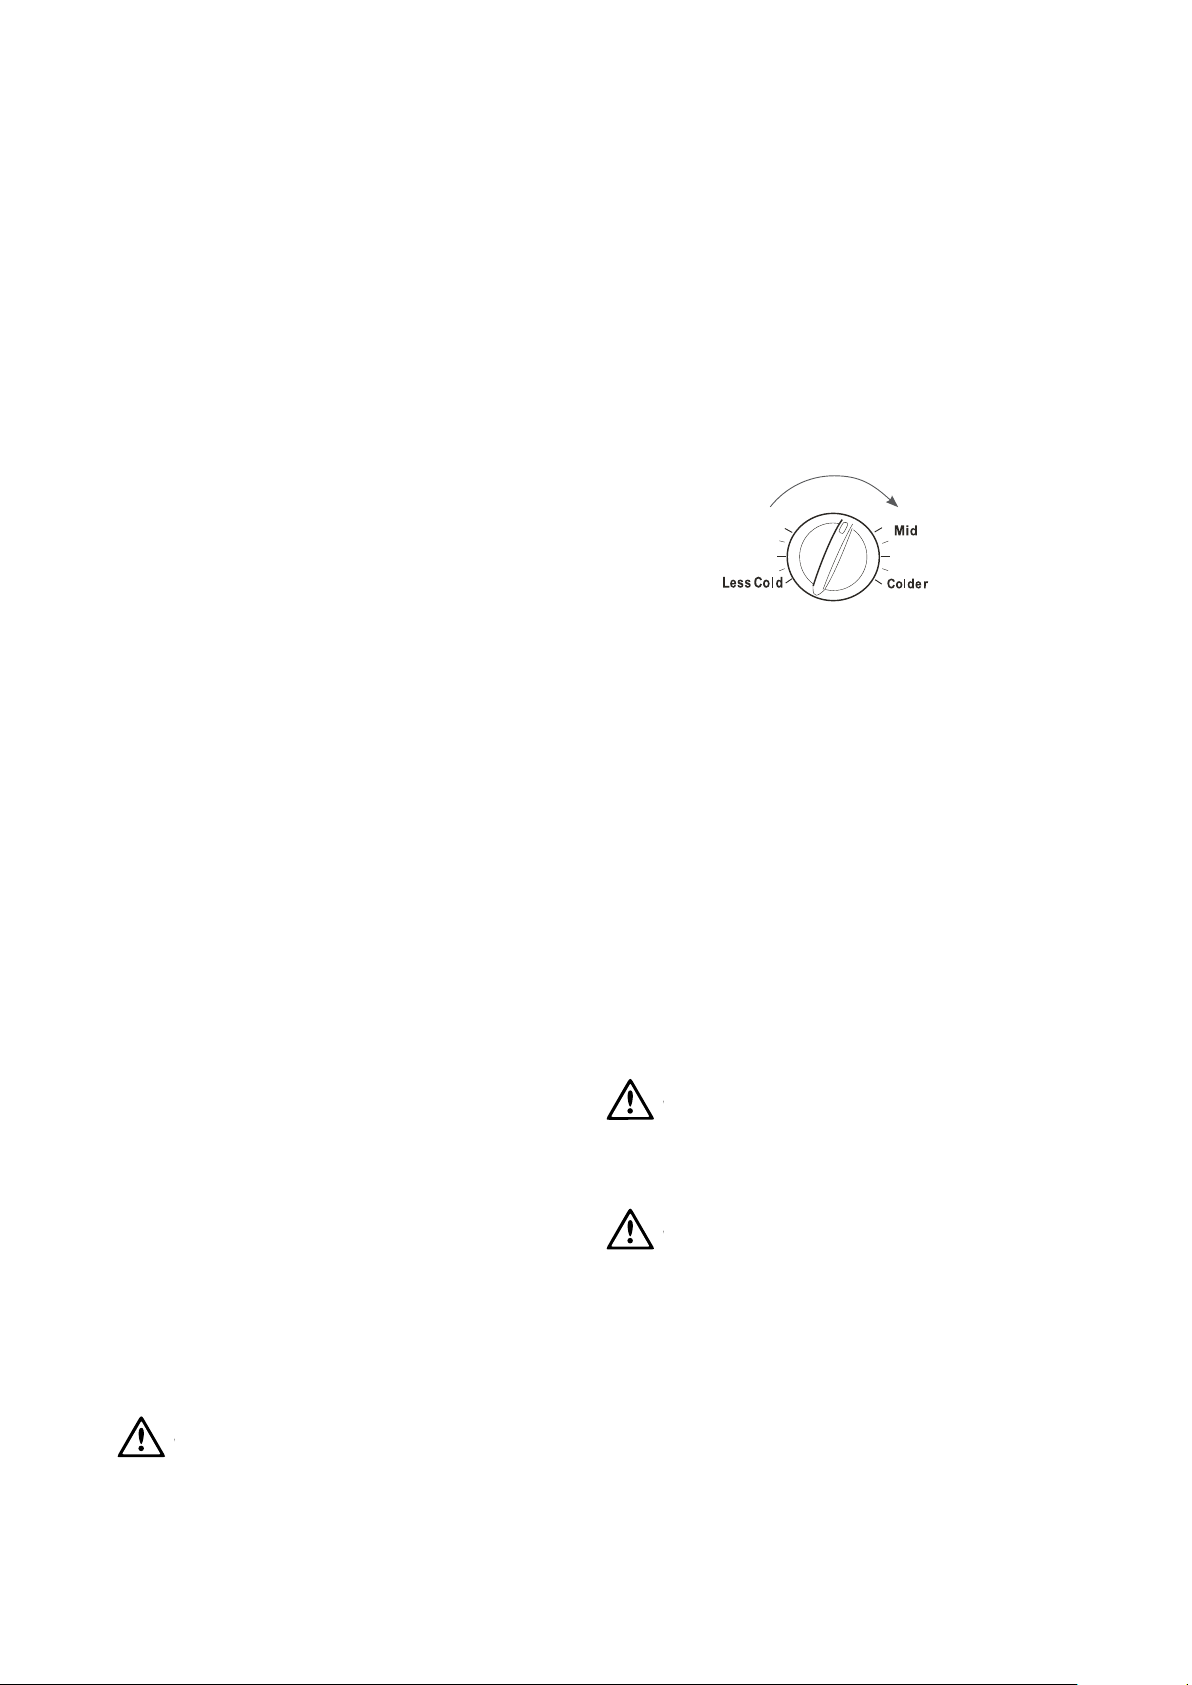
Controls
The temperature control is located on top of the front
right hand side of the cabinet on Models WFM0900 and
WFM1800.
Leave the control knob in the ‘Mid’ position for a trial
period. The control setting can be adjusted if required
by rotating the knob. Turn in a clockwise direction for a
colder temperature. When the thermostat is turned to
its lowest setting and past the point of resistance, the
appliance will not operate.
Defrosting
Your freezer should be defrosted when frost is
approximately 6mm thick otherwise it will interfere
with efficient operation and storage capacity. To ensure
optimal hygiene and efficiency complete defrosting is
recommended at least twice a year, preferably when food
supply is low.
• Switch off power to freezer at power outlet and
remove power supply plug from electrical outlet.
• Remove frozen food, wrap in newspaper and place in
a cardboard box or esky.
• Leave door open and wait for the frost to soften.
Pans of hot water may be placed inside the freezer to
speed up the defrosting process.
• Place towels and a container to catch the water in
the bottom of the freezer.
WARNING
WARNING
On no account should an electric heater or hair dryer be
used for defrosting the freezer.
WARNING
CAUTION
Do not use a knife, metal scraper or sharp pointed tool or
instrument to remove ice as they may cause damage to
the lining of your freezer.
• Scrape the softened frost off the walls of your freezer
using a plastic scraper.
• After defrosting is complete and all of the water has
drained, wipe the freezer thoroughly with a damp
cloth before drying thoroughly.
• Reconnect the power cord to the electrical outlet
and switch on.
• Replace frozen food.
Models WFM0900 &
WFM1800
Colder
Loading ...
Loading ...
Loading ...