Loading ...
Loading ...
Loading ...
5
Light Shield Reinstallation:
Place the right end of the light shield into the wall slots; then snap
the left end into its wall slots.
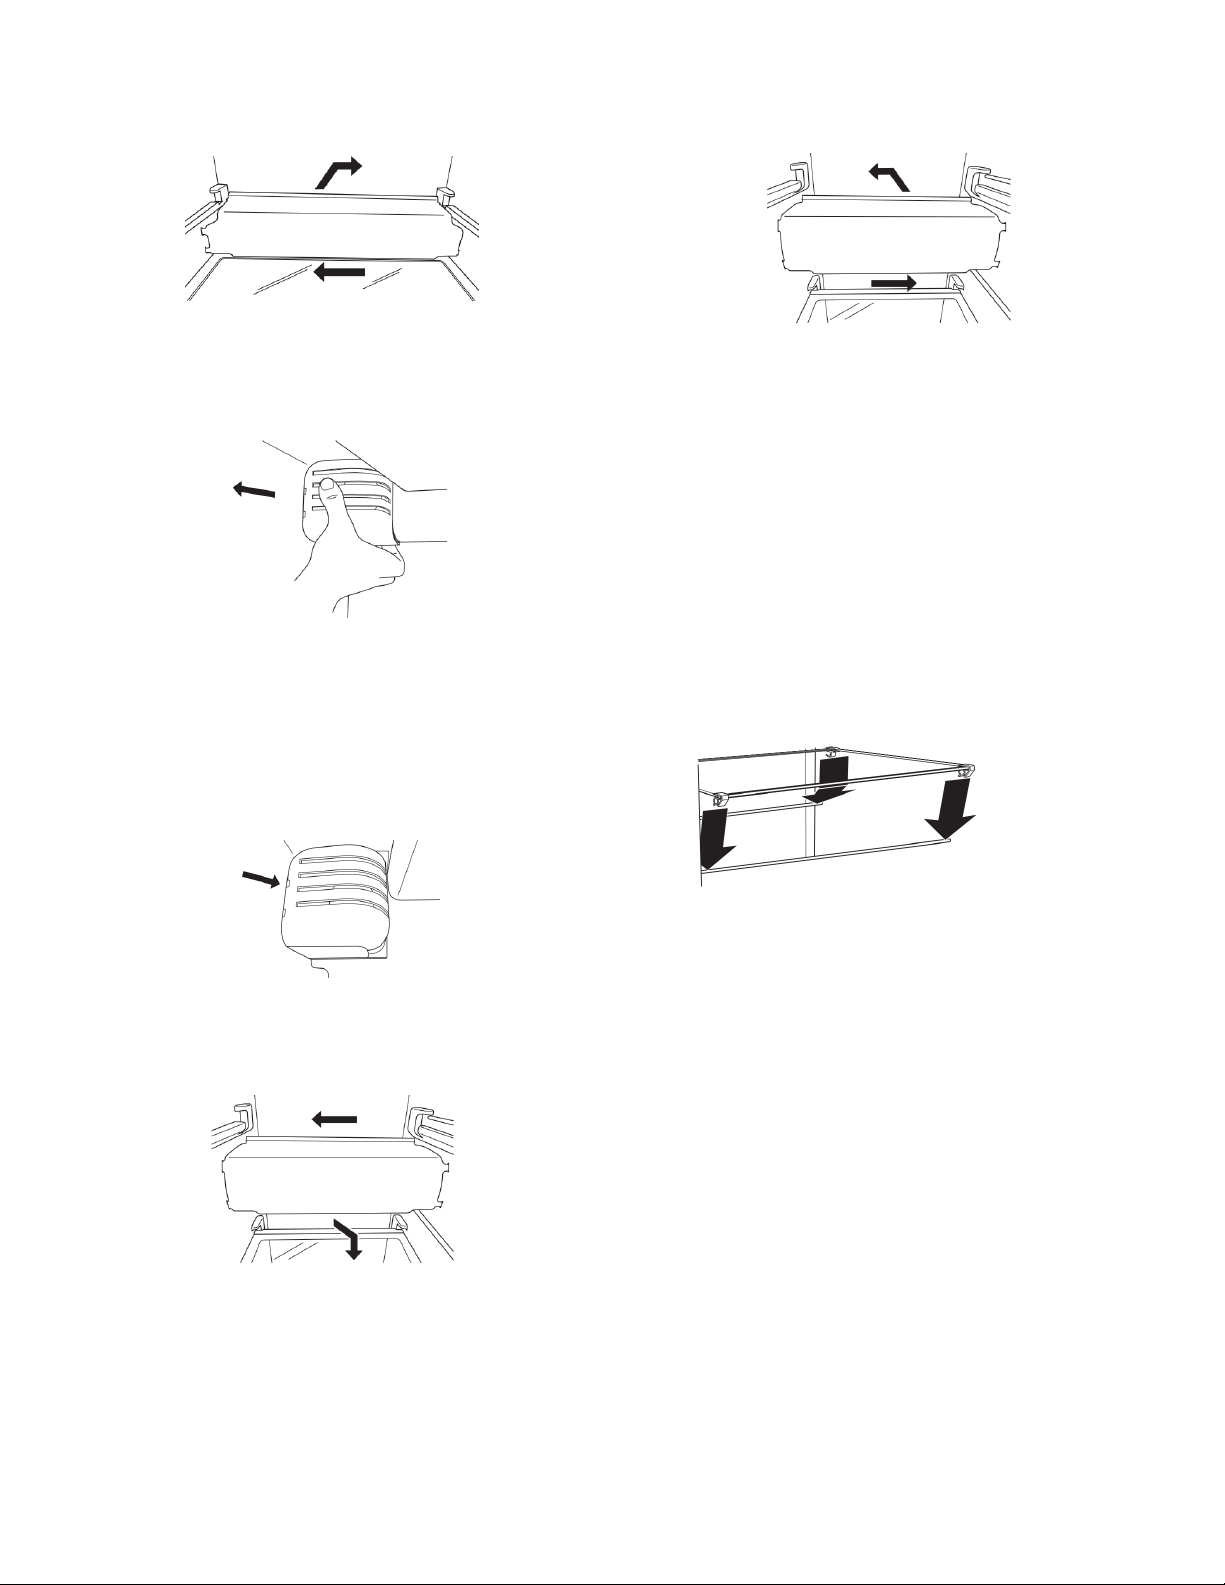
Freezer Compartment – Upper Light
Light Shield Removal:
Gently squeeze the front and the bottom-rear edge of the light
shield to release the tabs from the wall slots; then pull the light
shield forward.
Replacement Bulb:
� If the burned-out light is a full-size LED bulb, replace it with a
3.6 W LED bulb.
� If the burned-out light is an incandescent bulb, replace it with
an incandescent appliance bulb of the same size, shape, and
wattage (40 W maximum).
Light Shield Reinstallation:
Align the light shield in its proper position, and snap the tabs into
the wall slots.
Freezer Compartment – Lower Light
Light Shield Removal:
Slide the light shield to the left to remove the right end from the
wall slots; then pull the left end out of its wall slots.
Replacement Bulb:
� If the burned-out light is a full-size LED bulb, replace it with a
3.6 W LED bulb.
� If the burned-out light is an incandescent bulb, replace it with
an incandescent appliance bulb of the same size, shape, and
wattage (40 W maximum).
Light Shield Reinstallation:
Place the left end of the light shield into the wall slots; then snap
the right end into its wall slots.
Freezer Shelf (number varies by
model)
To Remove and Replace the Bottom Shelf:
1. Lift up the front and back of the shelf, and remove from the
cabinet. Be sure not to remove the retaining rods.
2. Replace the shelf, aligning the rods with the cabinet ribs.
Apply a little pressure on the shelf to attach the rods to the ribs
of the cabinet.
To Remove and Replace the Mid and Top Shelf:
1. With your hand, push the shelf from bottom to top until it is
released from the holding rod. Pull the shelf until it is released
from the rear rod. Remove from the cabinet.
2. To replace the shelf:
� Replace rods into the support holes. Push the rods down
so they click into the holes.
� Identify the front and rear trim of the shelf.
� Place the rear trim on the rear rod and push the shelf so it
clicks the rod into the rear trim. (Keep the front raised while
pushing.)
� Lower the front of the shelf until the front trim is on the rod
and push the shelf down so it clicks the rod into the front
trim.
NOTE: Be sure that both sides of the shelf are positioned evenly
in the shelf support holes and the shelf is secure.
Vacation and Moving Care
Vacations
If You Choose to Leave Refrigerator On While You Are Away:
1. Use up any perishables and freeze other items.
2. If your refrigerator has an automatic ice maker and is
connected to the household water supply, turn off the water
supply to the refrigerator. Property damage can occur if the
water supply is not turned off.
3. If you have an automatic ice maker, turn off the ice maker.
NOTE: Depending on your model, raise the wire shutoff
arm to Off (up) position or press the switch to Off.
4. Empty the ice bin.
Loading ...
Loading ...
Loading ...