Loading ...
Loading ...
Loading ...
MOBILITY Replacing components
222
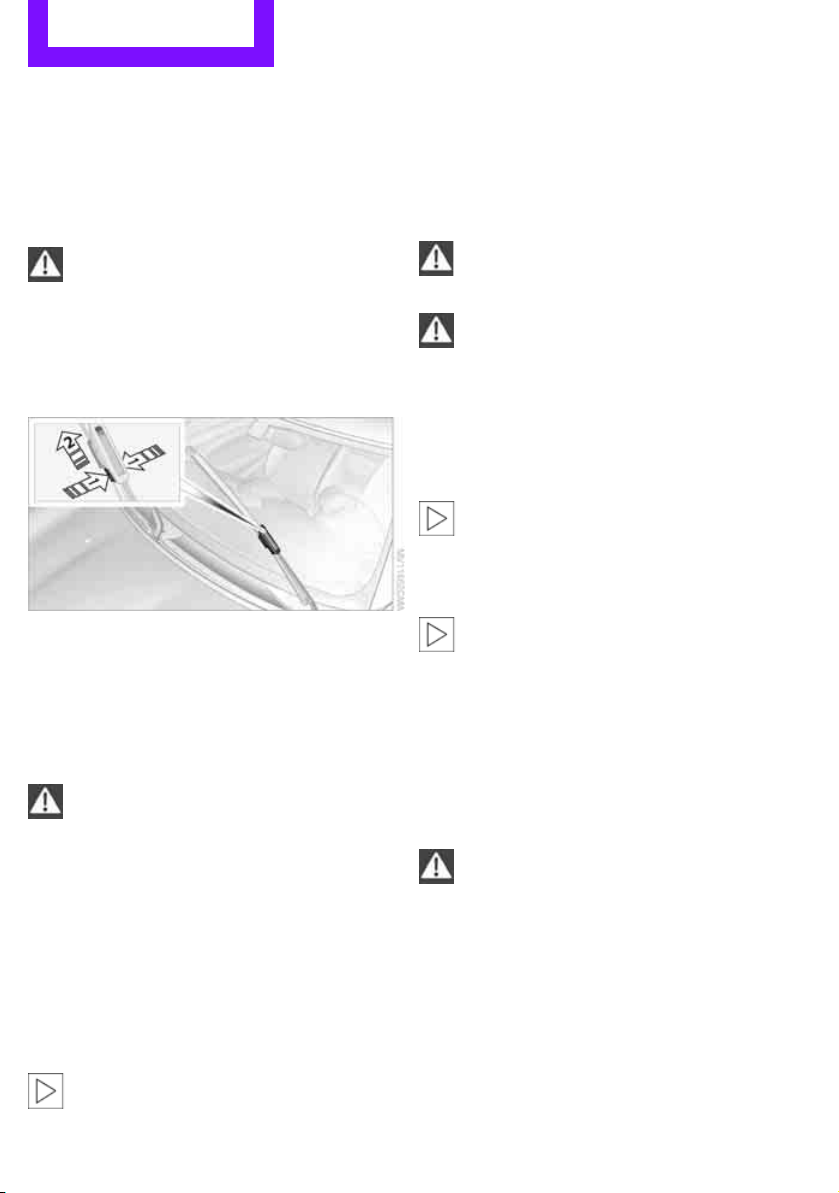
2. Press together the locking spring, arrows 1,
and fold out the wiper blade, arrow 2.
3. Pull the wiper blade forward and out of the
catch mechanism.
4. Press the new wiper blade into the fixture
until it engages audibly.
To avoid damage, make sure that the
wiper arms are against the windshield
before you open the hood.<
MINI Convertible: wiper blade
replacement
1. Fold out the wiper arm and hold it.
2. Press locking spring together, arrows 1.
3. Hold locking spring pressed together and
pull wiper blade from wiper arm, arrow 2.
4. Slide the new wiper blade onto the wind-
shield wiper arm until it audibly engages.
5. Fold down the wiper arm.
To avoid damage, make sure that the
wiper arms are against the windshield
before you open the hood.<
Lamps and bulbs
Lamps and bulbs make an essential contribution
to vehicle safety. They should, therefore, be
handled carefully. The manufacturer of your
MINI recommends having your MINI dealer per-
form any work that you do not feel competent to
perform yourself or that is not described here.
Never touch the glass of new bulbs with
your bare fingers, as even minute
amounts of contamination will burn into the
bulb's surface and reduce its service life. Use a
clean tissue, cloth or something similar, or hold
the bulb by its base.<
You can obtain a selection of replacement bulbs
at your MINI dealer.
Only replace bulbs after they have cooled
down; otherwise, you may burn your
fingers.<
When working on electrical systems,
always begin by switching off the con-
sumer in question; otherwise, short circuits
could result. To avoid possible injury or equip-
ment damage when replacing bulbs, observe
any instructions provided by the bulb manufac-
turer.<
Caring for headlamps, refer to page 218.
For any bulb replacement not described
below, contact a MINI dealer or a work-
shop that has specially trained personnel
working in accordance with the specifications
of the MINI manufacturer.<
For checking and adjusting headlamp aim,
please contact your MINI dealer.<
Light-emitting diodes LEDs
Light-emitting diodes installed behind translu-
cent lenses serve as the light sources for many of
the controls and displays in your vehicle. These
light-emitting diodes are related to conven-
tional laser diodes, and legislation defines them
as Class 1 light-emitting diodes.
Do not remove the covers or expose the
eyes directly to the unfiltered light source
for several hours; otherwise, this could cause
irritation of the retina.<
Headlamp glass lens
In cool or humid weather, condensation may
occur on the interiors of the headlamps. The
condensation disappears a short time after the
light is switched on. The headlamps do not need
to be changed.
Do not remove the condensation from head-
Online Edition for Part no. 01 40 2 914 807 - © 07/12 BMW AG
Loading ...
Loading ...
Loading ...