Loading ...
Loading ...
Loading ...
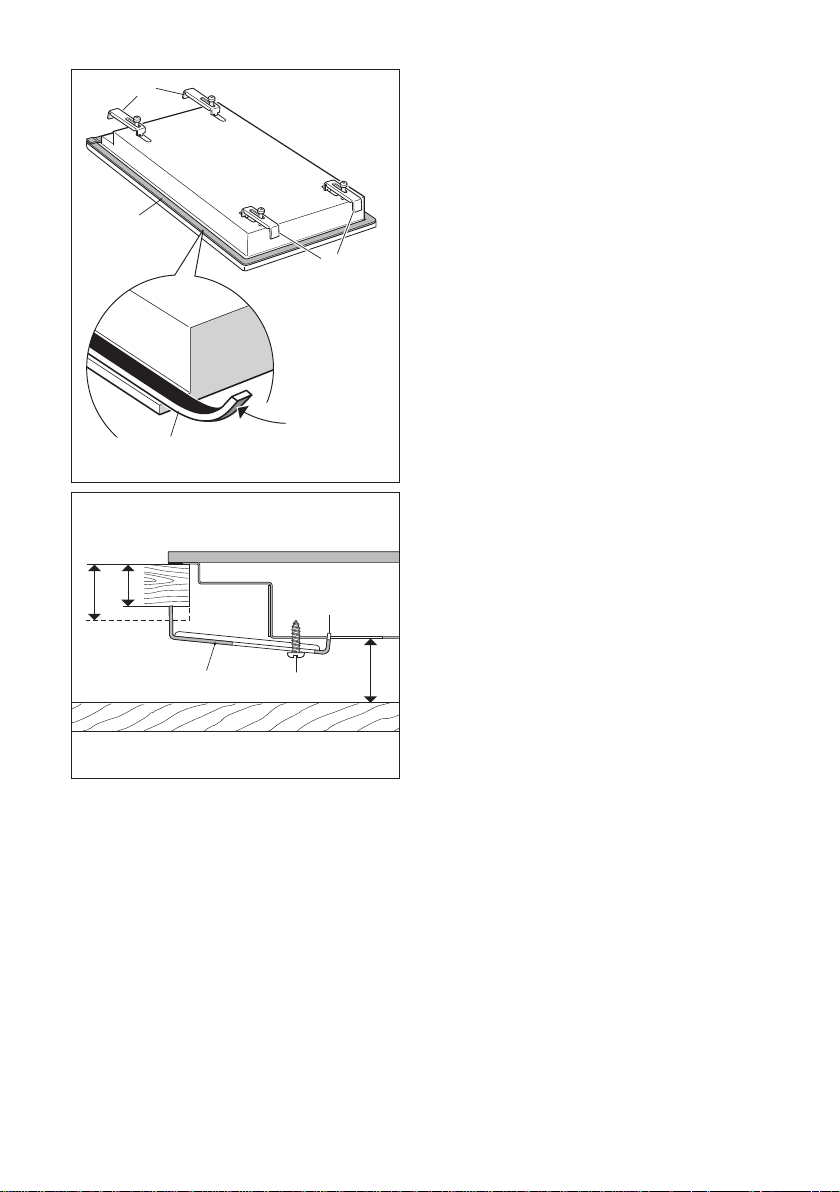
Figure 6
Figure 7
8
3 cm
min
3 cm
4 cm
S
A
R
Adhesive
side
G
G
R
R
FASTENING THE COOKTOP
Each cooktop is provided with an instal-
lation kit including brackets and screws
for fastening the cooktop to benches from
30 to 40 mm thick.The kit includes four R
brackets and four self-threading screws S
(figs. 6, 7).
– Cut the unit according to the dimen-
sions in figs. 3, 4.
– Turn the hob upside down and rest the
glass side on a soft surface.
– Spread the seal G around the edge of
the hob (fig. 6).
– Fasten the brackets R to the appropri-
ate socket holes, without tightening the
screws S for the moment.
Make sure that the tabs are mounted
correctly, as shown. Rotate the tabs so
that the cooktop can be put into the
cutout.
– Put the cooktop into the cutout and po-
sition it correctly.
– Put the brackets R into place; tooth A of
the brackets should go into the hole
(Fig. 7).
– Tighten screws S until the cooktop is
completely secured to the bench.
– Using a sharp cutter or trimmer knife,
trim the excess sealing material around
the edge of the cooktop. Take care not
to damage the workbench.
Loading ...
Loading ...
Loading ...